1021 | 1022 SMALL AIR COMPRESSOR
05
INSPECT FOR DAMAGE
1. Before use, inspect all parts for damage, including:
PRE-OPERATION CHECKLIST
SETUP
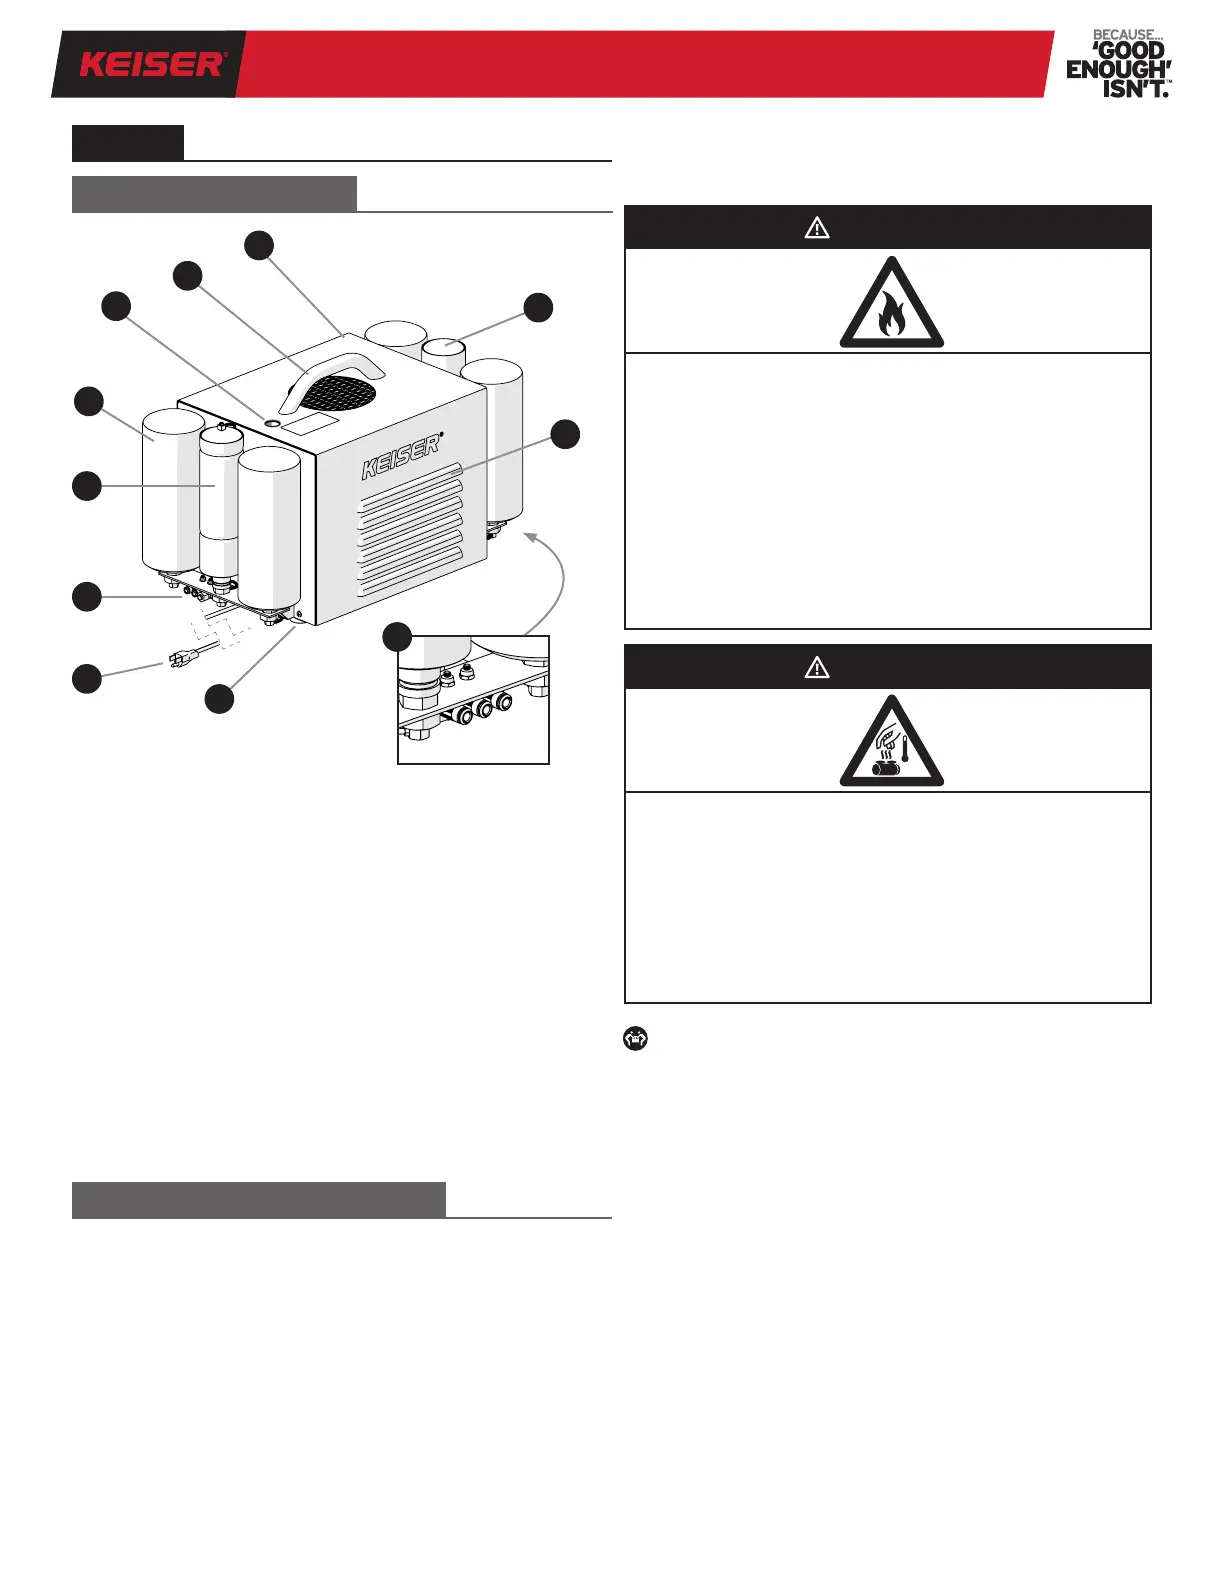
PRODUCT OVERVIEW
A. Cover
B. Handle
C. Display Lens
D. Air Tank
E. Dryer Tank
F. Air Outlets (left side)
• 1/4” quick-disconnect (qty2)
• 3/8” compression tting (qty 1)
G. Power Connector, Cord
H. Base
I. Air Outlets (right side)
• 1/4” quick disconnect (qty 3)
J. Louver
K. Purge Tank
L. Air Line (black tubes behind/under tanks, not
shown)
WARNING
FIRE HAZARD
• It is normal for the air compressor motor and pressure
switch to produce sparks while operating. If sparks come
in contact with vapors from solvents or gasoline, they may
ignite and cause a re or explosion.
• Always operate the air compressor a safe distance away
from ammable items. Use in well-ventilated areas.
• Protect all surrounding items from exhaust air; exhaust
air can become hot.
• Never exceed the maximum rated pressure.
CAUTION
HOT SURFACE
• Air compressor surfaces become hot during operation.
• Do not touch hot surfaces (cover) during operation as they
can cause severe burns.
• Allow the air compressor to cool before touching it.
• Do not place a storage cover on the unit during operation.
LOCATION AND PLACEMENT
HEAVY OBJECT: Equipment weighs 82 lbs (37 kg).
Help is required during lifting to avoid muscle strain and/or back
injury.
• Locate the air compressor in a clean, dry, and well-
ventilated area. Place the air compressor on a at, level
surface.
• Maintain adequate air ow, minimum 3-inch (76 mm)
obstacle-free perimeter required.
• Use an electrical circuit with the appropriate power
rating, avoid the use of an extension cord.
• Keep the air compressor away from the workout zone.
Ensure the power supply is easily accessible.
□ Power Cord
□ Air Tank
□ Dryer Tanks
□ Purge Tanks
□ Air Lines
(black tubes)
2. Check all tubes are rmly connected.
If any damage is found, do not use until all repairs have been
completed and tested by a Keiser-certied technician.
D
H
K
C
G
E
F
I
B
A
J