9
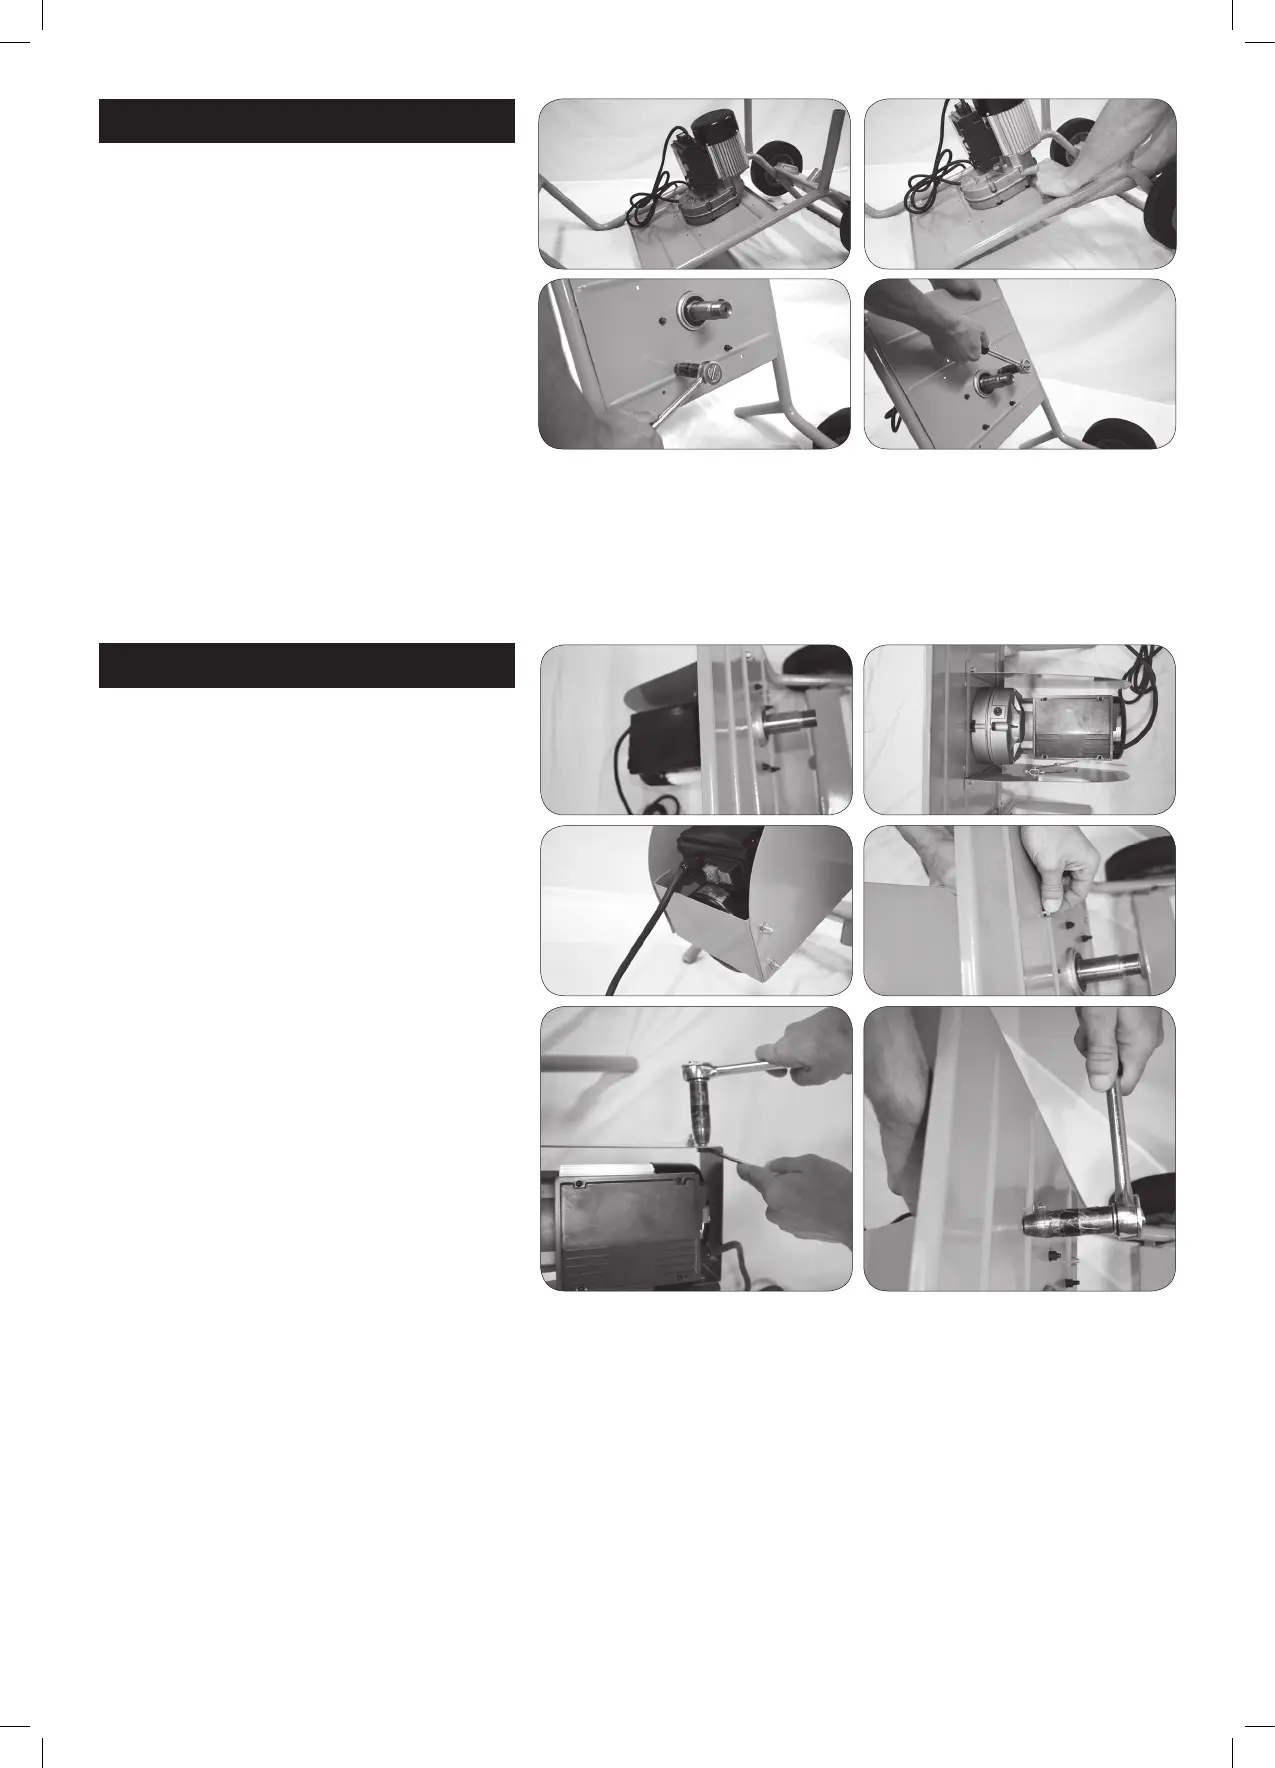
3. MOTOR ATTACHMENT
Grab the Motor (F) and remove the nuts,
spring washers and washers from all four
xing points.
Turn the frame over so that the handles
are pointing up.
Now insert the four xing points in the
motor into the matching holes of the
frame back plate ensuring the motor
shaft sits in the larger cut out hole.
Place a washer, spring washer and bolt
onto each of the four xing points and
tighten up by hand.
Tilt the frame up so that it is sitting back
on its wheels and legs.
Now tighten up all 4 bolts using a 10mm
socket.
4. MOTOR COVER ASSEMBLY
Grab the Left Cover (H) and line the holes
in the cover up with the holes in the
Frame Back Plate.
Using bolt (O), insert it through the top
hole from the back and then slide on the
washer and nut. Repeat this process for
the bottom hole.
Tighten up by hand.
Grab the Right Cover (I) and again line up
the holes with the Frame Back Plate and
attach using same bolts (O).
Now grab the Back Cover (J) and starting
on one side insert the bolts (O) from the
inside so that the washers and nuts are
applied from the outside. Repeat this for
remaining 3 xing points.
Now grab the Top Cover (K) and again use
the bolts (O) to attach to the Frame Back
Plate.
Lastly grab a 10mm spanner and 10mm
socket and tighten up all 10 nuts.
CT0016_Kelso-FrontTipMixer-Manual_FA.indd 9 26/06/2015 12:13 pm