8
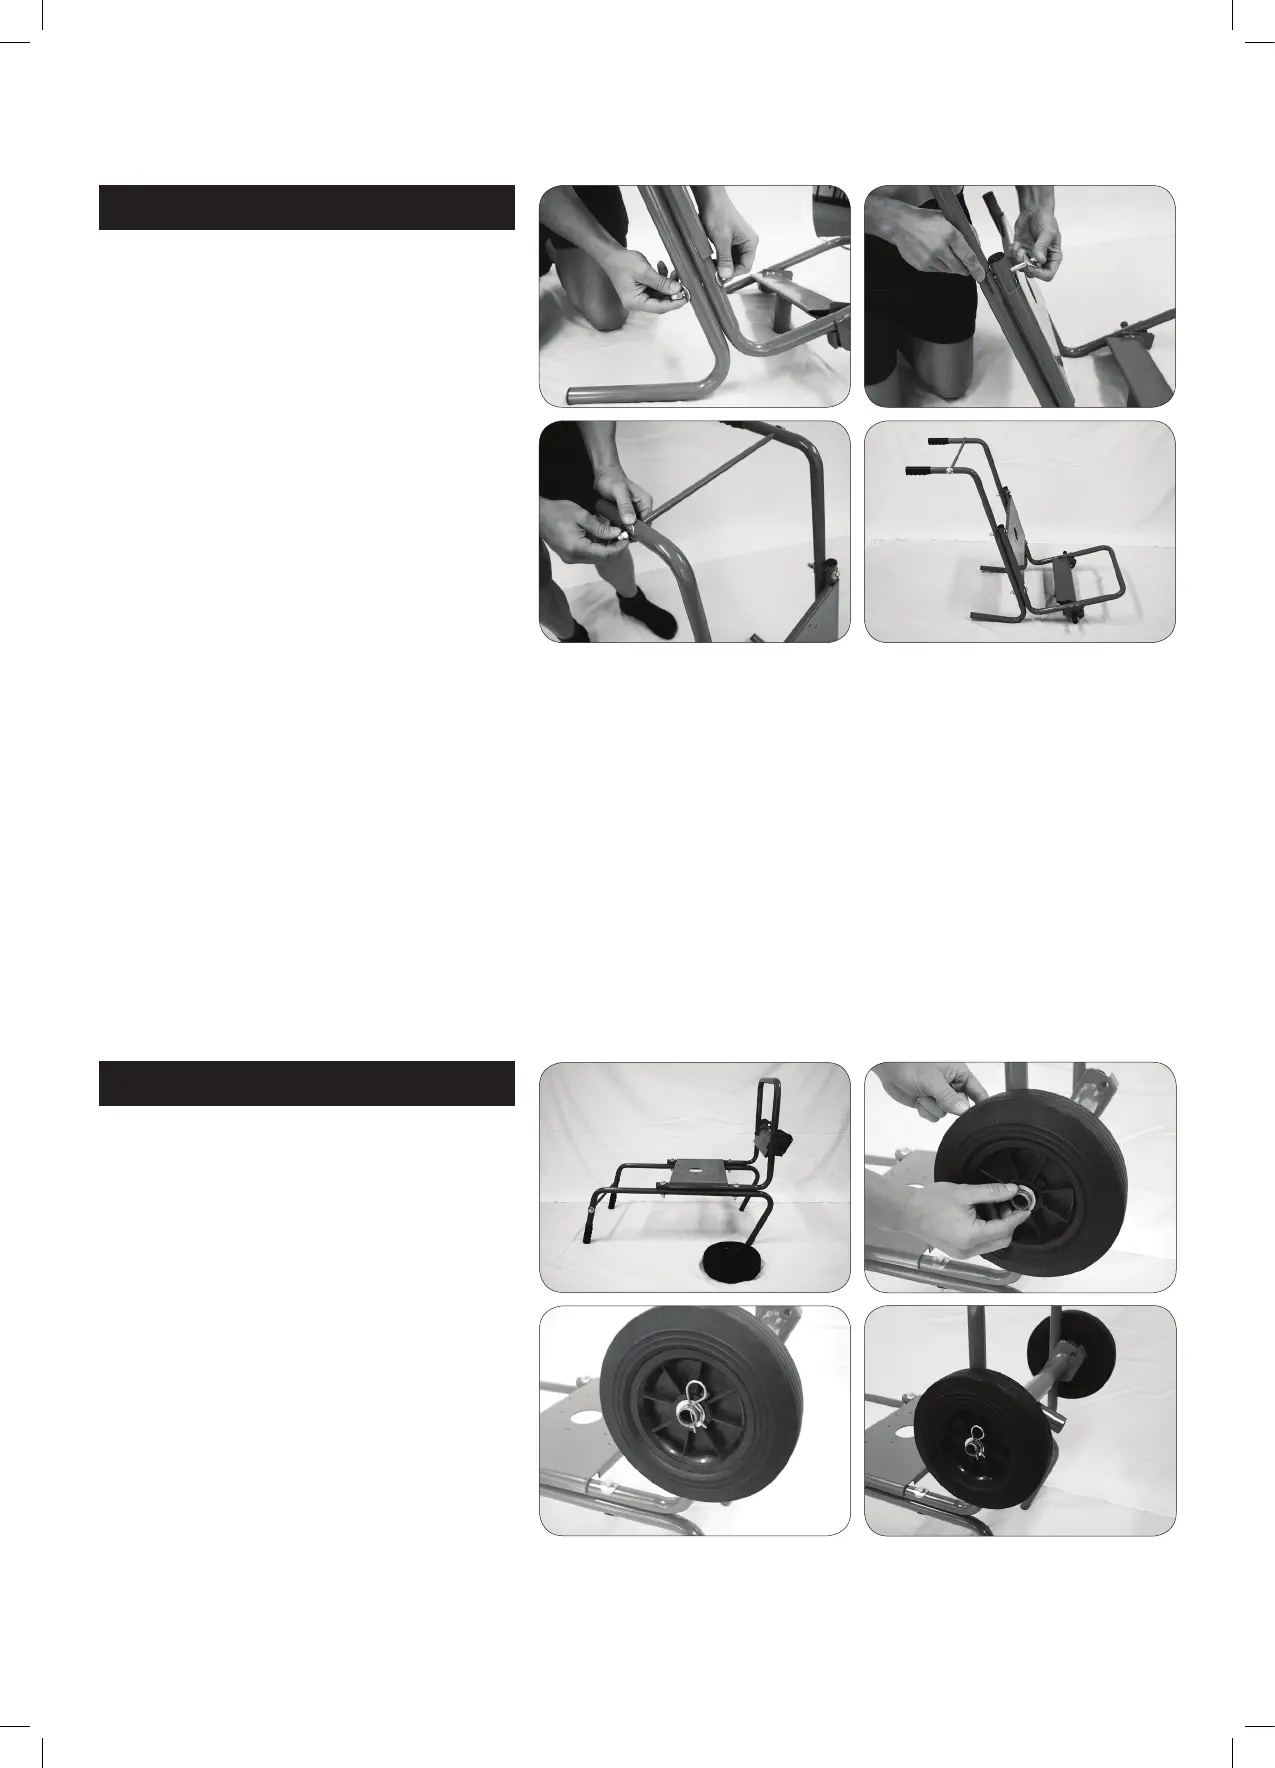
1. FRAME ASSEMBLY
ASSEMBLY INSTRUCTIONS
Ensure that you are working on a clean
at surface. A drop sheet may be useful
to ensure parts are not damaged during
assembly.
Grab the Main Frame Section (A) and Leg
Section (B).
Use bolt (N) and insert with curved
washer into the bottom hole from the
front to connect the Main Frame to the
Leg Section. Slide on secondary curved
washer and then the nut.
Grab the Handle Section (C) and slide this
into the Leg Section (B)
Use bolt (N) and insert with curved
washer into the top hole from the front
to connect the Main Section, Leg Section
and Handle Section. Slide on secondary
curved washer and then the nut.
Repeat the above steps for the other side.
Grab Handle Cross Bar (D) and insert
this into the holes in both of the Handle
Sections (C). Place Curved Washers (T)
onto each end and then secure using
Capped Nuts (U).
Tighten bolts using a 14mm socket and
16mm spanner.
2. WHEEL ASSEMBLY
Tilt the assembled frame on its back so
the axle is raised.
Grab a wheel (E) and slide it onto the axle.
Ensure the side of the wheel rim with the
raised hub is placed on the inside. Slide
axle washer (S) onto axle.
Now insert an R Clip (P) into the hole in
the axle to hold the wheel in place.
Place the secondary wheel and axle
washer onto the opposite axle and
attach with R Clip.
CT0016_Kelso-FrontTipMixer-Manual_FA.indd 8 26/06/2015 12:13 pm