Oven Light
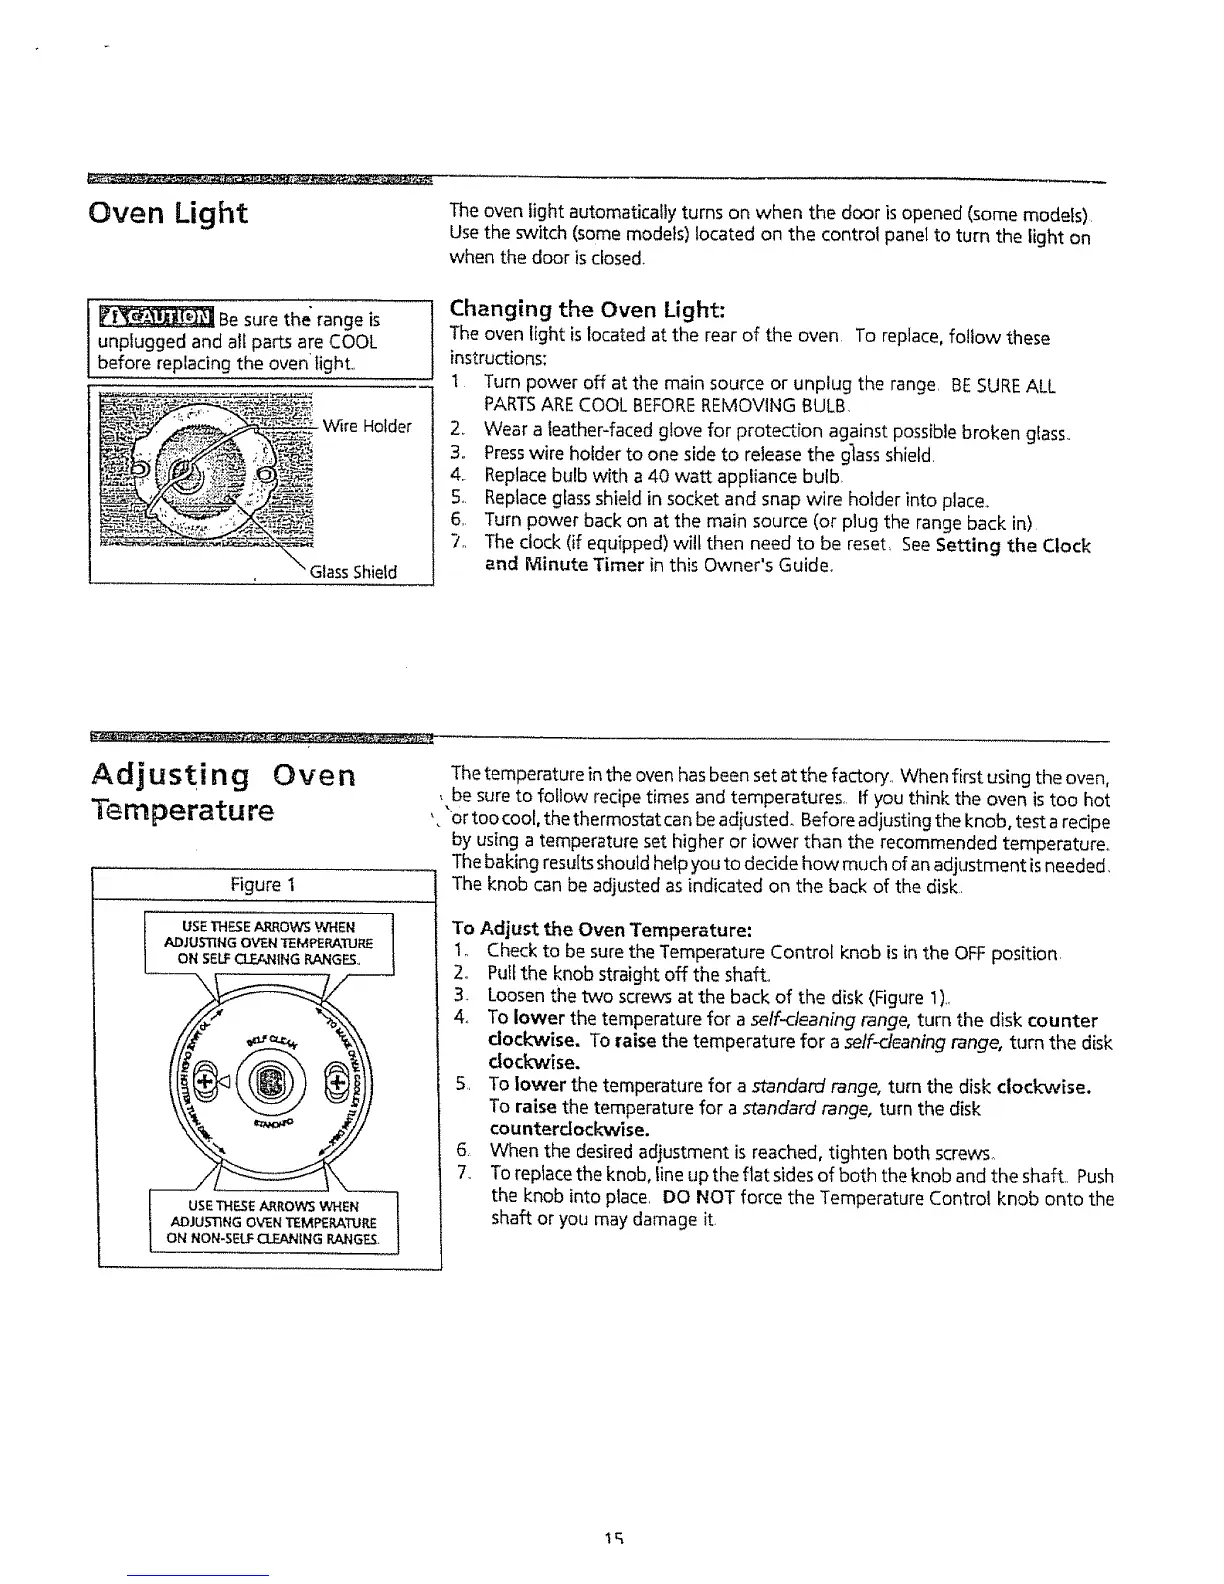
Be sure the range is
unplugged and all parts are COOL
before replacing the oven light,,
- Wire Holder
Glass Shield
The oven light automatically turns on when the door is opened (some models)
Use the switch (some models) located on the control panel to turn the light on
when the door is closed.
Changing the Oven Light:
The oven light islocated at the rear of the oven, To replace, follow these
instructions:
t Turn power off at the main source or unplug the range, BESUREALL
PARTSARECOOL BEFOREREMOVING BULB,
2, Wear a leather-faced glove for protection against possible broken gfass,,
3., Presswire holder to one side to release the glass shield.
4. Replacebulb with a 40 watt appliance bulb
5. Replaceglassshietd in socket and snap wire holder into place,,
6,, Turn power back on at the main source (or plug the range back in)
7., The clock (if equipped) will then need to be reset, SeeSetting the Clock
and Minute Timer in this Owner's Guide,.
Adjusting Oven
Temperature
Figure I
7
USETHF._E ARROWS WHEN |
ADJUSTING OVEN TEMPERATURE
f
ON NON-SELF CLEANING RANGE&
i .......
Thetemperature in the oven has been setat the factory.. When first using the oven,
, be sure to follow recipe times and temperatures, if you think the oven istoo hot
'. "or too cool, the thermostat canbe adiusted. Before adjusting the knob, test a recipe
by using a temperature set higher or lower than the recommended temperature.
Thebaking resultsshould help you to decide how much of anadjustment is needed.
The knob can be adjusted as indicated on the back of the disk.
To Adjust the Oven Temperature:
1,, Check to be sure the Temperature Control knob is in the OFFposition,
2o Pull the knob straight off the shaft,
3_ Loosen the two screws at the back of the disk (Figure 1),
4_ To lower the temperature for a self-cleaning range, turn the disk counter
dock'wise. To raise the temperature for a self-deaning range, turn the disk
clockwise.
5. To lower the temperature for a standard range, turn the disk clockwise.
To raise the temperature for a standard range, turn the disk
counterdockwise.
6, When the desired adjustment is reached, tighten both screws_
7, Toreplace the knob, line up the fiat sidesof both the knob and the shaft, Push
the knob into place, DO NOT force the Temperature Control knob onto the
shaft or you may damage it
lq