Am
1
1
i
©
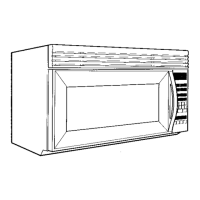
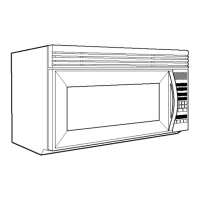
Removetape and savefor futureuse.
Removecontentsfrom inside microwaveoven including
turntable, turn table supportand hub.
Mounting plate is gray metal plate attachedto back of
microwave hood.
Removethe mounting plate:
• Remove two screws @ from top of microwave hood
located closest to the front corners. Do not remove
screws locatedtowards the center of hood.
• Remove front grille ®. Set screws and grille aside.
• Pull hook © to releasemounting plate. Separate
mounting plate and set aside.
• Replacegrill.
Completelyclose door andreplace tape sothat door does
not swing openwhile microwave isbeing handled.
Forventless(recircuiating)operation,go to "Prepare
cabinet opening" page12.
Tovent throughthe wall, go to step 2 then to step 3, "Wall-
venting installation".
Tovent through the roof, go to step 2 then to step 6,
"Roof-venting installation".
Quitela cintay gudrdelapara useen el futuro.
SaquetodoIo queest6dentrodel hornode microondas
inciuyendoei plato giratorio,ei soportedel platogiratorioy el
eje.
Laplacade montajees la placamet_licagris queest_ en la parte
traserade la campanadel homo.
Quitela placade montaje:
• Quitelos dostornillos @ de la partesuperior de lacampana
del homo, que est6nm_s pr6ximosalas esquinasdelanteras.
Noquite los tornillos colocados haciael centrode la campana.
• Quitela rejilla delantera®. Apartelos tornillos y la rejilla.
• Jaleel gancho @ parasoltar la placade montaje.Quite la
placade montajey ap_rtela.
• Vuelvaa colocar la rejilla.
Cierrela puertacompletamenteyvuelvaa colocarla cinta
para quela puertanose abramientrasse trabaja enel horno.
Parafuncionamientosinsaiida de aire (recirculaci6n),vayaa
lasecci6n "Preparelaabertura del gabinete"en la p_gina12.
Parasacarel aire a trav6sde la pared,vayaal paso2, luegoal
paso3, "lnstalaci6ncon salidade airea trav6sde la pared".
Parasacarel aire a trav6sdel cieloraso,vayaal paso 2, luego
al paso 6, "lnstalaci6ncon salidade airea trav6sdel cielo raso".
I
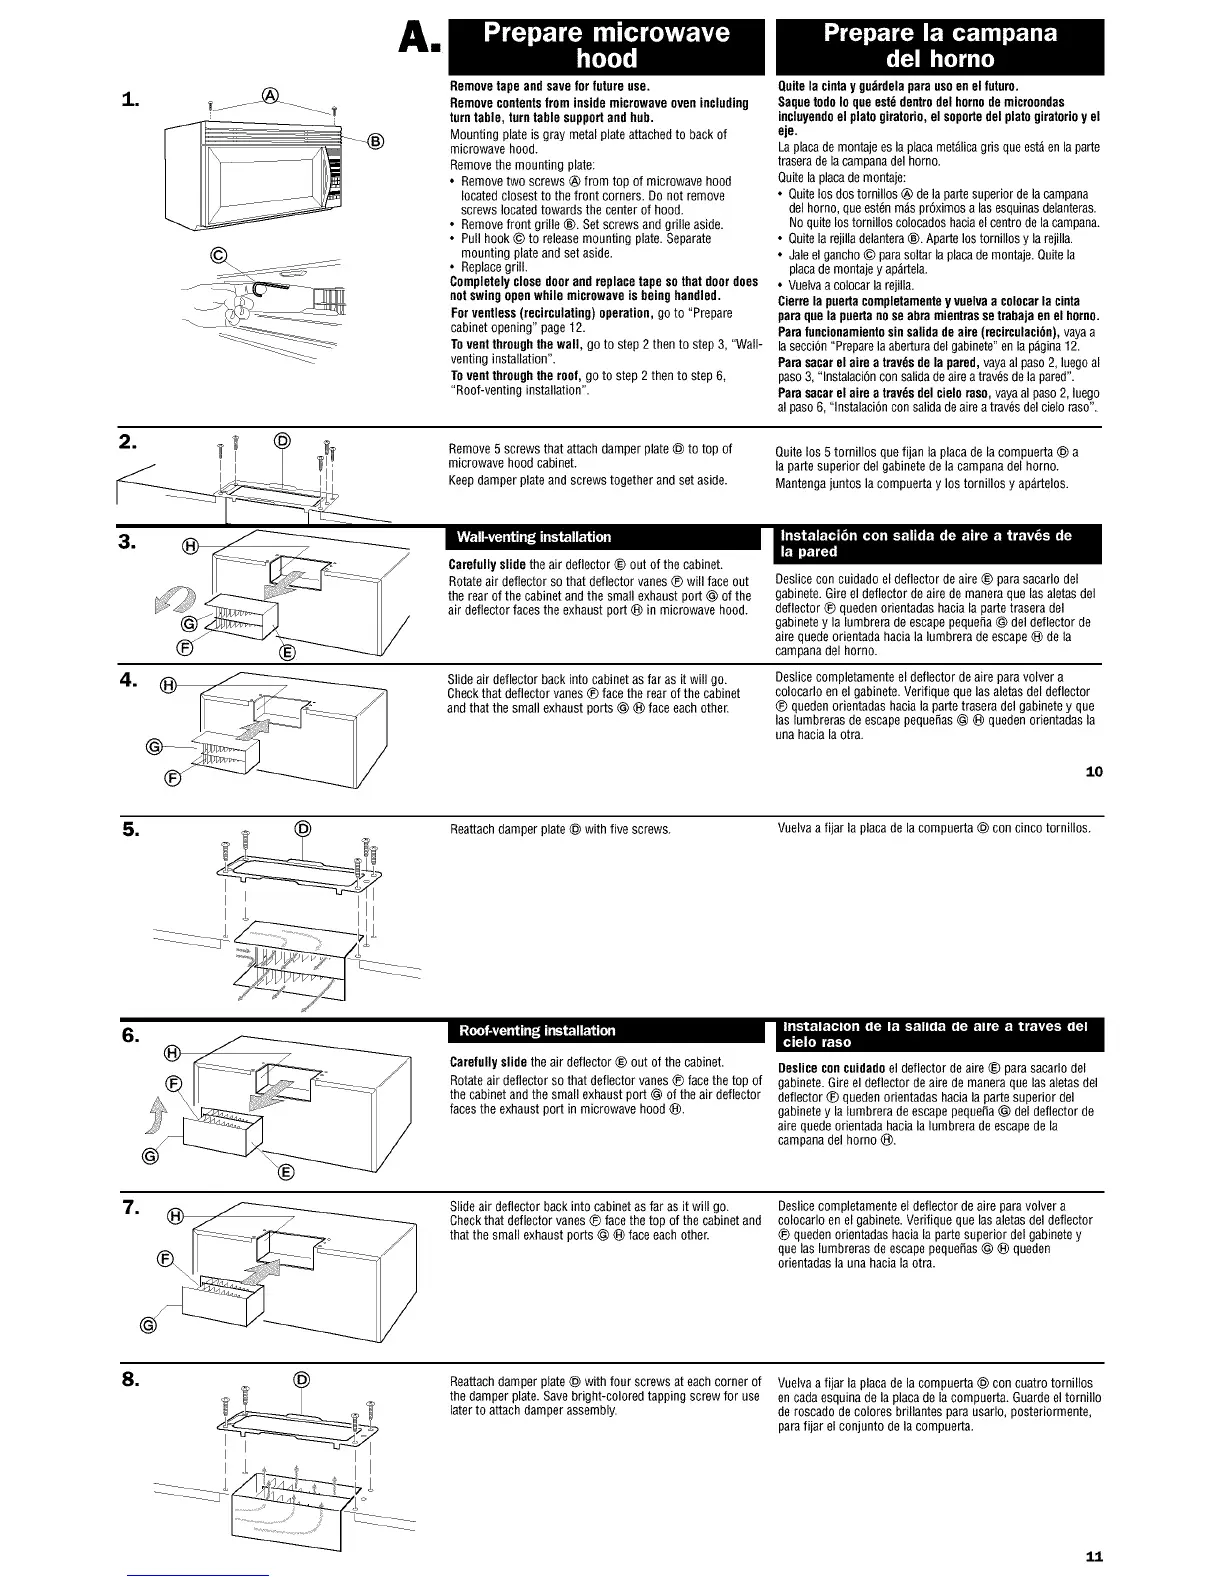
Remove5 screws that attach damper plate ® to top of
microwave hood cabinet.
Keepdamper plate and screws together and set aside.
Quitelos 5 tornillos que fijan la placade la compuerta @ a
la parte superior del gabinetede la campanadel homo.
Mantengajuntos la compuerta y los tornillos y ap_rtelos.
1
1
®
®
Carefullyslide the air deflector ® out of the cabinet.
Rotateair deflector sothat deflector vanes® will face out
the rear of the cabinet and the small exhaust port @ of the
air deflector faces the exhaust port ® in microwave hood.
Deslicecon cuidado el deflector de aire ® parasacarlo del
gabinete. Gire el deflector de aire de manera que las aletas del
deflector ® queden orientadas hacia la partetrasera del
gabinetey la lumbrerade escapepequefia@ del deflector de
aire quedeorientada haciala lumbrerade escape® de la
campana del horno.
Slide air deflector back into cabinetas far as it will go.
Checkthat deflector vanes ® face the rear of the cabinet
and that the small exhaust ports @ ® face each other.
Deslicecompletamente el deflector de aire paravolver a
colocarlo en el gabinete.Verifique que las aletas del deflector
® quedenorientadas hacia la parte trasera del gabinetey que
las lumbreras de escapepequefias @ ® queden orientadas la
una hacia la otra.
10
1
Reattachdamper plate ® with five screws.
Vuelvaa fijar la placa de la compuerta ® con cinco tornillos.
I
1
@
Carefullyslide the air deflector ® out of the cabinet.
Rotateair deflector sothat deflector vanes® face the top of
the cabinet and the small exhaust port @ of the air deflector
facesthe exhaust port in microwave hood ®.
Desliceconcuidadoel deflector de aire ® parasacarlo del
gabinete. Gire el deflector de aire de manera que las aletasdel
deflector ® queden orientadas hacia la parte superior del
gabinetey la lumbrera de escape pequefia@ del deflector de
aire quedeorientada haciala lumbrera de escapede la
campana del homo ®.
1
®
@
Slide air deflector back into cabinet asfar as it will go.
Checkthat deflector vanes® face the top of the cabinet and
that the small exhaustports @ ® face each other.
Deslicecompletamente el deflector de aire paravolver a
colocarlo en el gabinete.Verifique que lasaletas del deflector
® quedenorientadas hacia la parte superior del gabinete y
que las lumbreras de escapepequefias @ ® queden
orientadas la una hacia la otra.
1
Reattachdamper plate @ with four screws at each corner of
the damper plate. Save bright-colored tapping screwfor use
laterto attach damper assembly.
Vuelvaa fijar la placa de la compuerta ® con cuatro tornillos
en cada esquina de la placade la compuerta. Guardeel tornillo
de roscado de colores brillantes para usarlo, posteriormente,
parafijar el conjunto de la compuerta.
11
 Loading...