EasyManua.ls Logo

Kenmore 79048809100 User Manual

Kenmore 79048809100
12 pages
To Next Page IconTo Next Page
Page #1 background imageLoading...
Page #1 background image
United States
qS!
iNSTALLATiONAND SERVICEMUST BEPERFORMEDBYA QUALIFIED INSTALLER.
IMPORTANT: SAVE FOR LOCAL ELECTRICAL INSPECTOR'S USE.
READ AND SAVE THESE INSTRUCTIONS FOR FUTURE REFERENCE.
FOR YOUR SAFETY:Do not store or use gasoilne or other
flammable vapors and liquids in the vicinity of this or any other appliance.
Canada
Your new wall oven has been designed to fit a limited variety of cutout sizes to make the job of installing easier. The
first step of your installation should be to measure your current cutout dimensions and compare them to the cutout
dimensions chart below for your model. You may find little or no cabinet work being necessary.
Do not remove
spacers (if equipped) on the
side walls and/or an the back of
1½" (3.8 crn)
Min.
- o1--
NOTES:
1. Base must be capable of supporting 350 pounds (159 kg).
2. Allow at least 21" (53.3 cm) clearance in front of oven for
door depth when it is open.
3. Dimension G (cutout depth) is critical to the proper
installation of the built-in oven. If the oven decorative
trim does not butt against the cabinet, or if noise is heard
on convection models, verify dimension G to assure it is
according to the required dimension.
Needed (see note 4)
Electrical
Junction Box
Figure 1
_4. For a cutout height (H) between 441/2" (113cm) and
451/8'' (114.6cm) add a 2" (5 cm) ,,vide wood shim of
appropriate height to each side of the opening under the
appliance side rails. Lifting the unit wilt allow you to hide
the cutout openings showing above the unit. The bottom
trim of the unit wilt hide the shims at the bottom.
_'5. For a cutout height (H) between 451/8" (114.6 cm) and
467/8" (118.1cm) you can order a larger bottom trim
through your Service Center.
PRO DUCT DIME NSION S
MODEL I A I I C I
27" (68.6 cm) Walt Oven 27 (68.6) 45 9/T6(115.7) 24 5/8 (62.5) 24_/2 (62.2)
30" (76.2 cm) Wall Oven 30 (76.2) 45 9/_6(115.7) 28_/4 (71.8) 241/2 (62.2)
f CUTOUT DIMENSIONS AND CABINET WIDTH
27" (68.6cm) Walt Oven 258/8 (65.1)
30" (76.2cm) Walt Oven 281/2(72.4)
All dimensionsare in inches (cm).
Printedin United States
257/8 (65.7)
29 (73.7)
23_/2 (59.7)
23_/2 (59.7)
44_/4 (112.4) 44_/2 (113)
44_/4 (112.4) 44_/2 (113)
27i/8 (68.9) Min
30i/8 (76.5) Min
P/N 318201546 (1011)Rev.A
English- pages 1-6
Espa_ol -paginas 7-12
Question and Answer IconNeed help?

Do you have a question about the Kenmore 79048809100 and is the answer not in the manual?

Kenmore 79048809100 Specifications

General IconGeneral
BrandKenmore
Model Number79048809100
Capacity1.6 cu. ft.
Power1000 watts
ColorStainless Steel
Pre-Programmed SettingsYes
Child LockYes
Cooking ModesReheat, Defrost, Popcorn
Turntable Diameter12.4 inches
Control TypeElectronic Touch Control

Summary

Safety Instructions

General Safety Warnings

Important safety warnings regarding electrical hazards, use, and handling of the appliance.

Electrical Shock Hazard

Critical warnings about electrical grounding requirements and risks of shock.

Risk of Electrical Shock

Warnings related to connecting copper and aluminum house wiring and conduit handling.

Anti-tip Mounting

Instructions and warnings for installing anti-tip screws to prevent oven tipping.

Electrical Requirements and Connection

Power Supply and Circuit Protection

Details on voltage, frequency, branch circuit requirements, fuses, and circuit breakers.

Grounding Methods

Explains grounding procedures for 3-wire and 4-wire systems, including specific instructions for different scenarios.

Extension Cord Warning

Warning against using extension cords with the appliance due to fire and shock risks.

Cabinet and Physical Installation

Cutout Dimensions Overview

Guidance on measuring current cutout sizes and comparing them to required dimensions.

Cabinet Installation Steps

Detailed steps for installing the oven into the cabinet, including door removal and handling.

Trim Installation

Instructions for installing the bottom and center trims using provided screws.

Leveling the Wall Oven

Procedure for leveling the installed oven using a rack and level, with shims if necessary.

Operation and Service Checks

Checking Oven Operation

Steps to verify the proper functioning of bake, broil, and convection modes.

Before You Call for Service

Guidance on consulting the Use and Care Guide for common issues and service information.
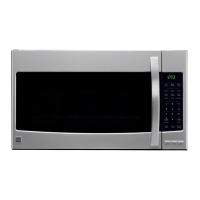
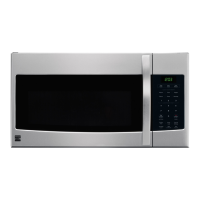
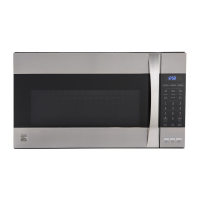
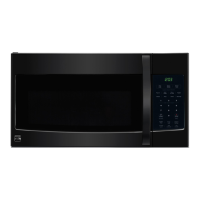
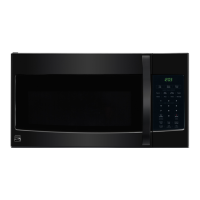
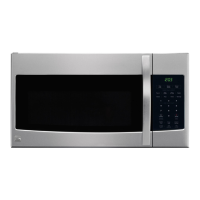
Related product manuals