EasyManua.ls Logo

Kenmore Garbage Disposal User Manual

Kenmore Garbage Disposal
10 pages
To Next Page IconTo Next Page
Page #1 background imageLoading...
Page #1 background image
FOOD WASTE
DISPOSERS
GUIDE FOR EASY, TROUBLE-FREE
INSTALLATION, CARE AND USE.
HOW THIS GUIDE WILL HELP YOU.
This guide describes everything you need to know
to install your new food waste disposer, including
care and use information. If you take your time,
follow the instructions and drawings, you should
have no trouble making a first-rate installation.
NOTE: Read through the entire guide before you
start installation so you can get all the tools and
materials you will need with one trip to the store.
II I I! II!1
These are the tools and
materials you will need.
ADJUSTABLE
("CRESCENT")
WRENCH
_ PIPE WRENCH
WIRE NUTS
PLUMBER'S PULP( (2 - Size 54)
(% lb.)
WP71865
HACK SAW
These are the tools and
materials you may need.
_ ON-OFFELECTRICAL
SWITCH 120 amp, rating)/_,_" -
DRAIN _ HAMMER
AUGER
ELECTRICAL CABLE
CONNECTOR
(1/2inch)
o o I /
DISHWASHER /
DRAIN CONNECTIN
COPPER WIRE
HOSE CLAMP
(7_inch) (12 or 14 gauge )
Question and Answer IconNeed help?

Do you have a question about the Kenmore Garbage Disposal and is the answer not in the manual?

Kenmore Garbage Disposal Specifications

General IconGeneral
TypeContinuous Feed
Motor Speed1725 RPM
Motor TypeInduction
Anti-Jamming FeatureYes
Motor1/2 HP
Grind Stages1
Sound InsulationYes

Summary

Check the Parts and Mounting Assembly

Mounting Assembly Components

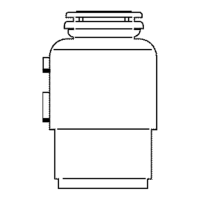
Lists the various parts comprising the disposer's mounting assembly.

Removing Your Old Disposer

Disconnect Drain Line

Instruction to disconnect the drain line from the old disposer discharge tube.

Handle Different Mounting Types

Instructions for removing disposers with different mounting systems.

Remove Electrical Plate and Wires

Steps to remove the electrical plate and disconnect power wires.

Remove Mounting Rings and Sink Sleeve

Guidance on removing the old mounting rings and sink sleeve.

Cleaning Sink Drain Line

Installing Your Sink's First Disposer

Removing Sink Strainer and Extension Tube

Steps to remove the existing sink strainer and extension tube.

Electrical Supply Requirements

Electrical Safety and Circuit Needs

Details on required circuit amperage, wire gauge, and safety precautions.

Clean Sink Hole Sealant

Mounting Assembly Steps

Separate Mounting Assembly Parts

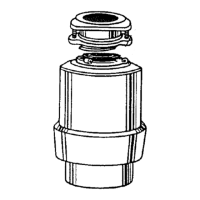
Instructions for disassembling the mounting assembly components.

Apply Plumber's Putty

Guidance on applying plumber's putty to the sink sleeve.

Attach Upper Mounting Assembly

Steps for assembling the upper mounting components onto the sink sleeve.

Electrical Connections

Connect Power Wires and Cable

Instructions for connecting the disposer's power wires to the house wiring.

Grounding the Disposer

Grounding Methods and Warnings

Details on proper grounding procedures and important safety warnings.

Dishwasher Drain Connection

Connect Dishwasher Hose

Steps for connecting the dishwasher drain hose to the disposer.

Locking the Disposer in Place

Check for Leaks

Disposer Operation and Safety

Operating Instructions for Feed Models

Guidance on operating continuous feed and batch feed disposer models.

Usage Recommendations and Warnings

Tips on efficient grinding, what to grind, and important safety warnings.

Troubleshooting and Service Calls

Addressing Loud Noises and Overloads

How to handle loud noises and motor overload situations.

Freeing a Jammed Disposer

Instructions and tips for safely freeing a jammed disposer.

Related product manuals