Do you have a question about the Kenwood EZ500 and is the answer not in the manual?
Use of controls or adjustments other than specified may result in hazardous radiation exposure. Follow Federal Regulations for laser product safety labels.
This equipment complies with FCC Rules Part 15 for Class B digital devices, designed for reasonable protection against harmful interference in residential installations.
To prevent injury or fire, take precautions like inserting the unit fully, using proper gauge wires, and avoiding metallic objects inside the unit.
To prevent machine damage, ground the unit to a negative 12V DC supply, do not open covers, and avoid direct sunlight, heat, or humidity.
The LX AMP and the sensor unit cannot be connected simultaneously. You must connect only one at a time.
If you try to load a 3-inch CD with its adapter, the adapter might separate and damage the unit.
Consult your Kenwood dealer for installation problems. Press the Reset button if the unit fails to operate properly.
Condensation may form on the CD player lens in cold weather, making CDs impossible to play.
Wipe the faceplate with a dry soft cloth. For bad stains, use a cloth moistened with neutral cleaner.
If the terminals get dirty, wipe them with a dry, soft cloth.
Clean the CD slot periodically. CDs can get scratched if put into a dusty slot.
Refer to the SIRIUS Satellite radio tuner manual for operation methods.
Select the category and channel you wish to listen to using the unit's controls.
Don't touch the recording surface of the CD. CD-R and CD-RW are easier to damage than normal music CDs.
If the CD center hole or outside rim has burrs, use it after removing them with a ball pen etc.
Don't use disc type accessories.
Clean from the center of the disc and move outward.
When removing CDs from this unit pull them out horizontally.
CDs that aren't round can't be used. CDs with coloring or dirt can't be used.
Don't place them in direct sunlight or high temperatures. Store CDs in their cases.
The MP3/WMA recording media acceptable to this unit are CD-ROM, CD-R, and CD-RW.
Formats like ISO 9660 Level 1/2, Joliet, Romeo, and Long file name are supported for file and folder names.
Set transfer bit rate and sampling frequency for MP3/WMA data compression.
The displayable ID3 tag is ID3 version 1.x. Refer to the List of Codes for character codes.
Use code list characters for file/folder names. Incorrect characters may not display correctly.
Loading media with many folders or non-MP3/WMA files can take a long time to start playing.
Instructions on turning the unit ON and OFF using the [SRC] button.
Press the [SRC] button to choose between various sources like SIRIUS tuner, HD Radio, CD, External disc, and Auxiliary input.
Adjust volume using the [VOL] knob. Turn clockwise to increase, counterclockwise to decrease.
Press the [ATT] knob to quickly turn the volume down. Press again to return to the previous level.
Press the [LOUD] knob for at least 1 second to compensate for low and high tones during low volume.
Press the [SRC] button to select the audio source you want to adjust.
Press the [AUDIO] knob to enter Audio Control mode for Bass, Middle, and Treble adjustments.
Use the [] / [►►I] knob to adjust Bass, Middle, Treble levels and their center frequencies.
Press the [SRC] button to select the source for audio setup.
Press the [AUDIO] knob for at least 1 second to enter Audio Setup mode.
Press the [AUDIO] knob to cycle through setup items like System Q, High Pass Filter, and Subwoofer Low Pass Filter.
Use the [◀] / [►►I] knob to adjust the selected audio setup item.
Press the [SRC] button and select the 'STANDBY' display.
Press the [AUDIO] knob to enter Speaker Setting mode.
Turn the [◀] / [►►I] knob to select speaker type: OFF, 5 & 4 inch, 6 & 6x9 inch, or OEM speaker.
Press the [AUDIO] knob to exit Speaker Setting mode.
Press the [DISP] button to switch display between Station name/Frequency or Frequency.
Press the [DISP] button to switch display between Disc title, Track title, Track number & Play time, or Disc name.
Press the [DISP] button to switch display between Song title, Album name, Folder name, File name, or Track number & Play time.
Press the [DISP] button to switch display between Channel Name, Song Title, Artist Name, Composer Name, Category Name, or Band & Channel Number.
Press the [DISP] button to switch display between Station name, Song title/Artist name/Album name/Genre, or Frequency.
Press the [DISP] button to display Auxiliary input name.
Select the station or CD you want to attach a title to.
Press the [DISP] button for at least 2 seconds to enter name set mode.
Press the [AUDIO] knob or [FM]/[AM] button to move the cursor to the enter character position.
Press the [MENU] button to switch between alphabet upper/lower case, numbers, symbols, and special characters.
Turn the [◀] / [►►I] knob to select characters. Use remote buttons for entry.
Repeat steps 3 through 5 to enter the name.
Press the [DISP] button to exit name set mode.
Press the [SRC] button and select 'AUX' or 'AUX EXT' display.
Press the [DISP] button for at least 2 seconds.
Turn the [◀] / [►►I] knob to switch through displays like AUX, TV, VIDEO, GAME, PORTABLE, DVD.
Press the [DISP] button to exit the setting mode.
Press the [SW] button for at least 1 second to toggle Subwoofer output ON or OFF.
The audio system automatically mutes when a call comes in, displaying 'CALL'.
Press the [SRC] button to resume audio playback. The 'CALL' display disappears.
Hang up the phone. The 'CALL' display disappears and the audio system comes back ON.
Press the [OPEN] button, drop open the faceplate, and pull it forward to remove it.
Align the shaft with the depression on the faceplate and push until it clicks to lock it in place.
Press the [AUTO] button to switch between Auto seek ('Auto 1'), Preset station seek ('Auto 2'), and Manual tuning.
Select the station by selecting the tuner source and band, then tune up or down band using the [] / [I] knob.
Press the [FM] / [AM] button to select the band.
Press the [DIRECT] button on the remote. Enter frequency using number buttons.
Press the [DIRECT] button on the remote to cancel.
Press the [FM] / [AM] button to select the band.
Press the desired [1] — [6] button to recall preset stations.
Press the [FM] / [AM] button to select the band.
Turn the [] / [I] knob to select the frequency.
Press the desired [1] — [6] button for at least 2 seconds to store the station.
Press the [FM] / [AM] button.
Press the [AME] button for at least 2 seconds to automatically store stations.
Select HD Radio source, then select HF or HA band and tune up or down band using the [] / [I] knob.
Press [SRC] button and select the disc player display like 'CD2', 'CD CH', or 'MD CH'.
Press the [II] button. Each time pressed, it pauses and plays.
Insert a disc by dropping open the faceplate, inserting the disc, and returning the faceplate.
Drop open the faceplate, press the [▲] button, and return the faceplate to its former position.
Search for a song on the disc or in the MP3/WMA folder by turning the [] / ►] knob.
Hold the [1] knob for fast forwarding or [] knob for reversing.
Enter the track/file number using remote buttons and press [] / [I] button to search.
Enter the disc number using remote buttons and press [DISC-] / [DISC+] button to search.
Press the [REP] button to switch between Track Repeat, Disc Repeat, or OFF.
Press the [M.RDM] button to turn Magazine Random Play ON or OFF.
Press the [F.SEL] button to enter Folder Select mode.
Press [FM]/[AM] to move down/up levels. Turn []/[] knob to select folder in the same level.
Press the [AUDIO] knob to release Folder Select mode and play the selected folder's MP3/WMA.
Press the [SCROLL] button for at least 1 second to scroll CD text, MP3/WMA text, or MD title.
Press the [DNPP] button on the remote to enter DNPP mode.
Press the [DISC+] / [DISC–] button to display the desired disc.
When the desired disc is displayed, press the [OK] button on the remote to play it.
Press the [DNPP] button on the remote to cancel.
Press the [MENU] button for at least 1 second to enter Menu mode.
Press the [AUDIO] knob to select the menu item you want to set.
Turn the [] / [I] knob to set the selected menu item, e.g., 'Beep ON' or 'Beep OFF'.
Press the [MENU] button for at least 1 second to exit Menu mode.
Press the [SRC] button and select the 'STANDBY' display.
Press the [MENU] button for at least 1 second.
Press the [MENU] button to display 'ENTER' and 'CODE'.
Press the [AUDIO] knob or [FM]/[AM] button to select digits.
Turn the [] / [I] knob to select the security code numbers.
Repeat steps 4 and 5 to complete the Security Code.
Press the [AUDIO] knob for at least 3 seconds to confirm the Security Code.
Perform steps 4 through 7 to reenter the Security Code. 'APPROVED' will be displayed.
Set the operation check sound (beep sound) ON or OFF.
Press the [AUDIO] knob and select 'Clock Adjust'.
Press the [MENU] button. The time indicator (hours) blinks.
Press the [AUDIO] knob to select hours or minutes.
Turn the [] / [I] knob to adjust the hours or minutes.
Press the [MENU] button to exit.
Set whether the clock display is ON or OFF.
Set the indicator to 'DSI ON' (LED flashes) or 'DSI OFF' (LED OFF) when the faceplate is removed.
Select button illumination color as 'Button Red' or 'Button Green'.
Adjust the display contrast from 'Contrast 0' to 'Contrast 10'.
Set 'Dimmer ON' to dim the display when the vehicle light switch is turned ON, or 'Dimmer OFF' to disable dimming.
Set whether to display System Q factors like Bass center frequency, Bass Q factor, etc. ('SystemQ ON' or 'SystemQ OFF').
Switch preout between rear ('SWPRE Rear') and subwoofer ('SWPRE Sub-W').
Toggle the mute control for the built-in amplifier ON ('AMP Mute OFF') or OFF ('AMP Mute ON').
Set the Dual Zone system to 'Zone 2 OFF' (same source) or 'Zone 2 ON' (different sources).
Set 'Zone 2 Rear' or 'Zone 2 Front' to define which channel's source is excluded.
Adjust the bass boost level of the external amplifier using 'AMP Bass FLT', '+6', '+12', or '+18'.
Set the central frequency using 'AMP Freq NML' or 'AMP Freq Low'.
Set CRSC to 'CRSC ON' to switch stereo to mono for FM reception, or 'CRSC OFF' to disable.
Display the SIRIUS ID (Electronic Serial Number). It is important to retain for service activation.
Set text scrolling to 'Scroll Auto' (repeats scroll) or 'Scroll MANU' (scrolls on display change).
Select 'Auto mode', 'Digital', or 'Analog' for HD Radio reception.
Set 'AUX OFF' (no input) or 'AUX ON' (input available) for Auxiliary input.
Select 'AMP Control' mode to adjust LX AMP settings. For details, see LX AMP instruction manual.
Use two 'AA'-size batteries. Slide cover, insert batteries with correct polarity, and close cover.
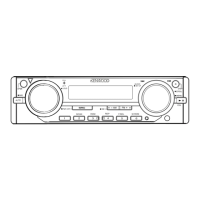
Covers [VOL.] buttons for volume, [SRC] button for source switching, and [ATT] button for quick volume reduction.
Select the band (FM1, FM2, FM3) or preset band.
Use [] / [I] buttons to tune up or down the band or search channels.
Press buttons [1]-[6] to recall preset stations or channels.
Enter/cancel 'Direct Access Tuning' mode or select items.
Do disc/folder forward and backward.
Pause and play songs.
Enter/cancel 'DNPP (Disc Name Preset Play)' mode.
Lists various accessories included with the unit.
Steps for preventing short circuits, making wire connections, and installing the unit in the car.
Diagram showing Aux input, Front output, Rear output/Subwoofer output, and FM/AM antenna input.
Details connections for Power control, Mute, External amplifier control, Dimmer control, and speaker wires.
Shows connections for Ignition key switch, Car fuse box (Main fuse), Battery, and Ground wire.
Instructions for installing the unit using a metal mounting strap and self-tapping screws.
Steps for aligning holes with the vehicle mounting bracket and securing with accessory screws for Toyota and Nissan cars.
Remove the hard rubber frame before proceeding with faceplate attachment.
Press Release button, then tighten accessory screws (⑤, ⑥, ⑦) into specified holes.
Engage catch pins on removal tool, remove locks, and pull frame forward.
Remove screw, insert removal tools, lower tool, and pull unit halfway out, then pull completely.
Covers issues like power not turning ON, inability to switch sources, memory erasure, loudness effect, and TEL mute function.
Addresses issues with fader/balance, input/output wires, Volume offset, or Built-in Amp Mute Setting.
Troubleshoots pinched speaker wires, incorrect speaker wiring, or sound quality issues.
Check if the preout jack is being used; Touch Sensor Tone cannot output from it.
Check Dimmer wire connection or ensure 'Dimmer' setting is ON.
Check antenna extension, antenna control wire connection, and ensure desired frequency is entered correctly.
Check for unsupported disc changers or discs not playing.
Address issues with disc removal after ACC switch OFF or discs not inserting.
Troubleshoot Direct Search and Track Search functions.
Clean media or check recording condition. Ensure correct format is used.
Clean media or check recording condition. Record media again or use another media.
Track time may not display correctly due to MP3/WMA recording conditions.
Check 'Receive mode Setting', broadcast station transmission, and tuner connection.
No disc magazine loaded, or disc magazine not completely loaded. Load magazine properly.
No disc loaded in the unit or disc magazine. Load disc properly.
No disc loaded, CD is dirty, upside-down, or scratched. Clean CD and load correctly.
The CD is upside-down. Load the CD correctly.
Nothing has been recorded on the MD.
No tracks recorded on MD, though it has a title.
Faceplate of slave unit removed. Replace it.
Unit malfunctioning. Press reset button. Consult service center if code persists.
Disc magazine issue or unit malfunctioning. Check magazine, press reset button. Consult service center if code persists.
Protective circuit activated due to high temperature. Cool down the unit for operation to resume.
Attempted to display DNPS during CD play without disc names preset.
Discs are being exchanged in the Disc changer.
Unit is reading data on the disc.
DNPP done without playback at least once.
MP3/WMA played with unsupported format.
A copy-protected file is played.
Details frequency range, sensitivity, frequency response, signal to noise ratio, selectivity, and stereo separation.
Details frequency range and usable sensitivity.
Details laser diode, digital filter, D/A converter, spindle speed, wow & flutter, frequency response, THD, S/N, dynamic range, channel separation, MP3/WMA decode.
Details maximum output power, full bandwidth power, tone action, preout level/load, and preout impedance.
Details frequency response, input maximum voltage, and input impedance.
Details operating voltage, current consumption, installation size, and weight.
| frequency range | 87.9MHz~107.9MHz |
|---|---|
| usable sensitivity | 9.3dBf (0.8µV/75Ω) |
| quieting sensitivity | 15.2dBf (1.6µV/75Ω) |
| frequency response | 30Hz~15kHz |
| signal to noise ratio (MONO) | 70dB |
| selectivity | ≥80dB |
| stereo separation | 40dB |
| maximum output power | 50W x 4 |
|---|---|
| full bandwidth power | 22W x 4 |
| frequency range | 530kHz~1700kHz |
| usable sensitivity | 28dBµ (25µV) |
| preout level/load | 2000mV/10kΩ |
|---|---|
| preout impedance | ≤600Ω |
| spindle speed | 1000~400 rpm (CLV 2 times) |
| frequency response | 10Hz~20kHz |
| total harmonic distortion | 0.01% |
| operating voltage | 14.4V |
|---|---|
| current consumption | 10A |
| installation size | 178 x 50 x 160 mm |
| weight | 2.87 lbs (1.3 kg) |