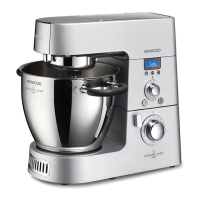
Do you have a question about the Kenwood KM001 and is the answer not in the manual?
Instructions for removing all initial covers from the top section of the appliance.
Procedure for removing four screws and associated spigots.
Guidance on safely removing the spigot plate using a flat-bladed screwdriver.
Step to remove three screws (No.2 Pozidrive) from the top section.
Instruction to raise the main head of the appliance.
Step to remove two TX15 screws.
Instruction to lower the main head of the appliance.
Procedure for lifting the top cover from the high-speed outlet end.
Re-assembly is reverse of steps 1-8; avoid disturbing anti-vibration cap.
Initial step to remove all covers from the pedestal base.
Instruction to invert the appliance to access the pedestal.
Step to remove two stuffer box screws (TX15 or TX20).
Procedure for unclipping and removing the pedestal lid.
Step to remove two fixing screws (TX20).
Instruction to remove the pedestal box, useful as a screw tray.
Step to remove the cable clamp screw (TX20).
Instruction to remove the cable clamp.
Carefully operate head release while restraining pedestal, allowing slow opening.
Step to remove four TX20 screws, noting a possible TX15 variant.
Caution to avoid scratching the body with the head lift mechanism.
Step to remove the location pin (8mm hex nut).
Lift quadrant cover and disconnect three connectors (sensors, motor, power).
Step to remove the speed control module.
Final step to remove the quadrant cover.
Procedure for pushing out the hinge pin if required.
Re-assembly reverse of steps 1-14; ensure power cable avoids fan.
First step for motor disassembly: remove the top cover.
Step to remove the top washer related to the motor.
Step to remove three motor screws (No.2 Pozidrive).
Procedure for removing the drive belt from the motor assembly.
Note on placing top cover to stabilize appliance during inverted steps.
Instruction to strip pedestal down to step 14 and remove quadrant cover.
Step to remove a single vent panel screw (TX20).
Instruction to remove the vent panel.
Step to remove the main motor unit.
Guidance on replacing motor in reverse order, fitting screws first.
Note that fan/pulley replacement requires a press; avoid shock loads.
Section pertaining to motor brushes.
Step to remove the sleeve held by two clips.
Step to unlatch the spring mechanism.
Step to remove a tag.
Step to remove a brush from the motor.
General instruction to re-assemble the motor in reverse order.
Methods to assist gearbox pulley removal: using a stall plug or mincer.
Procedure: fit stall plug in slow speed outlet, rotate pulley anti-clockwise.
Procedure: attach mincer, use screwdriver to stop rotation, undo pulley anti-clockwise.
Instruction to invert the appliance for latch assembly access.
Carefully operate head release while restraining pedestal, allowing slow opening.
Step to unhook the latch springs.
Step to remove the C-clip.
Step to pull out the latch bar.
General instruction to re-assemble the latch assembly in reverse order.
Step to remove the speed control module (refer to Pedestal section).
Step to remove the rear cover of the speed control knob.
Step to lift out the control board and insulation sheet.
Step to remove a single screw (No.1 Pozidrive).
General instruction to re-assemble the speed control knob in reverse order.
| Brand | Kenwood |
|---|---|
| Model | KM001 |
| Category | Food Processor |
| Language | English |