EasyManua.ls Logo

Kia K5 User Manual

Kia K5
3 pages
To Next Page IconTo Next Page
Page #1 background imageLoading...
Page #1 background image
Navigation& Entertainment System
Navigation& Entertainment System Navigation& Entertainment System
Navigation& Entertainment System
Installation Flow
Installation Flow Installation Flow
Installation Flow (V1.0)
(V1.0)(V1.0)
(V1.0)
Installation Guide Of Kia K5
Original car CD panel
Use insulating cutter to loose right side of the
decoration panel.
Use insulating cutter to pry the above of the
decoration panel.
Use insulating cutter to pry the upright of the
decoration panel
To loose the right bottom of the panel. Take out the decoration panel
Take out the 8 screws of the panel
Use insulating to loose upper side of the panel.
01 02
03 04
05 06
07 08
Question and Answer IconNeed help?

Do you have a question about the Kia K5 and is the answer not in the manual?

Kia K5 Specifications

General IconGeneral
Voice RecognitionYes
Bluetooth ConnectivityYes
TouchscreenYes
SiriusXMYes
Over-the-Air UpdatesYes
Apple CarPlayYes
Android AutoYes
Real-Time TrafficYes
Wireless ChargingYes
Display Size10.25-inch

Summary

Center Console Trim Removal

Loosening and Prying Trim Components

Use insulating cutter to loosen and pry various sides of the center console decoration panel.

Removing the Main Decoration Panel

Carefully detach and remove the primary decorative panel from the console.

Securing Panel Screws

Identify and remove the eight screws securing the panel before removal.

Steering Column and Lower Dashboard Disassembly

Removing Steering Column Trim

Remove screws securing the steering wheel and associated decoration panel.

Detaching Lower Dashboard Panels

Use insulating tool to remove and detach lower dashboard panels and their screws.

Console and CD Player Removal

Removing Console and Air Condition Outlet

Detach the console and the air condition outlet, removing surrounding screws.

Removing CD Player Unit

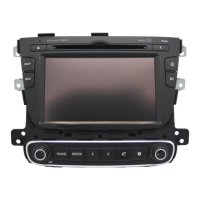
Disconnect and remove the CD player unit and its associated wiring.

Unit Installation and Wiring

Preparing the Holder and Unit

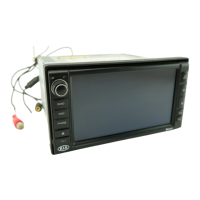
Remove the original CD holder and place it into the new machine.

Connecting Power and Signal Wires

Connect the special power cable, AV-IN, and FM wires as shown in diagrams.

Final Installation Check

Confirm all connections are secure and the unit is installed correctly.

GPS Antenna Installation and Precautions

GPS Antenna Mounting Location

Install GPS antenna on dashboard or roof rack, ensuring clear sky view.

Safety and Installation Precautions

Follow safety guidelines, disconnect battery, and use factory cables to avoid damage.

Related product manuals