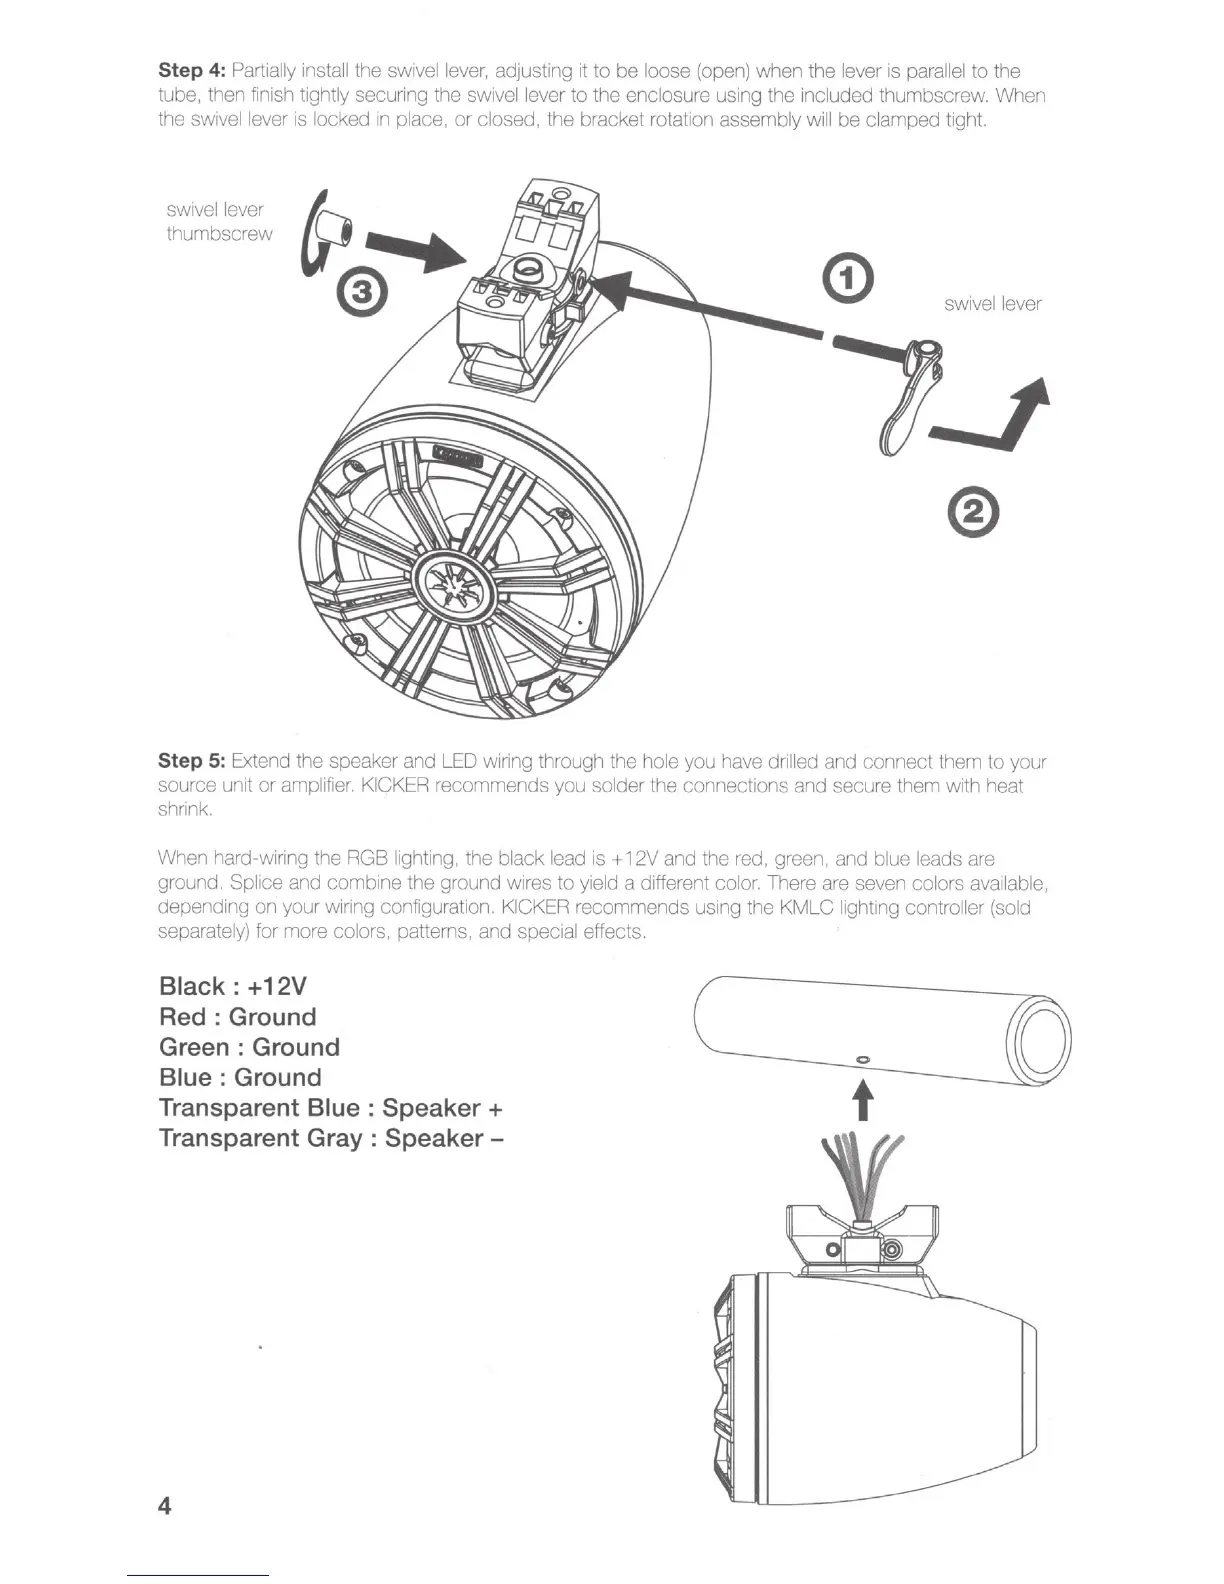
Step
4:
Partially
install the swivel
lever,
adjusting
it
to
be
loose
(open)
when the lever
is
paral
lel
to the
tube,
then
finish
tightly securing the
swivel
lever to the enclosure using the included thumbscrew. When
the
swivel
lever
is
locked
in
place, or closed, the bracket rotation assembly
will
be clamped tight.
swivel lever
thumbscrew
swivel
lever
Step
5: Extend the speaker and
LED
wiring through the hole you
have
drilled and connect them to your
source unit or
amplifier.
KICKER
recommends you solder the connections and secure them with heat
shrink.
When
hard-wiring the
RGB
lighting, the black lead
is+
12V and the
red,
green, and
blue
leads
are
ground. Splice and combine
tt1e
ground wires to yield a different color. There
are
seven colors
ava
il
able,
depending on your wiring configuration.
KICKER
recommends using the KMLC lighting controller
(sold
separately) for more colors, pattems, and special effects.
Black:
+12V
Red:
Ground
Green : Ground
Blue : Ground
Transparent Blue : Speaker
+
Transparent Gray : Speaker -
4
c
___
~
o
___
()
t