Blue
White*
Brown Blue
White*
Brown Blue
White*
Brown
House Cabling
(Interconnect)*
Line (Red Or Brown)
Neutral (Black Or Blue)
* Interconnect only – if single alarm installation, leave unconnected with sheathing intact.
These are double insulated products and do not need earthing never use
earth conductor to interconnect – use 3 core and earth cable. Use yellow
strand or black [ in new 3 core & earth] cabling, for in ter connect line.
Interconnect using YELLOW strand on old 3 core & earth cable, or BLACK
on New harmonised colours; if interconnecting using old & new cable take
great care / follow IEE Reqs.
5.Initial Testing and Checking of Alarm
• Befor
e powering up/testing
DOUBLE CHECK WIRING POLARITY is cor
rect &
connections tight. REVERSING POLARITY will fatally damage all inter
connected
alar
ms, and is not covered by the Guarantee. Plug any cable harness in
BEFORE
power up, to prevent the danger of arcing across the pins.
Having energised circuit, press and hold the test button again – the alarm
should sound and other interconnected ones also, within a few seconds.
• Do this for all alarms.
• If any do not sound, isolate mains and recheck cabling.
• On optical alarms if the red L.E.D. blinks every 30-40 seconds and the alarm
chirps in between, it indicates failure of the sensing chamber. This condition
also exists if the Hush button is pushed.
• Advise the house-holder (if present) as to how to test the alarms.
6. Interconnecting
• You may interconnect up to 23 Kidde Fyrnetics AC smoke, heat or CO alarms to
this unit. i.e. 24 in total.
• Crossing line and neutral connections or line and interconnect connections will
fatally damage all interconnected alarms invalidating the guarantee.
Never remove or connect cable harness, without having disconnected mains
power, or arcing could occur, damaging the alarm.
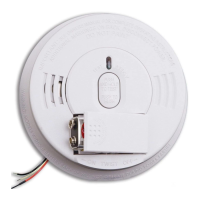
• Close door and plug in harness – if you need to
remove, squeeze on sides of connector.
• Check harness is secure into back of alarm.
• Reinstall on alarm base plate affixed to ceiling and
push (and hold) test button to verify battery opera-
tion.
• Slot in locking pin as in illustration
CPC omitted for clarity
 Loading...