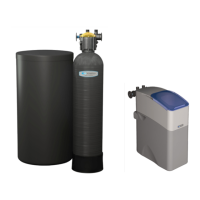
Kinetico 2030s, 2040s OD, 2050s, 2060s,
2100s, 2100s OD, 4040s OD, 2060s OD, 2030f OD
2060f OD, 2100f OD Backwashing Filters
2040C, 4050s 4060s OD Macrolite™,
4060s OD Activated Carbon, 4060f OD,
2080f OD Greensand, 2060s Tannin Plus
®
Rev. 09/08 Kinetico Incorporated Corporate Headquarters Newbury, Ohio 44065 440-564-9111 Product No. 11013K
1
INSTALLATION INSTRUCTIONS
SAFETY INSTRUCTIONS
1. Read all steps, guides and rules carefully before installing and using the system.
2. Check your local building and sanitation codes for installation compliance. INSTALLATION MUST MEET ALL
STATE AND LOCAL PLUMBING CODES, including, but not limited to:
Distances that equipment should be placed from the main panel box and electrical outlets.
Air gaps that must be provided for all drain lines.
3. Kinetico recommends that a WQA certified installer perform the installation. Failure to install the system as
instructed will void the warranty.
4. Do not use on water with pressure exceeding 125 psi or temperature exceeding 120°F.
5. If the outlet of the softener is within 10 feet of a hot water tank, the installation of a check valve and/or expansion
tank should be considered.
6. Do not install the system in an area where the temperature can cause the unit to freeze. Damage to the system
will result.
7. Provide proper ventilation when using PVC cleaner or glue.
8. Use a ladder for all work overhead beyond your natural reach. If working continuously at a height of six feet or
more, employ the appropriate safety devices.
9. Use an appliance dolly when transporting equipment on stairways.
10. You must adhere to the following guidelines when soldering:
Use only LEAD FREE solder.
Close or remove PVC containers and other flammable materials to prevent fire or explosions.
Do not wear loose clothing (i.e.: shirt tails, sleeves, etc.) when using a torch for soldering.
Notify the customer if you will be disabling smoke alarm(s) during installation. Be sure to reconnect the
smoke alarm(s).
Use a scorch pad to protect any surface that may be exposed to a torch flame or excessive heat.
Wear protective eyewear while installing to prevent potential eye injury that could be caused by splattering
soldering materials or metal/plastic shavings.
11. When installing a plastic component inline, Kinetico recommends installing grounding straps BEFORE the lines
are actually cut to ensure that the ground is never broken.
12. On iron bearing water, Kinetico recommends using a salt that contains resin-cleaning additives. (IMPORTANT!
This does not apply to Tannin Plus.) NOTE: Kinetico recommends a clean grade of salt. Do not use rock
salt.
SYSTEM INSTALLATION
1. Determine location to install equipment. Make sure that the unit will be on a flat surface. Test water to confirm
unit is properly sized for installation. If sand/silt or turbidity is present, install a separate prefilter. ALL HIGH
EFFICIENCY UNITS REQUIRE A PREFILTER.
NOTE: Verify installation complies with state and local plumbing codes before continuing. All Kinetico
conditioners and/or filters must follow a pressure tank on well water applications.
2. Install with by-pass valving as shown in Figure 1. Note the inlet and outlet arrows on valve head.


 Loading...