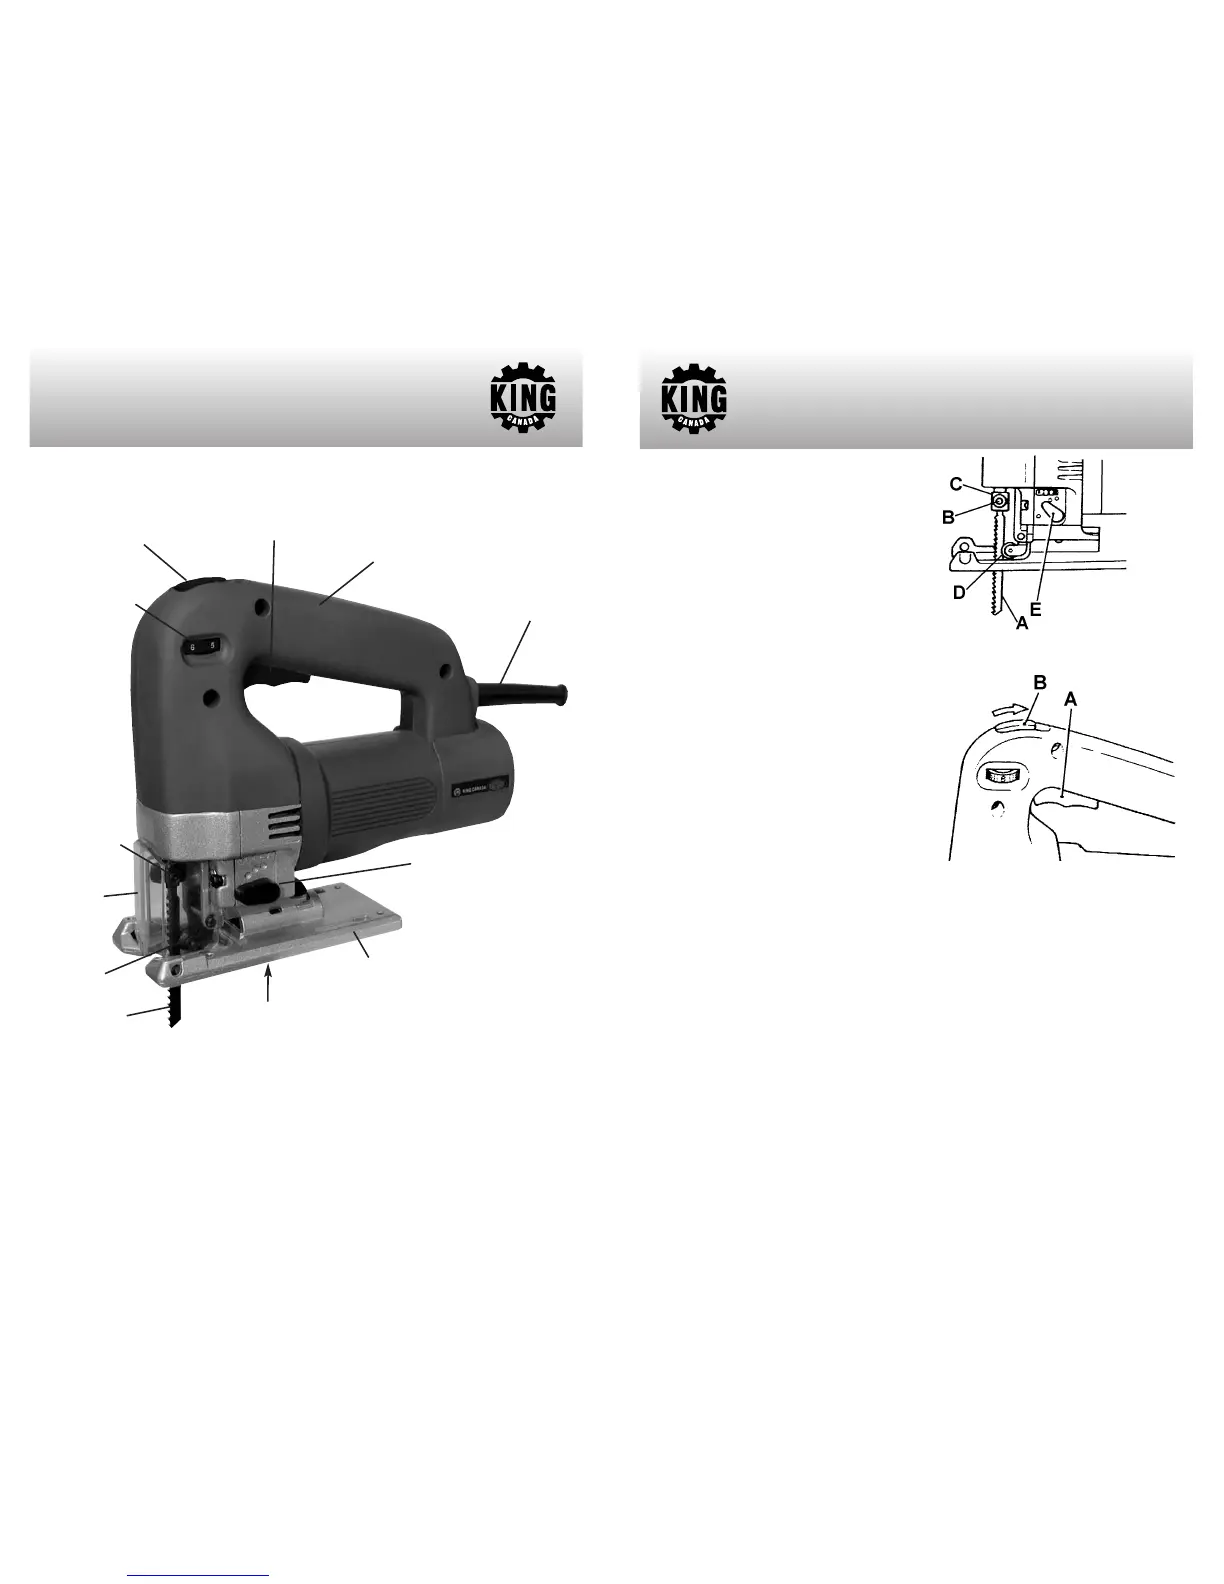
GETTING TO KNOW
YOUR JIG SAW
Cord protector
Getting to know your Jig Saw
Lock-on Button
Blade
roller guide
Soft Grip Housing
Figure 1
Trigger
Aluminum base with
removeable base insert
Blade
Rotary variable
speed selector dial
Transparent
guard
Blade fixing
set screws
Bevel locking
cap screw
Orbital settings lever
INSTALLING/REMOVING BLADE
Warning! Always make sure the jig saw is
unplugged from the power source before
attempting any assembly and/or adjustments.
To install the blade (A) Fig.2, loosen the blade
fixing set screw (B) which is found on the
blade holder (C). With the blade teeth facing
forward as shown, insert the blade into the
blade holder as far as it will go. Make sure
that the back edge of the blade fits into the
roller guide (D). Tighten set screw to secure
blade in place.
SELECTING THE CUTTING ACTION
There are 4 cutting actions, 3 orbital settings
and 1 straight cutting setting. To change the
cutting action, turn orbital settings lever (E)
Fig.2.
Settings:
0-
Straight line cutting- mild steel, stainless,
plastics.
I- Small orbit- mild steel, aluminum, hard wood.
II- Medium orbit- wood, plywood, fast cutting
ASSEMBLY & OPERATION
Figure 2
Figure 3
of aluminum and mild steel.
III- Large orbit- fast cutting wood and plywood.
SWITCHING ON AND OFF
To switch the jig saw on, press the trigger (A) Fig.3. To switch off, release the trigger.
CONTINUOUS OPERATION
To obtain continuous operation, press the trigger and at the same time move the lock-on
button (B) Fig.3 backwards. This will lock the trigger in place, to release this lock-on
position, press the trigger and release it.