18
FPPBC25-6
Getting Started . . .
Assembling the cutting blade
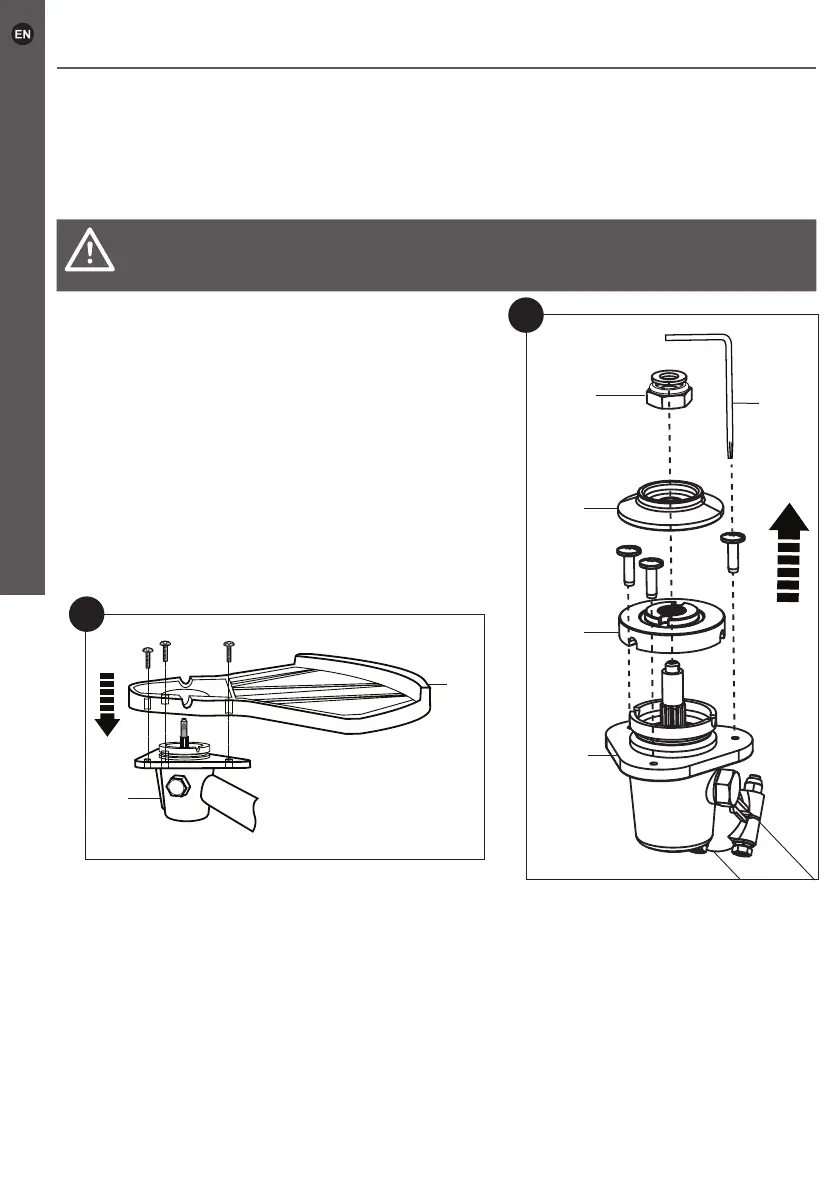
The cutting blade (24) is used together with the cutting-attachment guard (22). Use the
cutting blade for cutting heavier weeds, brush and similar vegetation with a thickness
of up to 20 mm.
CAUTION! Risk of cuts! Cutting blade (24) is very sharp. Wear protective
gloves when handling the cutting blade (24).
1.
Loosen the three pre-assembled screws on
the gear head (18), using the multi-tool II (34)
(Fig. 6).
2. With one hand holding the backing ange (23)
and the locking ange (25), turn the securing
nut (26) clockwise to loosen it.
3.
Remove the securing nut (26), the locking
ange (25) and the backing ange (23) from
the gear head (18).
4.
Attach the cutting-attachment guard (22) to
the gear head (18). Secure the guard with the
removed three screws (Fig. 7).
7
22
18
5. Put the backing ange (23) onto the
spindle (30) (Fig. 8).
6. Rotate the backing ange (23) until one of its grooves is aligned with one of those
on the gear head (18).
7. Insert the hex key (36) into one of the grooves to lock the rotation of the spindle.
8.
Remove the cutting blade (24) from the transport cover and place it onto the spindle.
The side with markings should be facing towards the gear head (18).
9.
Place the locking ange (25) and then the securing nut (26) onto the spindle. The pins
on the locking ange (25) should align with the groves on the backing ange (23).
10. Using the multi-tool I (33) tighten the securing nut (26) anti-clockwise to secure the
parts in place.
18
23
25
34
26
6
Before you start
 Loading...