KI 9000 UM-14 34
PERFORMANCE VERIFICATION TESTS
Optical Power Meter
Accuracy Test
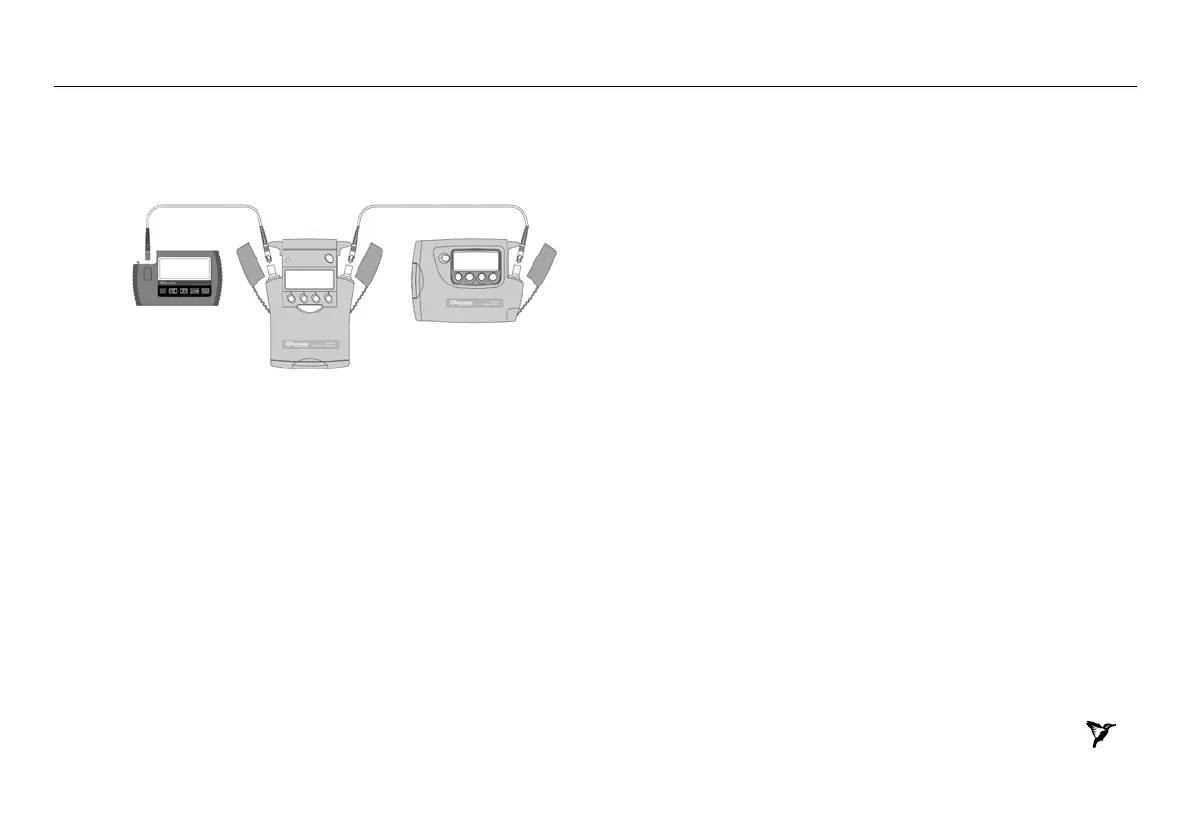
1. Connect the equipment as shown in Figure 2:
Power Meter Attenuator Light Source
Figure 2.Test set-up for KI 9600 Power Meter Accuracy Test
2. Switch on all three instruments.
3. Set all instruments to 1310 nm.
4. Change the attenuation of attenuator until the optical power meter
displays -10.00 dBm. Note the attenuator setting in setting 1 of
Table 4.
If the laser source is not powerful enough to give -10 dBm, set the
attenuator to 2.5 dB and correct the appropriate values in the test
report.
Repeat the above for reference power meter readings of
-20dBm, -30 dBm, -40 dBm and -50 dBm ( settings 2 ~ 5 ).
5. Measure the DUT:
Re-connect the attenuator output cable to the DUT.
Set the attenuator to its value for setting 1.
Note the displayed power level of the DUT in the test record.
Repeat the above for attenuator settings 2 ~ 5.
6. Repeat the Power Meter Accuracy Test at 1550 nm.