6. POWERING ON
Connect to the desired input voltage and press
and hold the on/off button for 2-3 seconds to
turn the unit on, the display will show the current
internal fridge temperature.
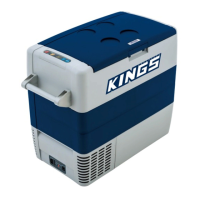
7. ADJUSTING THE TEMPERATURE
The temperature controller provides the ability to set the desired temperature level and displays
information on the fridge and set temperature.
The controller has been programmed to maintain an average of the set temperature. The
compressor will start up when the internal temperature increases 0.5 to 1.5 degrees above
the selected temperature and will run until the temperature is 0.5 to 1.5 degrees below the set
temperature.
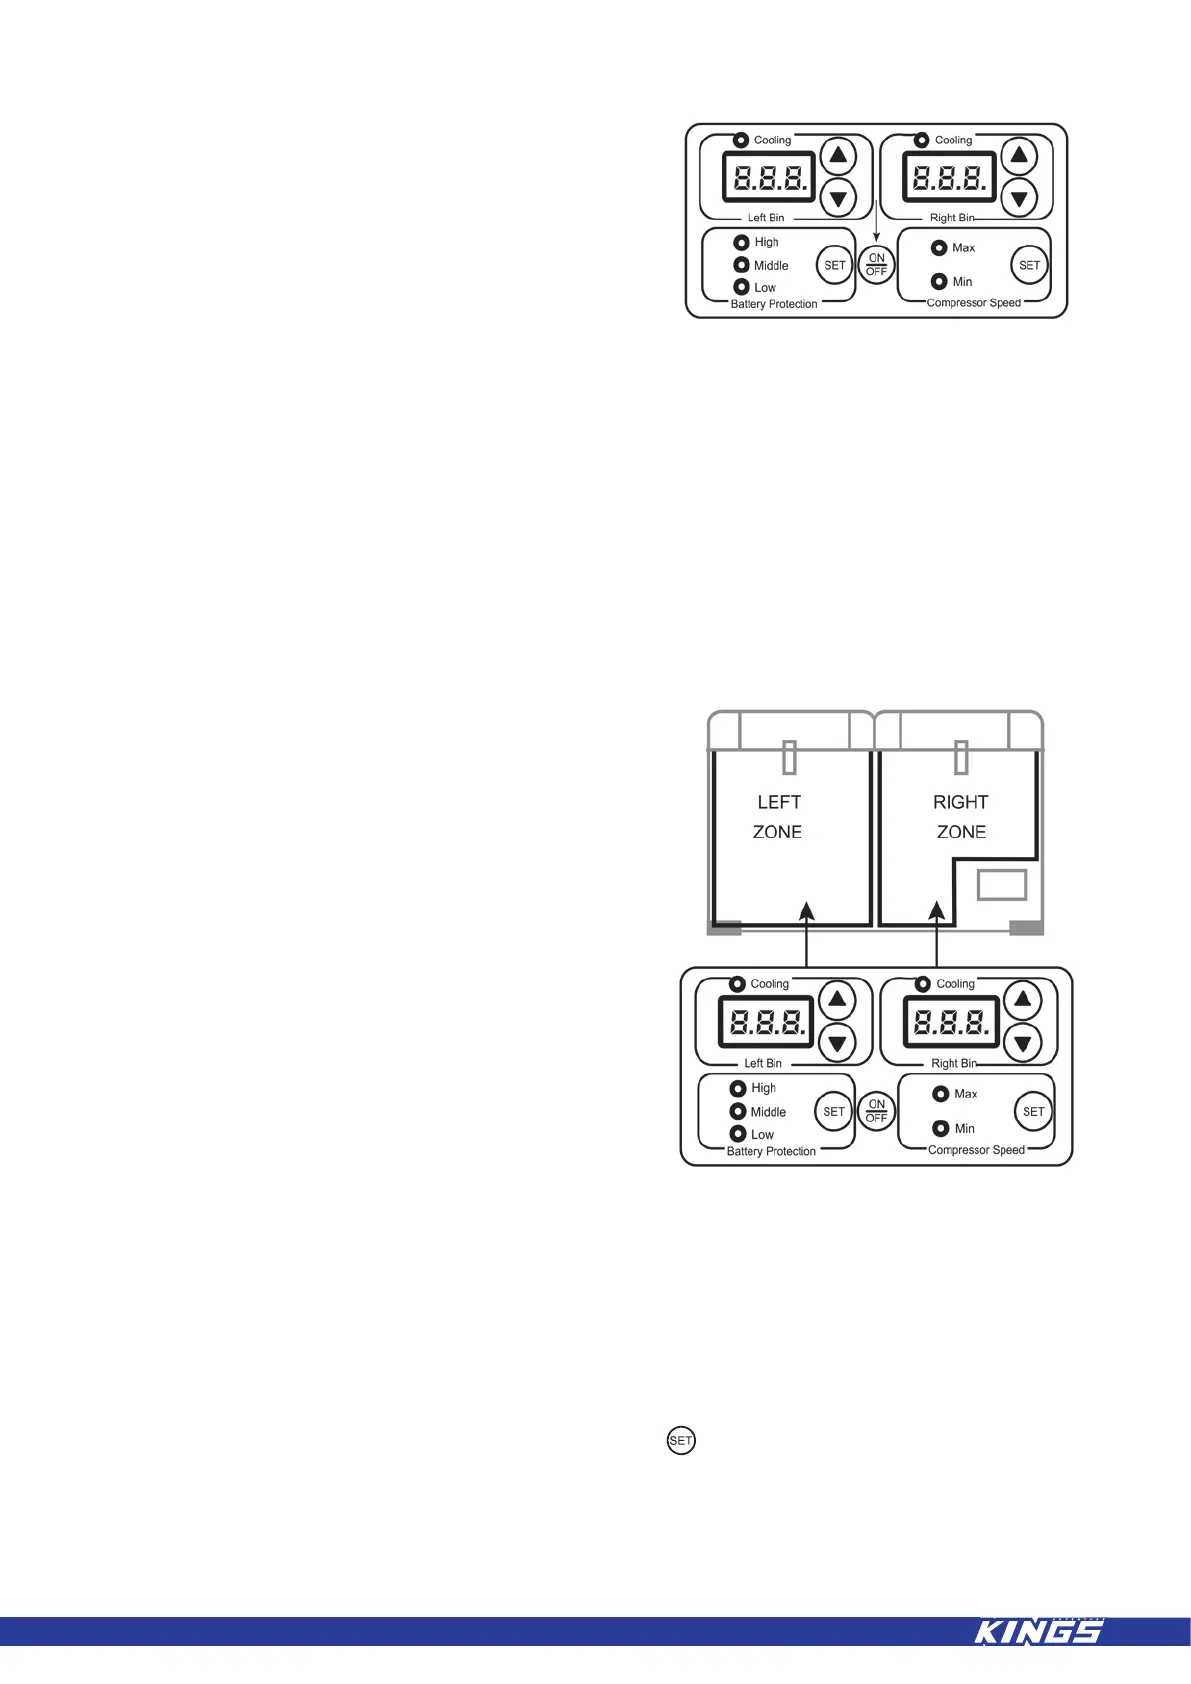
When your appliance is rst connected to the
AC or DC input the digital readout will show the
current temperature – the temperature shown
on the “LEFT ZONE TEMP” display corresponds
to the larger left zone compartment, the
temperature on the “RIGHT ZONE TEMP”display
corresponds to the stepped right zone
compartment.
To increase fridge temperature press “up”
▲ and to decrease press “down” ▼ until the
desired temperature is achieved. Once selected
the display will ash a number of times before
returning to the current temperature.
NOTE: The left bin can only be set to an equal
or higher temperature than the right bin.
8. MAX/MIN SETTINGS
There are two modes of operation:
MAX = HIGH SPEED RUNNING
MIN = LOW SPEED RUNNING
To swap between these two settings press and hold the button
The fridge will display via an indicator light which mode has been selected.
7
 Loading...