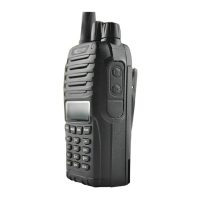
This document outlines the features and operation of the PT6500 two-way radio, a communication device designed for various applications. The manual covers everything from initial setup and basic usage to advanced programmable functions and troubleshooting.
Function Description
The PT6500 is a two-way radio primarily used for voice communication over designated channels. It supports both individual and group calls, with features designed to enhance communication clarity and security. The device operates on specific frequency bands and can be configured with various signaling options like CTCSS/DCS, DTMF, and 2TONE to filter unwanted calls and ensure privacy within a group. A key function is its Push-To-Talk (PTT) button, which allows users to transmit their voice when pressed and receive signals when released.
The radio incorporates several auxiliary functions that can be programmed via PC software, offering flexibility in its application. These include a Time-out Timer (TOT) to prevent a single user from monopolizing a channel, a Battery Saving mode to extend operational time, and Voice Annunciation of Channel Number for ease of use. The device also supports Busy Channel Lockout (BCL) to prevent interference with other radios using the same channel, and a Scrambler function for enhanced communication privacy.
Usage Features
The PT6500 is designed for straightforward operation, starting with unpacking and checking the supplied accessories, which typically include an antenna, battery, belt clip, charger, power adapter, and hand strap.
Preparation and Basic Operation:
- Battery Charging: The battery is charged by connecting the power adapter to the charger and placing the battery or transceiver into the charger slot. An indicator light changes from red (charging) to green (fully charged). It's important to charge new batteries fully before initial use and regularly thereafter, avoiding overcharging.
- Battery Installation/Removal: The battery pack is installed by aligning its bulges with the transceiver's holes and pressing down until it clicks. Removal involves pressing the belt clip and a release button simultaneously.
- Antenna Installation: The antenna is screwed clockwise into the connector at the top of the transceiver.
- Optional Speaker/Microphone: An external speaker/microphone can be connected to the versatile connector and secured with a snail screw.
- Belt Clip Installation: The belt clip grooves align with the rear of the battery and lock into place.
- Switch On/Off and Volume Adjustment: The Power/Volume switch turns the radio on/off with a click and adjusts the volume.
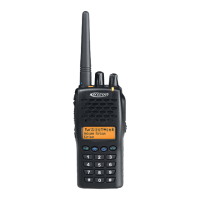
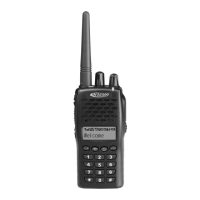
- Channel Selection: A channel selector allows users to choose from 1 to 128 channels, organized into 8 zones. The display shows the current zone, transmit power (High/Low), and channel number.
- Making and Receiving Calls: To make a call, press and hold the PTT button and speak into the microphone. Releasing the PTT button allows the user to receive calls. The radio can be configured to only receive calls from specific signaling tones (CTCSS/DCS, 2 Tone).
- Menu Navigation: The radio features a menu system accessed via dedicated buttons for entering, confirming, returning, and deleting options.
The PT6500 offers two side buttons and one top button that can be programmed by the dealer for various auxiliary functions, enhancing user convenience. These functions can be set as short or long key presses.
- Scan: Initiates channel scanning to detect signals, stopping on active channels.
- Separate Working: A safety mode for individual users, often linked to automotive checking.
- Contact List: Quick access to a stored list of contacts for calling.
- Busy Channel Lockout (BCL): Prevents transmission on a busy channel, issuing a warning sound if PTT is pressed.
- Key Lock: Locks/unlocks the radio's keys to prevent accidental operation.
- Squelch Level Selector: Allows instantaneous adjustment of the squelch level (0-9) to filter out background noise.
- Companding: Enhances audio quality by compressing and expanding the dynamic range of the voice signal.
- Scrambler: Encrypts voice transmissions to prevent unauthorized listening.
- Battery Volume Checking: Displays the current battery power level.
- Monitoring: Disables CTCSS/DCS/2Tone/DTMF filtering to listen to all signals on a channel, including weak ones.
- Cancel Squelch: Temporarily disables squelch to hear all signals, regardless of strength or signaling.
- Emergency Alert: Activates a warning ring or transmits identity/background music in emergency situations.
- Back Light: Toggles the display backlight on or off.
- Rptr/Talkarnd (Repeater/Talkaround): Switches the next transmission to either repeater mode or direct radio-to-radio communication on the same frequency.
- Instantaneously Select Channel: Quickly switches to a pre-selected channel.
- Call 1, 2, 3, or 4: Transmits a specified code from the contact list for quick calls.
- Voice Annunciation of Channel Number: Enables or disables spoken channel number announcements.
- Adjust Display Contrast: Allows users to modify the display contrast.
- Manual Programming: Dealers can enable rights for users to manually set channel frequency, CTCSS, and DCS.
Auxiliary Functions (Programmed with PC):
- Time-out Timer (TOT): Configurable timer to limit continuous transmission, with pre-warning and reset options.
- Battery Saving: Automatically enters a low-power mode after a period of inactivity to conserve battery life.
- Voice Annunciation of Channel Number: Provides audible announcements of channel numbers when switching.
- CTCSS/DCS: Allows the radio to filter out unwanted calls by only opening the squelch for signals with matching tones.
- DTMF Signaling: Supports various DTMF systems for group calls and other functions, with customizable encoding and decoding sequences.
- 2TONE Signaling: Similar to DTMF, allowing for specific tone sequences for communication, with customizable parameters.
- Transmit Start/Over Signaling (PTT ID): Sends an identification signal at the start or end of a transmission, often used to connect or disconnect repeaters or phone systems.
Maintenance Features
The manual includes a "Problems and Troubleshooting" section to help users diagnose and resolve common issues. This section provides a list of potential problems, such as "No display after switched on," "Phase locked loop unlocked," "Cannot transmit," "No signal," "Transmitting red light is on, but no voice is heard," "Receiving green light is on, but no voice is heard," and "Abnormal programming." For each problem, a corresponding solution is offered, ranging from simple actions like recharging the battery or checking antenna connections to more complex internal component replacements (e.g., CPU, oscillator tube, amplifier ICs) that would typically require professional service.
The document also emphasizes the importance of using approved accessories, including antennas and batteries, to ensure compliance with FCC RF exposure guidelines and prevent damage to the radio. It advises against disassembling the battery and warns about short-circuiting or exposing it to fire. Regular charging and proper storage are recommended to maintain battery life.
For optimal performance and compliance with RF energy exposure standards, users are instructed to transmit no more than 50% of the time and adhere to specific operating procedures, such as holding the radio one to two inches from the lips during transmission and using approved body-worn accessories. In case of persistent issues or complex repairs, consulting the dealer or an experienced radio/TV technician is recommended.