CH2 icon flashes when the input voltage is above the Flashing Voltage (> 14.5V) and it is not
the source to charge the battery. It will change to solid when it becomes the source to charge
the battery.
During normal operation, every time when the ‘INFO’ button is pressed once, the display will
scroll through and show ‘CH1’, ‘CH2 & ‘CH3’ voltage for 3 seconds and it will return to the
normal display automatically. If CH2 or CH3 is not connected, it will show 0V.
The display will remain ON when either one or both CH2 & CH3 inputs are available. The
display will turn OFF if CH2 or CH3 is not available.
During equalization operation on flooded battery only, the numerical section on the display will
show a flashing ‘eq’ indicating the equalization process is in progress and it will not show the
battery voltage or the charging current.
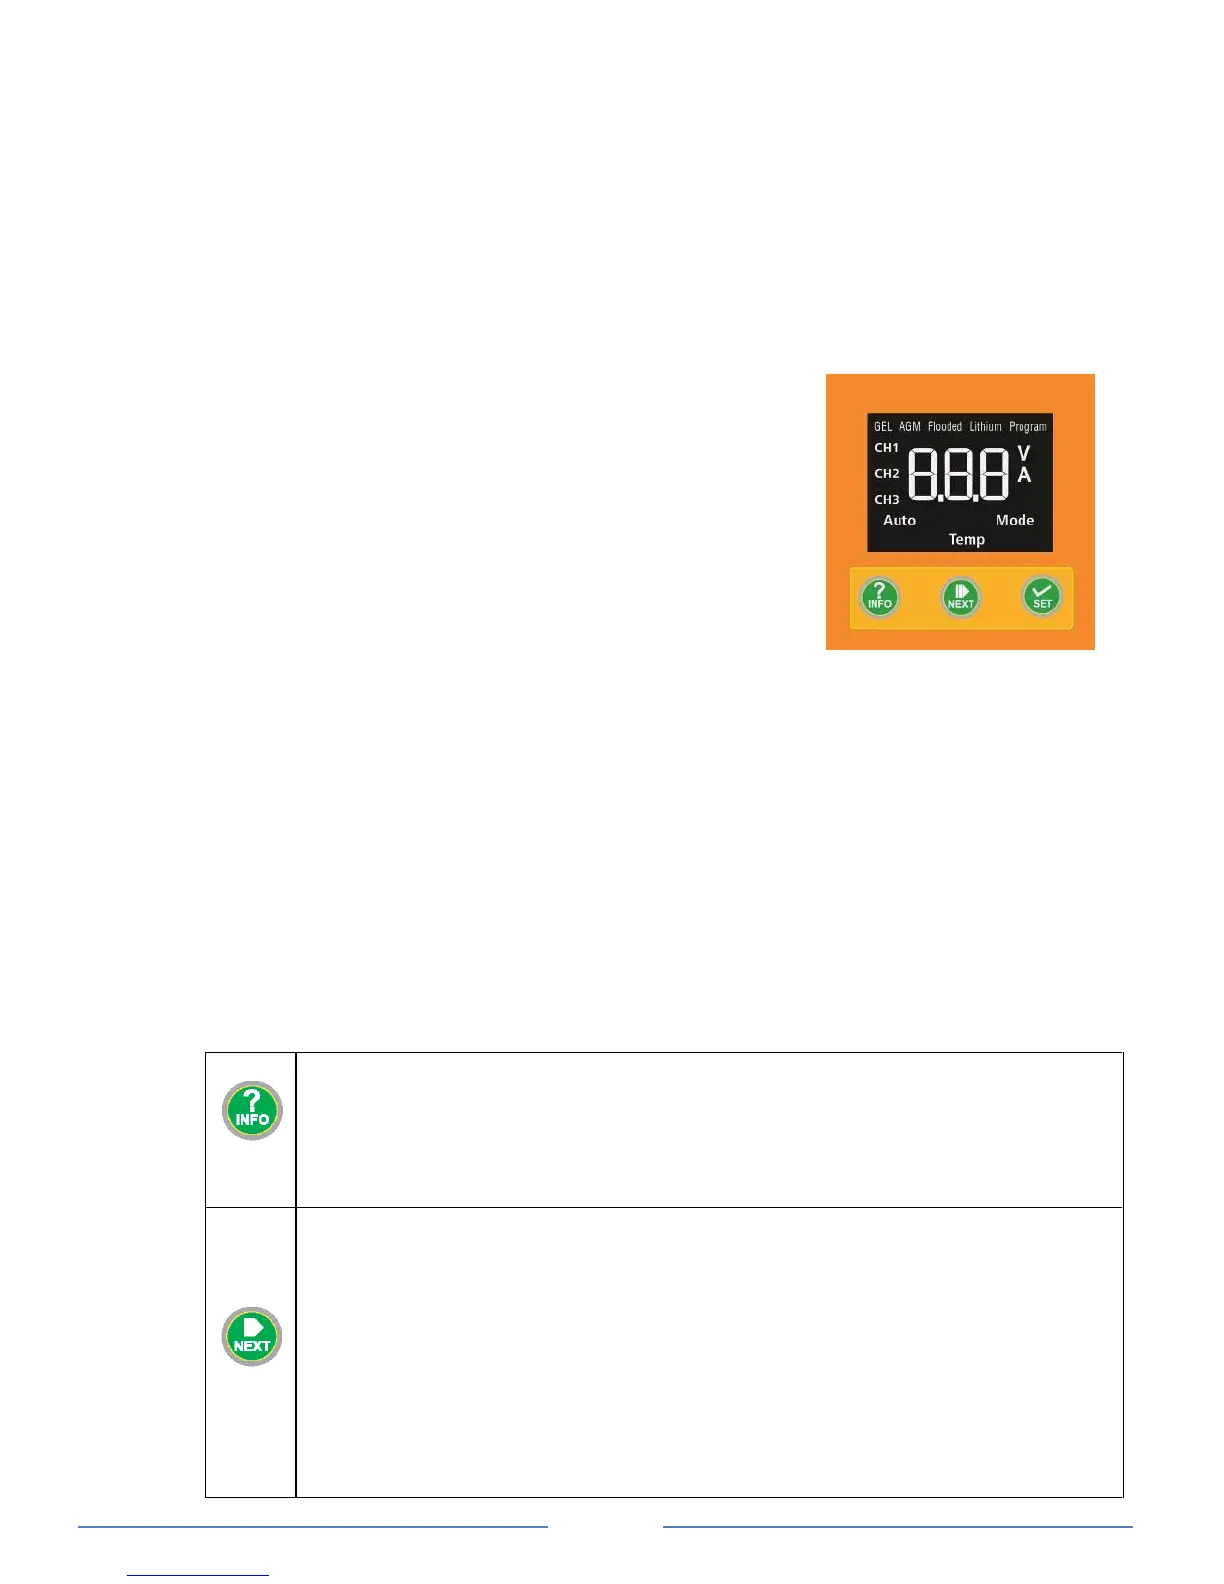
Understanding the Function Key Icons on Display
CH1 - Display is showing the charging battery info (charging
status, voltage and current)
CH2 / CH3 - When displayed solid means the power is getting
from the related channel and the other channel
will be flashing if it is available but not charging.
V - Display is showing the voltage
A - Display is showing the current
Auto - Unit Silent mode is on
Priority - Unit alternator terminal is High or unit is set to
Manual Override mode
Mode - Charging mode setting*
Temp - Temperature setting*
Note *: Will only display when selected setting is active
Digital Display
During the charging process, the display shows ‘CH1’ charging status, voltage and current
repeatedly, and ‘CH2’ or ‘CH3’ is solid to indicate the recent active input source. If the other
input channel is available and the voltage is above the ‘CH2 and CH3 Flashing Voltage’ the
icon will be flashing.
When ‘INFO’ button is pressed once, the display will change to show CH2 voltage for 3
seconds and CH3 voltage for 3 seconds. The display will then go back to normal
automatically and will show the CH1 info.
When the House Battery (CH1) is fully charged, it will show ‘CH1’ and ‘FLO’, voltage and
current repeatedly on the display.
The selected ‘battery type’ icon is always ON at all times during the whole charging process.
The ‘Priority’ Icon turns ON when the ‘Ignition Start’ terminal is connected to high or the unit is
set to ‘Manual Override’ mode.
Button Functions
• During normal charging operation, press once to change the display to show CH2 and CH3
voltage and press once more to go back to normal display.
• During normal charging operation, press and hold for more than 3 seconds to enter Charger
Function Setting Menu
• When CH2 or CH3 is not available (voltage detected is below the sense voltage), display will
turn OFF. Pressing once will temporary trigger the display and it will automatically cycle
through all three channels voltage, the software revision and then turn off.
During the charger Setup Menu, this button is used to confirm the setting and continue to the
next menu.
Manual Override Mode: During normal operation, when the input source is charging from CH2,
press and hold for more than 10 seconds to turn mode ON. ‘Priority’ icon on display will turn
ON. This will force the charger from being connected to CH2 and connect it to CH3 (subject to
CH3 being within the operating range specified on the spec). If CH3 is not connected or out of
override operating range, it will go back to CH2. This setting mode is used when CH2 (Solar) is
available but the charging current is too small due to the lack of available of sunlight. Use the
same procedure to turn off the ‘Manual Override’ mode when not required.
Please Note: If Manual Override Mode is used and left on there is a risk of flattening the start
battery. The preferred method is to use the automatic override method by connecting the
ignition source to the ‘ignition start ‘terminal of the charger.
With Flooded Battery Type setting, press and hold the “NEXT“ and “SET“ buttons together for
 Loading...