Using the juice extractor
• Wash the fruit and/or vegetables you want to juice and cut them into pieces that fit into the
feeding tube. (See page 12 for hints.)
• Place the fully assembled juice extractor on a flat, stable work surface, plug it into an appropriate
power point and switch on power to the outlet.
• Make sure the juice jug has been placed under the spout.
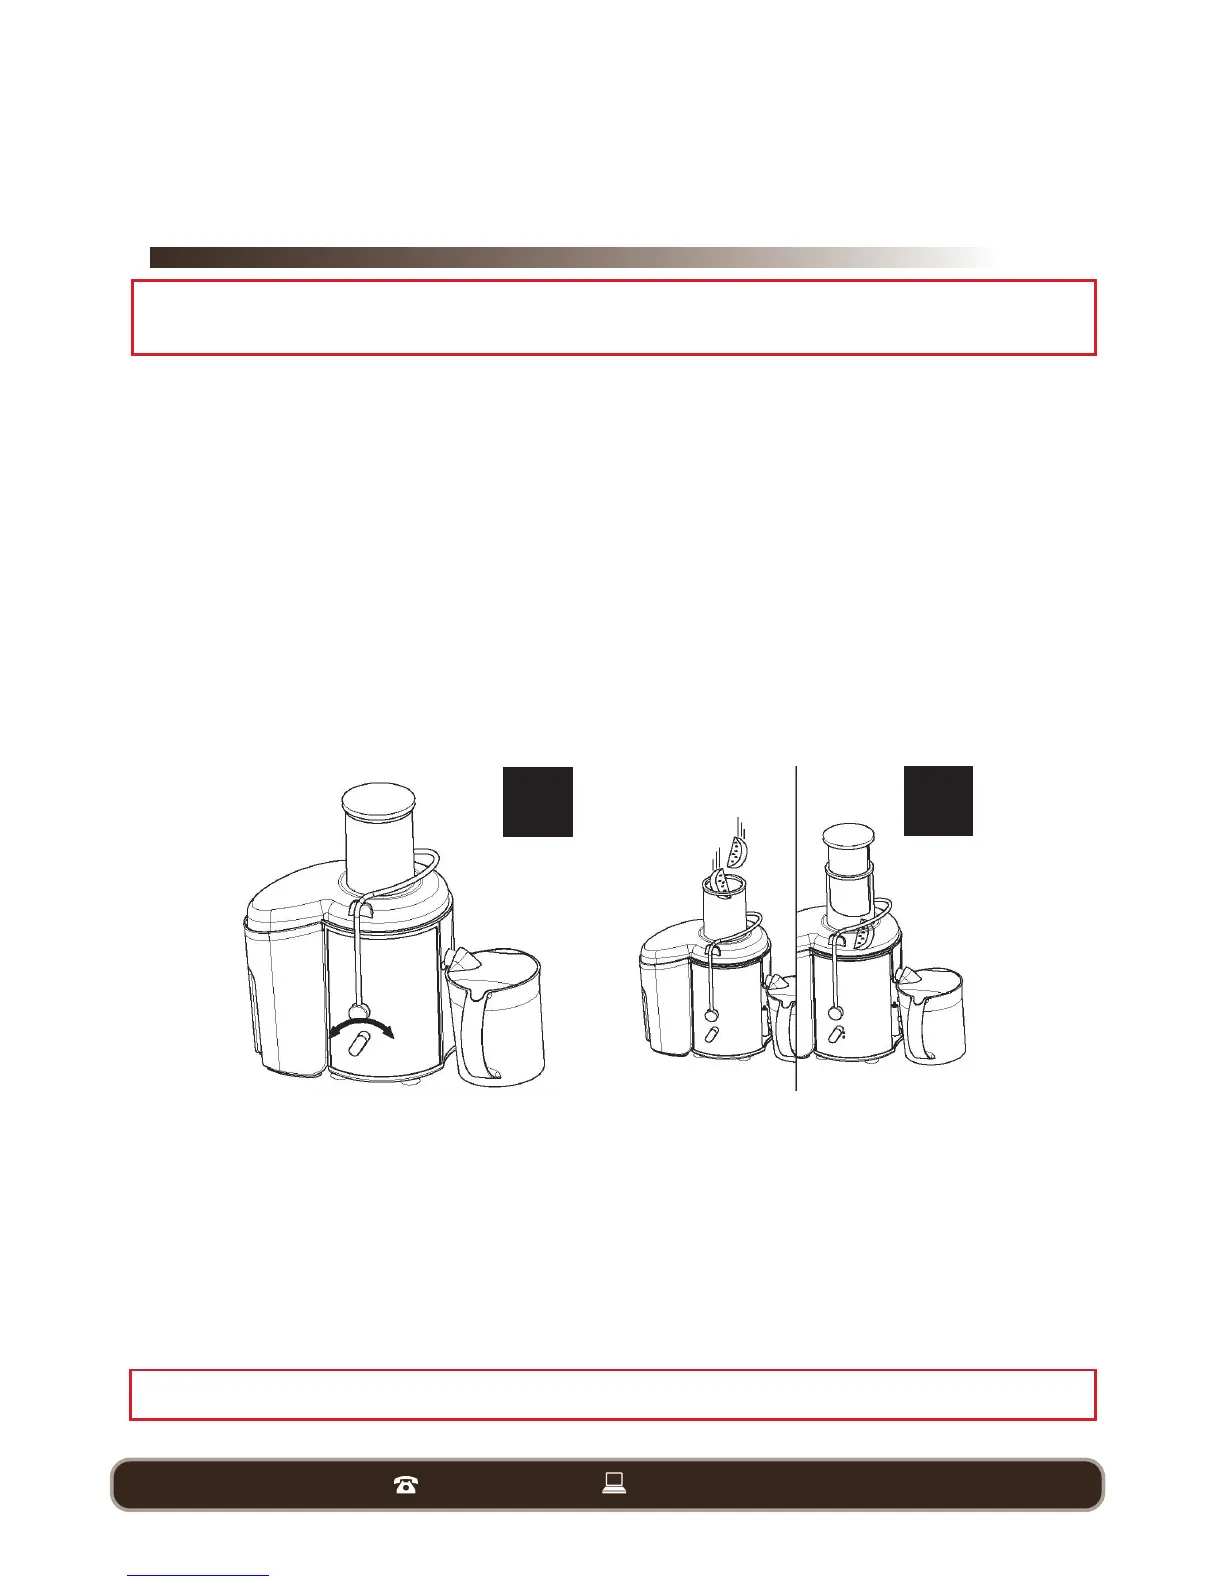
• Switch the appliance on by turning the control knob to speed setting 1 (low speed) or 2 (normal
speed) — see Fig. 6 below.
• Speed 1 is particularly suitable for soft fruit and vegetables such as watermelons, grapes,
tomatoes, cucumbers and raspberries.
• Speed 2 is suitable for all types of fruit and vegetables.
CAUTION! The appliance will only function if all parts are properly assembled and the lid is securely
locked in place with the clamp.
• Put the pre-cut pieces into the feeding tube, then use the pusher to gently press them down
towards the rotating filter — see Fig. 7 above.
NOTE: Do not exert too much pressure on the pusher, as this could affect the juice quality and it
could even cause the filter to come to a halt.
• After you have processed all ingredients and the juice flow has stopped, switch the appliance off
and wait until the filter has stopped rotating.
• If the pulp container needs emptying while juicing, switch off the appliance, carefully remove the
container, empty it and then reassemble it before you continue juicing.
CAUTION! Never insert your fingers or an object into the feeding tube.
6.
7.
Instructions (Cont.)