EasyManua.ls Logo

KitchenAid Convection Oven - User Manual

KitchenAid Convection Oven
12 pages
Print Icon
To Next Page IconTo Next Page
Loading...
Installation Instructions
30" Electric Range
with self-cleaning
thermal/convection
oven
Quick Reference
Table of Contents:
Pages
2
3
3-4
4
5-8
9
10
10
10
If you need assistance:
Check your Use and Care Guide for a toll-free number to
call or call the dealer from whom you purchased this
appliance. The dealer is listed in the Yellow Pages of your
phone directory under Appliances — Household —
Major — Service and Repair.
Call when you:
Have questions about range installation or operation.
Need to obtain the name and number of an authorized
service company.
When you call, you will need:
The range model number.
The range serial number.
Both numbers are listed on the model/serial rating plate
located on the oven frame behind the storage drawer
panel.
Before you start
Product dimensions
Cabinet dimensions/requirements
Electrical requirements
Installation steps
Check operation
If range does not operate
If you need assistance/service
Moving the range
IMPORTANT:
Installer: Leave Installation Instructions with the homeowner.
Homeowner: Keep Installation Instructions for future reference.
Save Installation Instructions for local electrical inspector's use.
Part No. 9757988
IMPORTANT:
Read and save these instructions.
®
HOME APPLIANCES
www.kitchenaid.com
Freestanding
Range
Slide-in
Range
Tip Over Hazard
A child or adult can tip the range
and be killed.
Connect anti-tip bracket to rear
range foot.
Reconnect the anti-tip bracket, if
the range is moved.
Failure to follow these instructions
can result in death or serious
burns to children and adults.
WARNING
Question and Answer IconNeed help?

Do you have a question about the KitchenAid Convection Oven and is the answer not in the manual?

Summary

Before You Start Installation

Safety First: Warnings and Hazards

Details safety alerts, DANGER/WARNING meanings, and precautions for safe installation.

Electrical Connection Requirements

Four-Wire Electrical Setup

Explains how to connect the range using a four-wire electrical supply.

Installation Steps and Safety

Power Supply Cord Connection

Four-Wire Cord Installation

Detailed steps for connecting the range using a four-wire power supply cord.

Three-Wire Cord Installation

Detailed steps for connecting the range using a three-wire power supply cord.

Direct Wire Connection Method

Four-Wire Direct Wiring

Instructions for directly wiring a four-wire cable to the range.

Three-Wire Direct Wiring

Instructions for directly wiring a three-wire cable to the range.

Finalizing Range Placement and Leveling

Appliance Operation Check

Troubleshooting and Maintenance

Overview

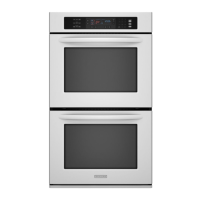
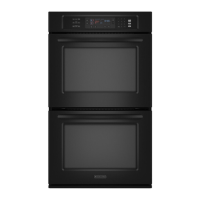
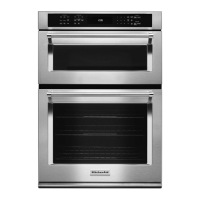
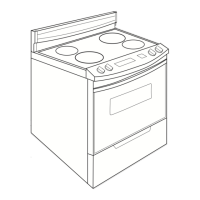
This document provides installation instructions for a KitchenAid 30" Electric Range, available in both freestanding and slide-in models, featuring self-cleaning thermal/convection oven capabilities. It is crucial for installers to read and save these instructions, and for homeowners to keep them for future reference and for local electrical inspector's use.

Function Description:

The KitchenAid 30" Electric Range is designed for cooking and baking, offering both conventional thermal and convection oven functions, along with a self-cleaning feature. The range is available in two configurations: a freestanding model that can be placed between cabinets or at the end of a cabinet run, and a slide-in model designed to fit seamlessly into a countertop cutout. The cooktop includes multiple surface units for various cooking needs. The oven provides precise temperature control for baking, roasting, and broiling. The self-cleaning feature simplifies oven maintenance by using high temperatures to burn off food soils.

Important Technical Specifications:

  • Dimensions:
    • Freestanding Range:
      • Cooktop Width: 30" (76.2 cm)
      • Overall Height: 44-3/8" (112.7 cm)
      • Cooktop Height (with feet loosened 1-1/2 turns): 36" (91.4 cm)
      • Depth with Handle: 27-3/4" (70.5 cm)
      • Width: 30" (76.2 cm)
      • Spacer: 1" (2.5 cm)
      • When installed in a 24" (61 cm) base cabinet with 25" (63.5 cm) countertop, the front of the oven door protrudes 1-7/8" (4.8 cm) beyond the 24" (61 cm) base cabinet.
    • Slide-in Range:
      • Cooktop Width: 30" (76.2 cm)
      • Cooktop Height (with feet loosened 1-1/2 turns): 36" (91.4 cm)
      • Depth with Handle: 25-3/4" (65.4 cm)
      • Width: 30" (76.2 cm)
      • Spacer: 1" (2.5 cm)
      • Radius on both corners: 1/2" (1.3 cm)
  • Cabinet Opening Dimensions (for 25" (63.5 cm) countertop depth, 24" (61 cm) base cabinet depth, 36" (91.4 cm) countertop height):
    • Minimum Cabinet Opening Width: 30" (76.2 cm)
    • Maximum Upper Cabinet Depth: 13" (33 cm)
    • Minimum Clearance (Upper Cabinet to Countertop): 18" (45.7 cm)
    • Minimum Clearance from Range Sides to Side Wall/Combustible Material: 4" (10.2 cm)
    • Junction Box Location: 8" (20.3 cm) to 22" (55.9 cm) from either cabinet, 7" (17.8 cm) maximum from floor.
    • Minimum Required Between Cutout and Cabinet Door/Hinge: 7/8" (2.2 cm)
    • Slide-in Range Opening Depth: 22-3/4" (57.8 cm)
    • Minimum Clearance between Cooking Platform Top and Unprotected Wood/Metal Cabinet Bottom: 30" (76.2 cm)
    • Note: 24" (61 cm) minimum when bottom of wood or metal cabinet is protected by at least 1/4" (0.64 cm) flame retardant millboard covered with at least No. 28 MSG sheet steel, 0.015" (0.4 mm) stainless steel, 0.024" (0.6 mm) aluminum, or 0.020" (0.5 mm) copper.
  • Electrical Requirements:
    • Power Supply: Four-wire or three-wire, single-phase, 120/240-volt, 60-Hz, AC-only (or 120/208-volt if specified on rating plate).
    • Circuit: Separate, 40 amp circuit, fused on both sides of the line.
    • Fuse/Breaker: Time-delay fuse or circuit breaker recommended.
    • Connection: Direct connection to fused disconnect (or circuit breaker box) through flexible armored conduit, or via a U.L.-listed, 40 amp range power supply cord (pigtail).
    • Wire Sizes (Copper, Four-wire cord, 40 amp circuit): 2 No.-8 conductors, 1 No.-10 white neutral, 1 No.-8 green grounding.
    • Wire Sizes (Copper, Direct Wire): 8 gauge copper wire.
    • Wire Sizes (Aluminum, Direct Wire): 6 gauge aluminum wire.
    • Strain Relief: U.L.-listed strain relief required for power supply cord/conduit.
    • Grounding: Must be connected to a grounded metal, permanent wiring system. For four-wire systems, the green grounding wire must be connected to the cabinet. For three-wire systems, local codes may permit connecting cabinet-ground conductor to neutral wire of power supply cord.
    • Torque Specifications (Direct Wire):
      • 8 gauge copper wire: 25 in/lbs
      • 6 gauge aluminum wire: 35 in/lbs
      • Terminal block nuts: 20 in/lbs

Usage Features:

  • Cooktop Operation: Push in and turn surface unit control knobs to "HI" position to check operation of cooktop elements and indicator lights.
  • Oven Operation (Bake): Press "BAKE" pad, "350°F" appears, press "START" pad. "Lo" then "170°F" appears. The bottom element should glow red, and the indicator light should be on. The upper element becomes hot but not red. Temperature increases in 5°F increments until set temperature is reached. Press "CANCEL/OFF" to stop.
  • Oven Operation (Broil): Close oven door, press "BROIL" pad, "500°F" appears, press "START" pad. The top element should glow red. Press "CANCEL/OFF" to stop.
  • Leveling: Adjustable leveling legs allow the range to be leveled for satisfactory baking conditions. A level should be placed on the oven rack, first side to side, then front to back.
  • Anti-Tip Bracket: A floor-mounted anti-tip bracket is supplied and must be installed to prevent the range from tipping over, which can cause death or serious burns. The rear range foot must be engaged under the anti-tip bracket.
  • Storage Drawer: The range includes a storage drawer or lower panel that can be removed for access during installation and replaced afterward.
  • Mobile Home Installation: Requires securing the range to the floor during transit and must conform to Manufactured Home Construction and Safety Standard, Title 24 CFR, Part 3280, or ANSI A225.1/NFPA 501A*. A four-wire power supply cord or cable must be used, and appliance wiring may need revision.

Maintenance Features:

  • Self-Cleaning Oven: The range features a self-cleaning oven, which simplifies the cleaning process.
  • Troubleshooting: The manual provides guidance for common issues such as the range not operating (check circuit breaker, fuse, power cord connection) and directs users to the Use and Care Guide for further troubleshooting.
  • Assistance/Service: For questions about operation, cleaning, or maintenance, users can refer to the Use and Care Guide or contact the KitchenAid Consumer Assistance Center. For service needs, users should contact the dealer or a KitchenAid-authorized service company. Model and serial numbers (located on the oven frame behind the storage drawer panel) are required for assistance.
  • Moving the Range: Instructions are provided for safely moving the range for cleaning or maintenance, including disconnecting power, sliding the range forward, ensuring the anti-tip bracket is re-engaged, checking level, and reconnecting power. Cardboard or hardboard should be used to protect floor coverings when moving the range.

KitchenAid Convection Oven Specifications

General IconGeneral
BrandKitchenAid
ModelConvection Oven
CategoryOven
LanguageEnglish

Related product manuals