4-10
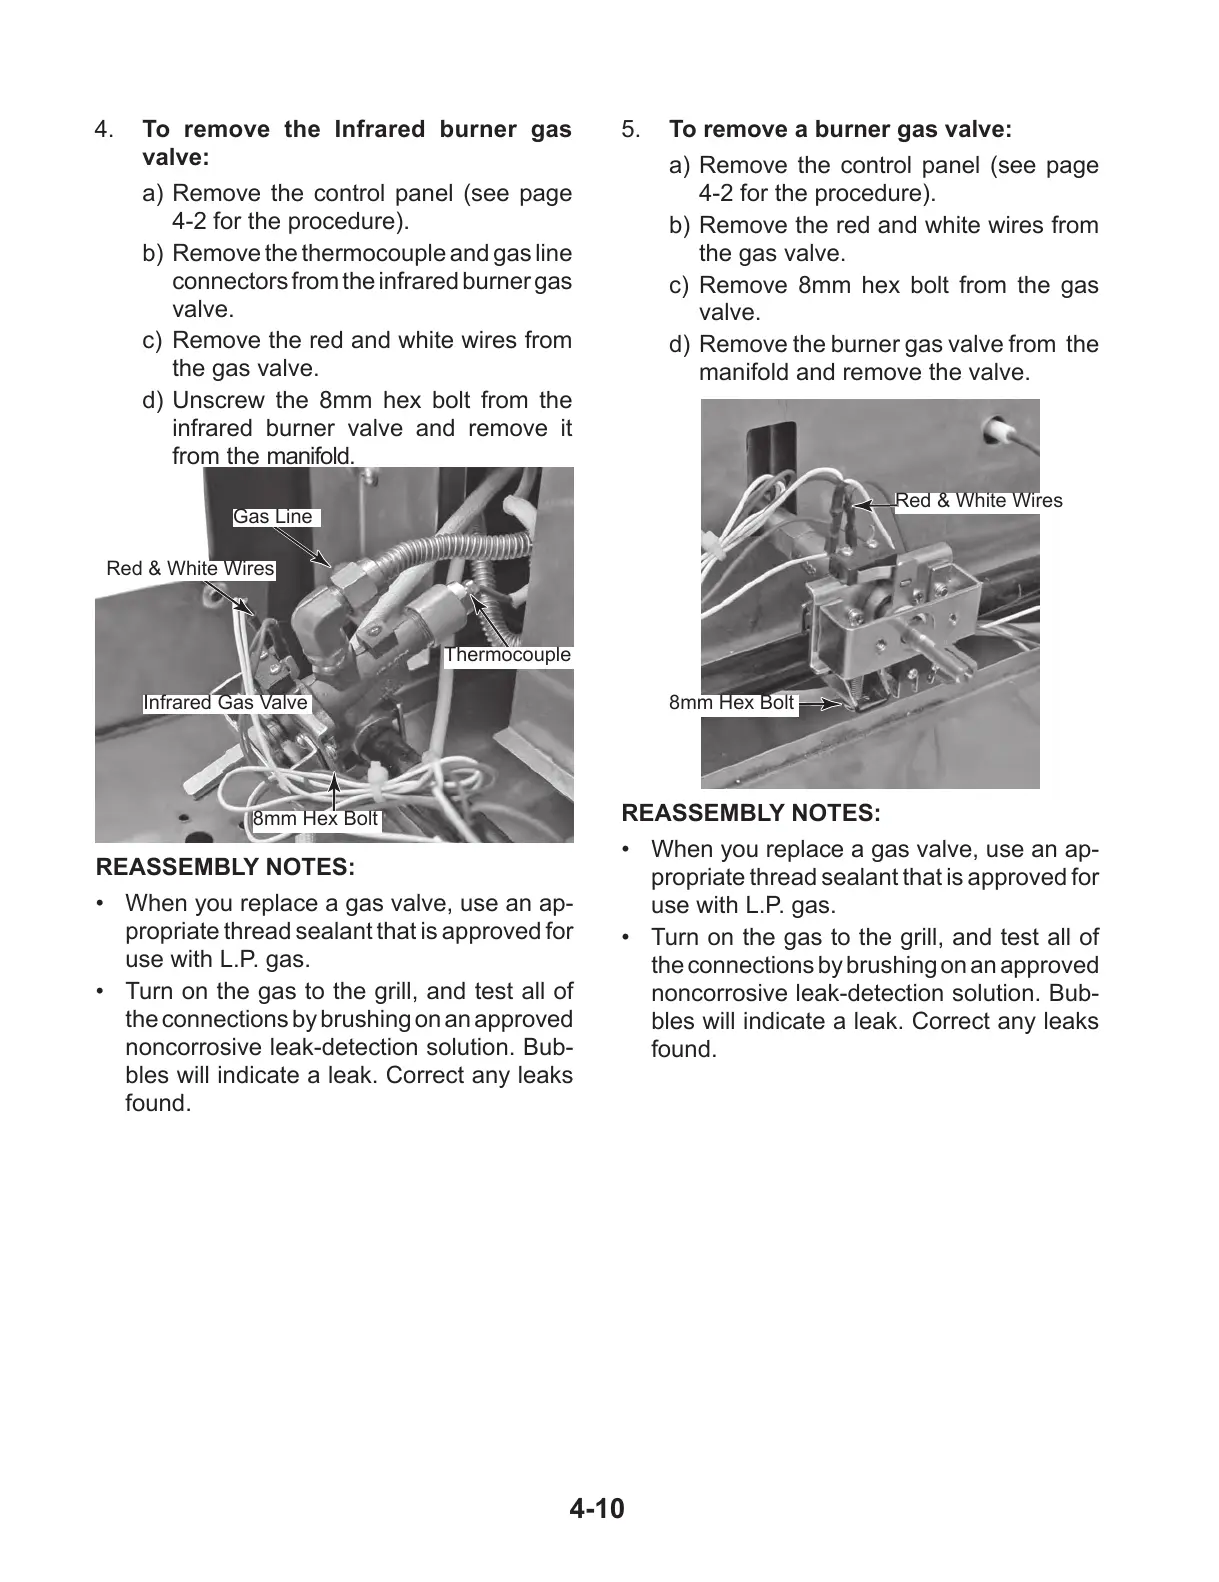
5. To remove a burner gas valve:
a) Remove the control panel (see page
4-2 for the procedure).
b) Remove the red and white wires from
the gas valve.
c) Remove 8mm hex bolt from the gas
valve.
d) Remove the burner gas valve from the
manifold and remove the valve.
4. To remove the Infrared burner gas
valve:
a) Remove the control panel (see page
4-2 for the procedure).
b) Remove the thermocouple and gas line
connectors from the infrared burner gas
valve.
c) Remove the red and white wires from
the gas valve.
d) Unscrew the 8mm hex bolt from the
infrared burner valve and remove it
from the manifold.
REASSEMBLY NOTES:
• Whenyoureplaceagasvalve,useanap-
propriate thread sealant that is approved for
use with L.P. gas.
• Turnonthegastothegrill,andtestallof
the connections by brushing on an approved
noncorrosive leak-detection solution. Bub-
bles will indicate a leak. Correct any leaks
found.
Gas Line
Thermocouple
8mm Hex Bolt
Infrared Gas Valve
REASSEMBLY NOTES:
• Whenyoureplaceagasvalve,useanap-
propriate thread sealant that is approved for
use with L.P. gas.
• Turnonthegastothegrill,andtestallof
the connections by brushing on an approved
noncorrosive leak-detection solution. Bub-
bles will indicate a leak. Correct any leaks
found.
8mm Hex Bolt
Red & White Wires
Red & White Wires