15
Refrigerator
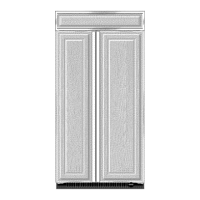
Side Trim
Inset Installation Dimensions
1. Measure the distance from point A (as shown) to the back
wall. Add ¹⁄₃₂" (0.8 mm) to this measurement to allow the side
panel to fit into the trim.
2. If the panel is more than ³⁄₈" (9.5 mm) thick, rout the front
edge to allow the side panel to fit into the trim.
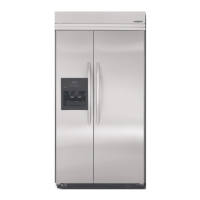
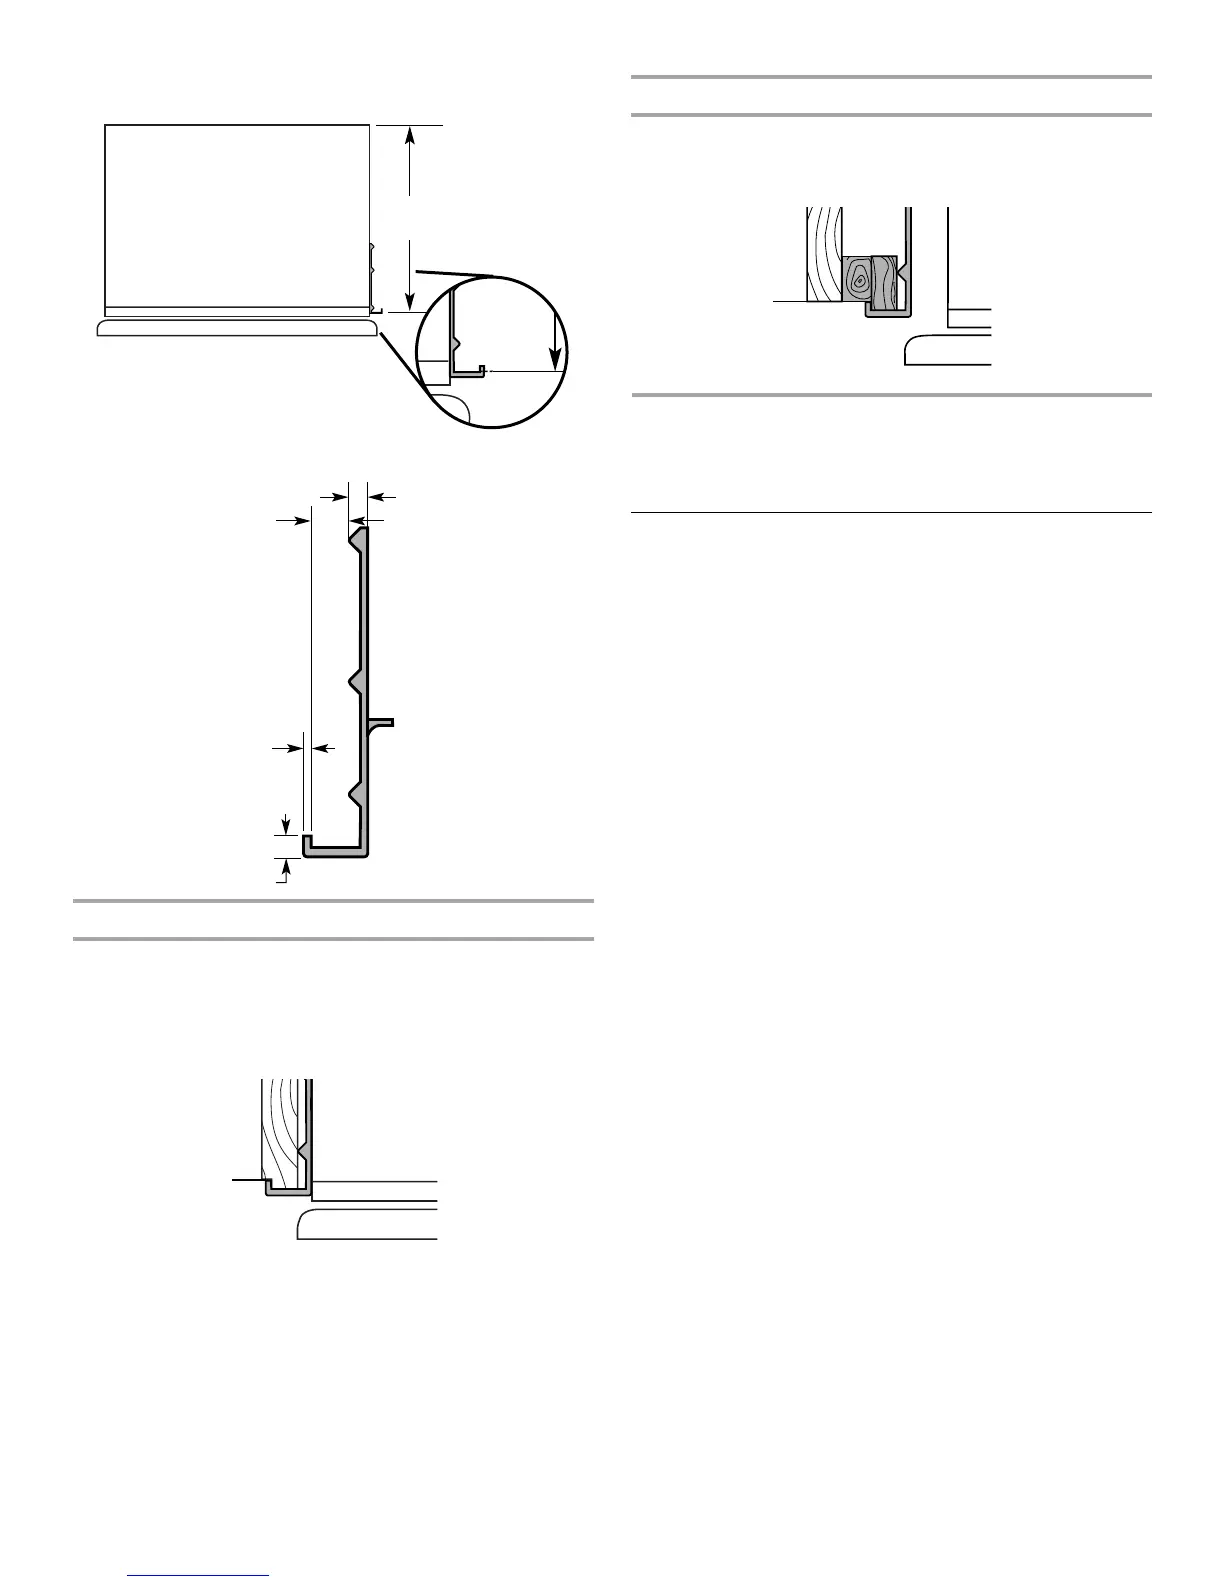
Recessed Inset Installation Dimensions
1. Measure the distance from point A (as shown) to back wall.
2. Rout the front edge of the support board or attach a ³⁄₈"
(9.5 mm) board to hold the panel in the cabinet side trim.
INSTALLATION
REQUIREMENTS
Tools and Parts
IMPORTANT:
■ Installer: Leave Installation Instructions with the homeowner.
■ Homeowner: Keep Installation Instructions for future
reference. Save these Installation Instructions for the local
electrical inspector’s use.
TOOLS NEEDED:
Gather the required tools and parts before starting installation.
Read and follow the instructions provided with any tools listed
here.
PARTS NEEDED:
■ Six #8 x 3" (7.6 cm) wood screws (longer screws may be needed)
■ One or two 2" x 4" x 32" (5 cm x 10 cm x 81 cm) wood board(s)
■ Order factory panels, make custom panels or consult a
qualified cabinetmaker or carpenter to make the panels.
Classic Series: Order factory panels, make custom panels, or
consult a qualified cabinetmaker or carpenter to make the
panels. See “Design Specifications” for more information.
Overlay Series: Make custom panels, or consult a qualified
cabinetmaker or carpenter to make the panels. See “Design
Specifications” for more information.
Pro Line
®
, Complete and Architect
®
Series are shipped
complete.
■ If you are connecting the water line directly to copper tubing
and not to a shutoff valve, you need a ferrule, a union, and a
¹⁄₄" (6.35 mm) compression fitting.
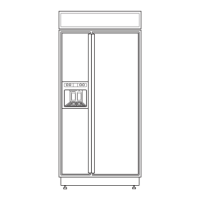
23³⁄₈"
(59.40 cm)
Overlay
³⁄₁₆"
(4.5 mm)
³⁄₈"
(9.7 mm)
¹⁄₁₆"
(1.5 mm)
¹⁄₈"
(3.2 mm)
A
■ Hand drill or electric drill
(properly grounded)
■ Torx
®
†
T27 screwdriver
■ Drill bits ■ ¹¹⁄₃₂" nut driver
■ Two adjustable wrenches ■ ³⁄₈" and ¹⁄₂" open-end
wrenches
■ Phillips screwdriver ■ ⁵⁄₃₂" Allen wrench
■ Small level ■ ⁵⁄₁₆" socket wrench
■ Appliance dolly ■ Tape measure
A
†®TORX is a registered trademark of Textron Innovations Inc.