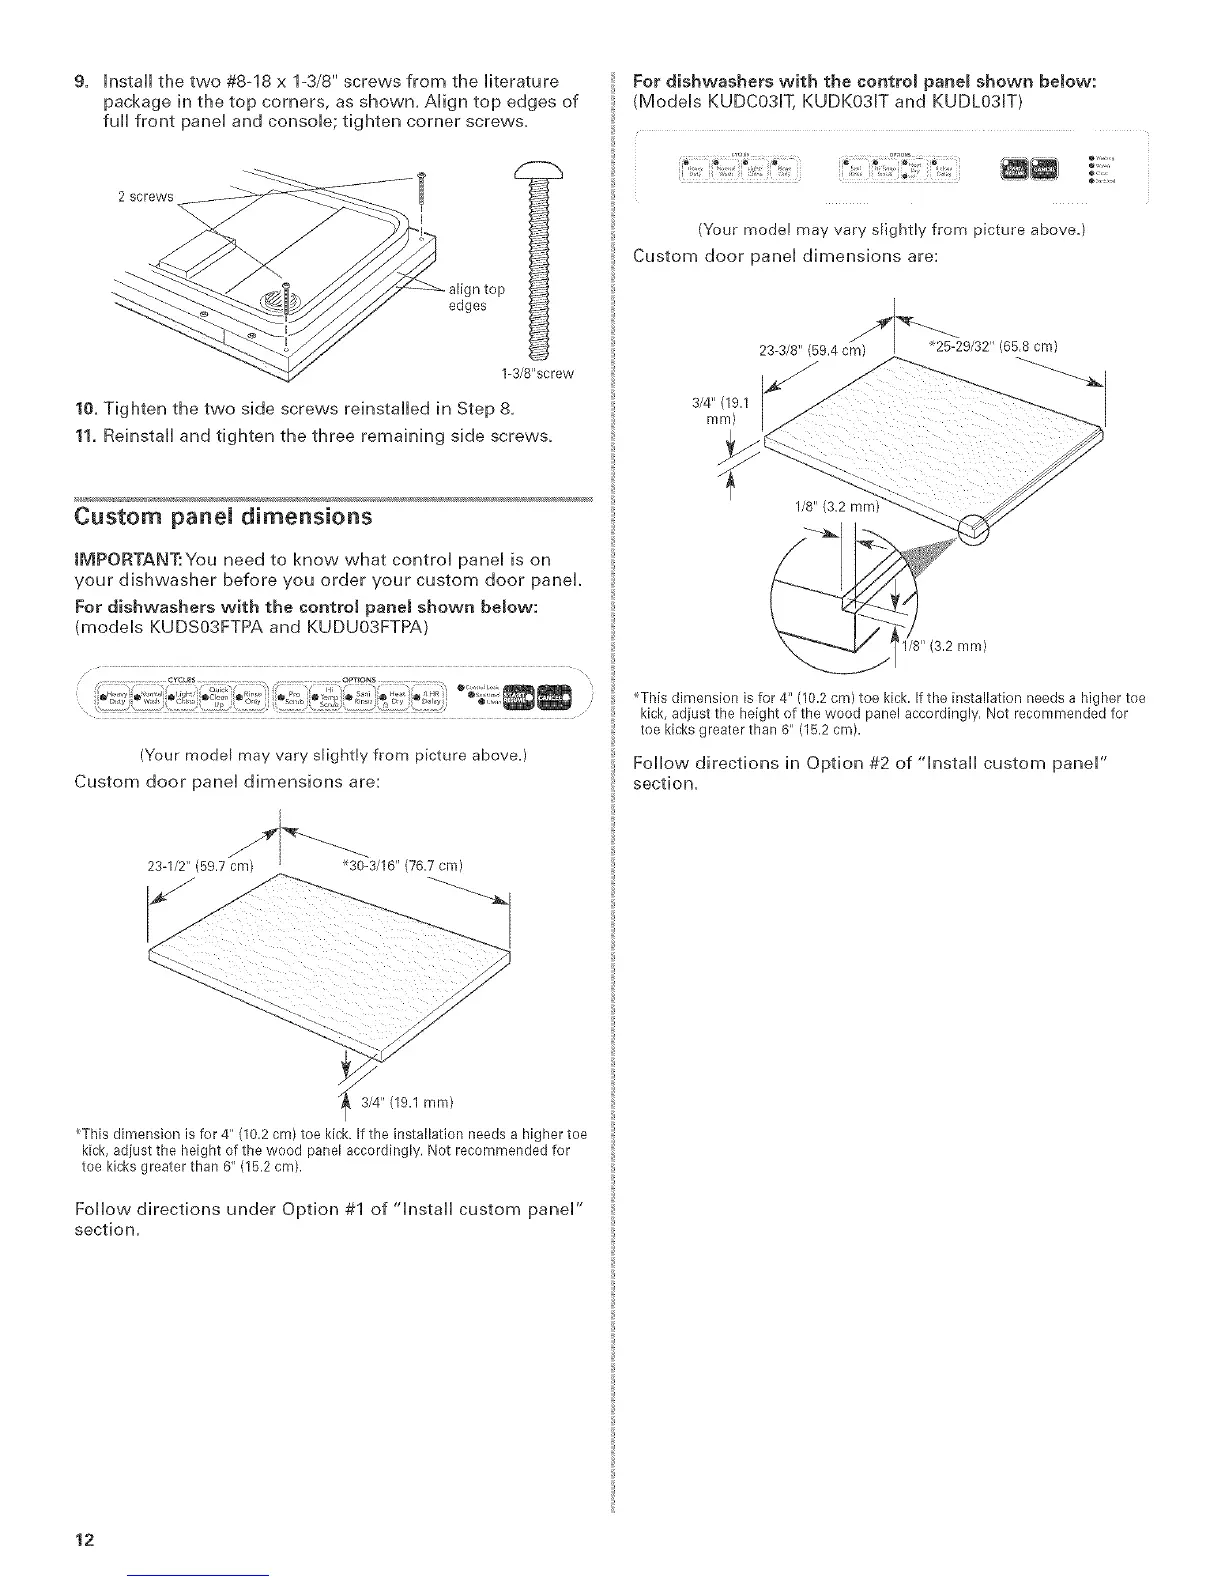
9. HnstaHHthe two #8-18 x 1-3/8" screws from the Hiterature
package in the top corners, as shown, AHign top edges of
fuHHfront paneH and consoHe; tighten corner screws,
2 screws
0l
I
top
edges
1-3/8"screw
10. Tighten the two side screws reinstaHHed in Step 8,
11. ReinstaHHand tighten the three remaining side screws,
Custom paneU dimensions
IMPORTANT:You need to know what controH paneH is on
your dishwasher before you order your custom door panel
For dishwashers with the controJ panel shown below:
(modeHs KUDSO3FTPA and KUDUO3FTPA)
(Your modeF may vary sFightly from picture above.)
Custom door panei dimensions are:
23-I/2" (597 cm) _30 3/10 (767 cm)
3/4" (19.1 ram)
_This dimension is for 4" (10.2 cm) toe kick. If the installation needs a higher toe
kick, adiust the height of the wood panel accordingly. Not recommended for
toe kicks greater than 6" (15.2 cm).
Foiiow directions under Option #1 of "instaii custom panei"
section,
For dishwashers with the control panel shown beJow:
(ModeHs KUDCO31T, KUDKO31T and KUDLO31T)
(Your model may vary slightly from picture above.)
Custom door paneH dimensions are:
3/4" (19.1
ram)
1/8" (3.2 mm)
_This dimension is for 4" (10.2 cm) toe kick. If the installation needs a higher toe
kick, adjust the height of the wood panel accordingly. Not recommended for
toe kicks greater than 6" (15.2 cm).
FoHHow directions in Option #2 of 'qnstaHH custom paneH"
section.
12