Do you have a question about the KitchenAid Undercounter Dishwasher 4171206 and is the answer not in the manual?
Verify site meets needs for access, layout, clearances, and protection against freezing.
Requires a single-phase, 115-volt, 60 Hz, AC only, 15 or 20 ampere fused electrical supply.
Details on recommended grounding and alternate methods for safety.
Guidance on using a UL-listed flexible cord with a grounding-type plug.
Ensure water pressure is 20-120 psi and temperature is 120°F for optimal performance.
Use 1/2" O.D. copper tubing or 3/8" galvanized pipe for the inlet line.
Drain line must connect at least 20" above floor or form a 20" loop to prevent siphoning.
Use 9/16" ID flexible hose or 5/8" OD copper tubing for the drain line.
Details on connecting the drain hose using air gaps, waste tees, or disposers, ensuring proper height.
Prepare cabinet opening by cutting holes for water, drain, and electrical lines.
Install a shutoff valve in the water line for easy access and maintenance.
Flush water line before connecting to remove particles that could clog the inlet valve.
Ensure no sharp bends or kinks in the water line that could restrict flow.
Attach drain hose to air gap or waste tee as per drain requirements.
Cut and prepare a 1-inch hole for electrical wiring, using a grommet for metal cabinets.
Remove screws and tabs to detach the access panel and toe panel.
Adjust leveling legs to achieve the required cabinet opening height (34").
Slide dishwasher into cabinet opening, ensuring drain hose is routed correctly.
Verify rear cross channel does not contact water, drain, or electrical lines.
Connect water supply lines using appropriate fittings, ensuring no kinks.
Secure drain hose to dishwasher valve with a clamp, checking for proper fit and no kinks.
Attach dishwasher to underside of countertop using provided brackets and screws.
Check door operation and ensure equal spacing between inner door and tub sides.
Place a level against interior flange and adjust legs for side-to-side and front-to-back leveling.
Connect power supply cable wires (white, black, ground) to terminal box leads.
Verify door closes easily, does not slam, and stays open or closed as intended.
Remove all shipping materials, including rack bumpers and spring retainers.
Check all parts installed, turn on electrical and water supply, and run a test cycle.
Install custom door panels now if color change or custom panel is desired.
Custom panels should be 1/4" thick; thinner panels need a spacer, thicker ones require routing.
Custom wood panels need a waterproof finish on all sides and edges.
Adjust door-spring brackets to ensure the door is counterbalanced.
| Color | Stainless Steel |
|---|---|
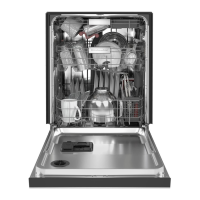
| Place Settings | 14 |
| Noise Level | 44 dBA |
| Energy Star Certified | Yes |
| Heated Dry | Yes |
| Soil Sensor | Yes |
| Type | Undercounter |
| Third Rack | Yes |
| Delay Start | Yes |