Repairs
● Repairstothedeviceshouldonlybeperformedbyanauthorisedworkshop.
● Anyremodelingormodicationofthedevicewillaectproductsafety.Caution:riskofinjury!
● Neveropentheproductorattempttoperformrepairsyourself.
● Incorrectreassemblymayresultinmalfunctionsortotalbreakdown.
● Neveropenthedeviceunderanycircumstances.
Attention:
Weacceptnoliabilityforconsequentialdamages.Technicalmodicationsanderrorsreserved.
Note:
The warranty is invalidated in case of external interference with the device.
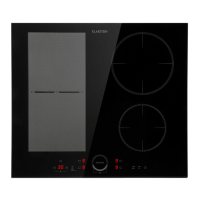
Device Usage
1. Press the ‘ON / OFF’ button to turn on the device. The unit will display ‘P4’.
2. By pressing the ‘+’ and ‘-’buttons, you can modify the device power level (from P1 to P5). The
corresponding meaning can be found in the diagram below.
3. By pressing the ‘MENU’ button, you can switch between the device power (W), adjust the tempe-
rature setting (° C) and change the timer.
4. When the ‘temperature adjustment’ menu item is selected, you may press the ‘+’ and ‘-’ buttons
to modify the temperature setting (from C1 to C5). The corresponding meaning can be found in
the diagram below.
5. When the ‘timer’ menu item is selected, the LED lamp under the imprint ‘MIN’ is illuminated and
the value ‘15’ (minutes) is displayed. By pressing the ‘+’ and ‘-’ buttons, you can set the timer in
arangefrom1to99minutes.
Power and temperature codes front area
Power code Power range Temperature code Temperature range
P1 300W C1 80°C
P2 600W C2 120°C
P3 800W C3 160°C
P4 1000W C4 200°C
P5 1200W C5 240°C
Power and temperature codes front area
Power code Power range Temperature code Temperature range
P1 300W C1 80°C
P2 600W C2 120°C
P3 800W C3 160°C
P4 1000W C4 200°C
P5 1200W C5 240°C
8 9