EasyManua.ls Logo

Klarstein 10031698 - User Manual

Klarstein 10031698
56 pages
Go to English
Print Icon
To Next Page IconTo Next Page
Loading...
10031698 10031699
Dunstabzugshaube

Questions and Answers

  • A
    annetteclayAug 3, 2025
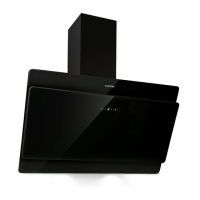
    What to do if my Klarstein Ventilation Hood has insufficient suction?
    • A
      Amy BonillaAug 4, 2025
      If your Klarstein Ventilation Hood isn't sucking up enough air, it might be because the hood is too far from the gas top. Try readjusting the distance. Also, too much ventilation from open doors or windows can be the cause. Consider choosing a new place and reassembling the machine.
  • M
    Monica LyonsAug 10, 2025
    Why is my Klarstein Ventilation Hood shaking?
    • A
      Anthony LeeAug 10, 2025
      If your Klarstein Ventilation Hood is shaking, it could be due to a damaged leaf, which necessitates replacement. Another cause might be that the motor isn't tightly secured; ensure it's properly locked. Also, check if the body itself is tightly fixed.
  • V
    Valerie HinesAug 16, 2025
    What to do if my Klarstein Ventilation Hood is leaking oil?
    • S
      Sarah BryanAug 16, 2025
      If you notice oil leaking from your Klarstein Ventilation Hood, the one-way valve and air ventilation entrance might not be tightly sealed. Remove the valve and seal it with glue. Alternatively, there could be a leak from the connection of the U-shaped section and cover; in this case, take the U-shaped section down and seal it with soap or paint.
  • T
    trandavidAug 21, 2025
    How to fix a Klarstein Ventilation Hood that inclines?
    • T
      Timothy Snyder Jr.Aug 21, 2025
      If your Klarstein Ventilation Hood is inclining, the fixing or hanging screws might not be tight enough. Tighten the hanging screws to make it horizontal.
  • J
    Jason BestAug 27, 2025
    What to do if the light is on but the motor doesn't work on my Klarstein Ventilation Hood?
    • M
      Michelle ReidAug 27, 2025
      If the light is working but the motor isn't running on your Klarstein Ventilation Hood, it could be due to several reasons: * The leaf might be blocked; remove the blockage. * The capacitor might be damaged; replace it. * The motor bearing might be damaged or jammed; replace the motor.

Summary

Technical Specifications

Item Numbers and Power Supply Details

Product item numbers (10031698, 10031699) and required power supply specifications (220-240V ~ 50-60Hz).

Important Safety Instructions

General Safety and Installation Precautions

Read manual carefully, ensure qualified installation, check voltage/frequency, manufacturer not liable for misuse.

Child Safety and User Supervision

Prohibits child operation. Appliance use for 8+ with supervision; cleaning by children requires supervision.

Usage, Maintenance, and Service Guidelines

Home use only, regular cleaning, power off before cleaning, no fire contact, call service for faults.

Power Cord Safety and Ventilation Needs

Replace damaged cord immediately. Ensure adequate room ventilation when used with gas or fuel appliances.

Flammable Hazards and Hot Surfaces Warnings

Do not flambé under the hood. Accessible parts may become hot during operation.

Installation and Extraction Mode Guidelines

Installation Distances and Flue Regulations

Maintain 15mm wall distance. Air discharge must not be routed into flues for other appliances.

Extraction Mode Safety and Airflow

Risk of poisoning from backdraft. Ensure adequate airflow when using with open flue appliances.

Room Ventilation and Pressure Limits

Ensure sufficient fresh air supply. Negative room pressure must not exceed 4 Pa for safe operation.

Recirculation Mode Usage

Unrestricted operation is possible when the hood is used exclusively in recirculation mode.

Fire Hazard from Solid Fuels

Fire hazard from sparks. Install on solid fuel fireplaces only if a closed, non-removable cover is present.

Installation Steps Overview

Positioning and Cabinet Mounting

Place hood 15mm from the wall. Use glass cement and screws to attach securely to the cabinet.

Outlet and Casing Assembly

Fix outlet to casing with screws. Connect casing and hood, select wind direction as required.

Final Pipe and Power Connections

Fix pipe to outlet, secure PCB box with screws, and connect the main power supply.

Lamp and Filter Care

Lamp Replacement Procedure

Open hood door, prize lamp with screwdriver. Ensure unit is off and unplugged before replacement.

Filter Cleaning Methods

Wash filter in warm water with detergent or place in dishwasher at 60°C.

Filter Material and Cleaning Advice

Filter is metal; avoid corrosive detergents. Clean filter regularly for optimal performance.

General Cleaning Precautions

Do not block hood movement. Always switch off the power before cleaning the hood.

Filter Cleaning Steps

Aluminum Filter Removal and Initial Cleaning

Remove decorative board, wipe clean, then release aluminum filter by pressing the slots.

Detaching the Charcoal Filter

Turn the aluminum filter upside down and then detach the charcoal filter from it.

Soaking and Manual Washing

Soak aluminum filter in warm water with mild detergent for 10 mins (max 65°C). Clean with cloth or brush.

Dishwasher Cleaning and Drying

Aluminum filter can be cleaned in a dishwasher (max 65°C). Rinse thoroughly and dry well.

Cleaning Frequency and Replacement

Clean monthly; increase if used >2 hours/day. Replace filter promptly with genuine parts.

Re-attaching Charcoal Filter

Attach the cleaned charcoal filter to the aluminum filter and secure it with the provided iron wires.

Installing Cleaned Filters

Insert the aluminum filter back into the cooker hood, then replace the decorative board [04].

Important Filter Usage Notes

Filter Security and Locking

Ensure the filter is securely locked to prevent loosening and potential danger.

Carbon Filter Impact on Suction

Attaching the activated carbon filter will lead to a reduction in the unit's suction power.

Control Panel and Operation

Control Panel Layout

The control panel features five function buttons: Timer, Light, Slide control, Speed, and Power.

General Operating Modes

Details on standby mode, hood sliding mechanism activation, and motor operation.

Speed Adjustment via Slide Control

Use SPEED button to control motor. Use SLIDE CONTROL to adjust speed in 4 levels by finger movement.

Lighting and Timer Functions

Lighting Control

Lights turn on automatically. Control on/off and intensity using LIGHT button and SLIDE CONTROL.

Timer Setting and Operation

Set timer for operation (5-40 mins). Timer cancels if SPEED or LIGHT is adjusted.

Troubleshooting Guide

Motor and Light Issues

Troubleshoot motor issues (blockage, capacitor, bearing) and light issues (damaged bulb).

Oil Leakage Causes and Fixes

Address oil leaks from valve, ventilation, or connection points by sealing or replacement.

Body Stability and Suction Issues

Fix body shake (leaf, tightness, distance) and insufficient suction (tightness, distance, ventilation).

Machine Inclination Correction

Correct machine inclination by tightening fixing or hanging screws to ensure horizontal alignment.

Disposal and Compliance Information

Environmental Disposal Guidelines

Do not treat as household waste. Recycle electrical and electronic equipment at designated points.

Declaration of Conformity

Product conforms to EU directives for EMC, LVD, RoHS, and ErP. Producer information included.

Klarstein 10031698 Specifications

General IconGeneral
Model10031698
Frequency50/60 Hz
Number of Speed Levels3
Filter TypeAluminum Grease Filter
Lighting2 x 1.5W LED
MaterialStainless steel
Width60 cm
TypeVentilation Hood
Voltage220-240 V
Installation TypeWall Mounted
Airborne acoustical A-weighted sound power emission at maximum speed68 dB

Related product manuals