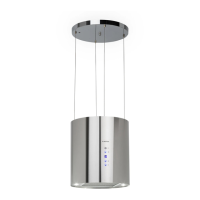
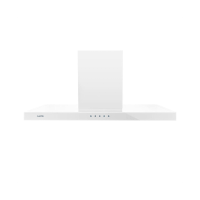
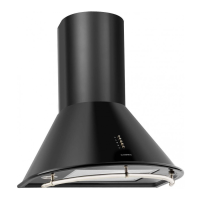
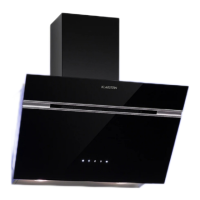
The BARELLA cooker hood is designed to efficiently remove cooking fumes and odors from your kitchen. It can operate in either exhaust air mode (external ventilation) or recirculation mode (internal ventilation with activated carbon filters).
Function Description:
The cooker hood features a control panel with five buttons:
- LOW key (low fan speed): Activates the fan at a low speed.
- MEDIUM button (medium fan speed): Activates the fan at a medium speed.
- HIGH key (high fan speed): Activates the fan at a high speed.
- LIGHT button (light on/off): Turns the integrated lighting on or off.
- POWER button (extractor hood on/off): Turns the entire unit on or off.
When the device is plugged in, all indicator lights briefly illuminate, and the device enters standby mode. Pressing the POWER button turns the unit on, and the indicator light for the LOW fan speed will light up, indicating the fan is running at low speed. Pressing the POWER button again turns the appliance off, terminating all functions and returning it to standby mode. The fan speed and light can be operated independently of the POWER key. If a specific function key is pressed, the range hood will be set to the corresponding mode. If the POWER key is pressed in any mode, the unit will turn off, and all functions will be terminated.
To turn the light on, press the LIGHT key. The indicator light of the LIGHT key and the POWER key will illuminate. Press the LIGHT key again to turn the light off. The indicator light of the LIGHT key and the POWER key will go out.
When the HIGH key is pressed, the motor runs at a fast speed, and the indicator lights for the HIGH key and the POWER key illuminate. Pressing the HIGH key again stops the motor. The indicator lights for the HIGH key and the POWER key turn off. Similarly, pressing the MEDIUM key once runs the motor at medium speed, and pressing it again stops the motor. The same applies to the LOW key for low speed operation.
Only one speed can be set at a time. If the range hood is running at fast speed and the LOW key is pressed, the range hood will switch to slow speed. If the cooker hood is running at slow speed and the MEDIUM key is pressed, the cooker hood immediately changes to medium speed, and so on.
Important Technical Specifications:
- Item number: 10037863, 10037864, 10037865
- Power supply: 220-240 V ~ 50 Hz
- Annual Energy Consumption (AEC_hood): 57.9 kWh/Jahr
- Energy Efficiency Class: B
- Fluid Dynamic Efficiency (FDE_hood): 22.1
- Fluid Dynamic Efficiency class: C
- Lighting Efficiency (LE_hood): 102.5 lux/W
- Lighting Efficiency class: A
- Grease Filtering Efficiency (GFE_hood): 79.3 %
- Grease Filtering Efficiency class: C
- Air flow at minimum and maximum speed in normal use, intensive or boost excluded: 317.8 / 537.8 m³/h
- Air flow at intensive or boost setting: - m³/h
- Airborne acoustical A-weighted sound power emissions at minimum and maximum speed available in normal use: 62 / 72 dB
- Airborne acoustical A-weighted sound power emissions at intensive or boost setting: - dB
- Power consumption in off mode (P_o): 0.36 W
- Power consumption in standby mode (P_s): - W
- Maximum wattage (LED lamp): 2 x 1 W
- Voltage range (LED lamp): DC 4V
- Nominal power of the lighting system (W_L): 2.0 W
- Average illumination of the lighting system on the cooking surface (E_middle): 205 Lux
- Time increase factor (f): 1.2
- Measured air flow rate at best efficiency point (Q_BEP): 291.8 m³/h
- Measured air pressure at best efficiency point (P_BEP): 351 Pa
- Maximum air flow (Q_max): 557.5 m³/h
- Measured electric power input at best efficiency point (W_BEP): 128.9 W
- Sound power level (L_WA): 62 / 72 dB
Usage Features:
- Installation: The cooker hood can be connected to an outside air outlet via a suction duct (enamel, aluminum, flexible tube, or non-flammable material with an inside diameter of 150 mm). It should be placed at a distance of 65-75 cm above the cooking surface for optimal effect.
- V-flap assembly: The V-flap is installed in two halves. The first half (2) is inserted into the housing (6), ensuring the pin (3) is facing upwards. The axle (4) is then inserted into the holes (5) on the housing. These steps are repeated for the second half of the flap.
- Exhaust pipe installation: The exhaust pipe should be short and straight. Avoid reducing its size or restricting it. When using exhaust pipes, they must be laid tightly to minimize pressure loss. All installation work should be carried out by a qualified electrician or person. The exhaust pipe should not be connected to an existing ventilation system used for other units (e.g., gas flues, gas pipes, or hot air pipes). If the exhaust pipe makes a bend, the angle should not be less than 120°. The pipe should always be aligned horizontally or guided from the starting point upwards to the air outlet on the outer wall. After installation, ensure the cooker hood is horizontal to prevent grease accumulation.
- Environmental Protection: Ensure sufficient air supply during cooking for efficient and quiet operation. Adjust fan speed to the amount of steam. Use intensive mode only when necessary. Lower fan speeds consume less energy. Choose a higher fan speed in advance for large amounts of steam. Turn off the cooker hood and lighting when not needed. Clean filters regularly to maintain efficiency and prevent fire hazards. Always put a lid on pots during cooking to reduce steam and condensation.
Maintenance Features:
- General Cleaning: Always disconnect the cooker hood from the power supply before cleaning or maintenance. Ensure the cooker hood is off and the plug has been removed. External surfaces are prone to scratches and dents, so follow cleaning instructions to get the best results without damage. Clean the device and filter completely before cleaning and care. Do not use alkaline or acidic substances such as lemon juice or vinegar to clean the surface.
- Stainless Steel: Stainless steel surfaces should be cleaned regularly (weekly) to ensure a long service life. A special stainless steel cleaning fluid can be used.
- Control Panel: The control panel can be cleaned with warm soapy water. Make sure the cloth is clean and well wrung out before cleaning. Use a dry, soft cloth to remove excess moisture after cleaning. Important: Use neutral detergents and avoid harsh cleaning chemicals, strong household cleaners, or products containing scouring agents, as these may affect the appearance of the device and possibly remove printed symbols on the control panel.
- Grease Filter: The fabric filters can be cleaned by hand. Soak them in water together with a degreasing detergent for about 3 minutes, then gently brush them with a soft brush. Do not apply too much pressure to avoid damaging the filter. Then allow the filter to air dry, but do not place it directly in the sun. Filters should always be washed separately from dishes and kitchen utensils. Remove the filter as shown in the picture and insert it again in reverse order.
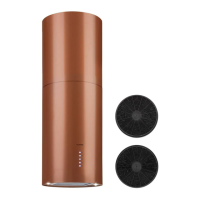
- Activated Carbon Filter (for recirculation mode): Activated carbon filters are used to remove odors. They should typically be changed every three or six months, depending on cooking habits.
- Disconnect the hood from the power supply.
- Press the filter cap and remove the net filter.
- Turn the carbon filters counter-clockwise on both sides of the motor. Replace old carbon filters with new ones.
- Replace the net filter.
- Reconnect the power plug to the wall outlet.
Note: Ensure the filter is tightly closed. Otherwise, it can become loose and dangerous. When the activated carbon filter is connected, the suction power is reduced.
- Replacing the Bulb:
- The bulb must be replaced by the manufacturer, its customer service, or similarly qualified persons.
- Always turn off the power before performing any work on the unit.
- When handling the bulb, make sure it is completely cool before touching it directly with your hands.
- When inserting or removing the bulb, always hold it with a cloth or gloves to ensure that sweat does not come into contact with the bulb, as this may shorten the life of the bulb.
- Before changing the bulb, make sure the hood is off.
- Turn the cover counter-clockwise. Loosen the screw of the stainless steel filter and remove it.
- Press the bulb connector to remove the bulb.
- Install the new bulb and reconnect the cable.
Important information about the bulb type: LED type: round glass lamp. Maximum wattage: 2 x 1 W. Voltage range: DC 4V. Dimensions: see picture.