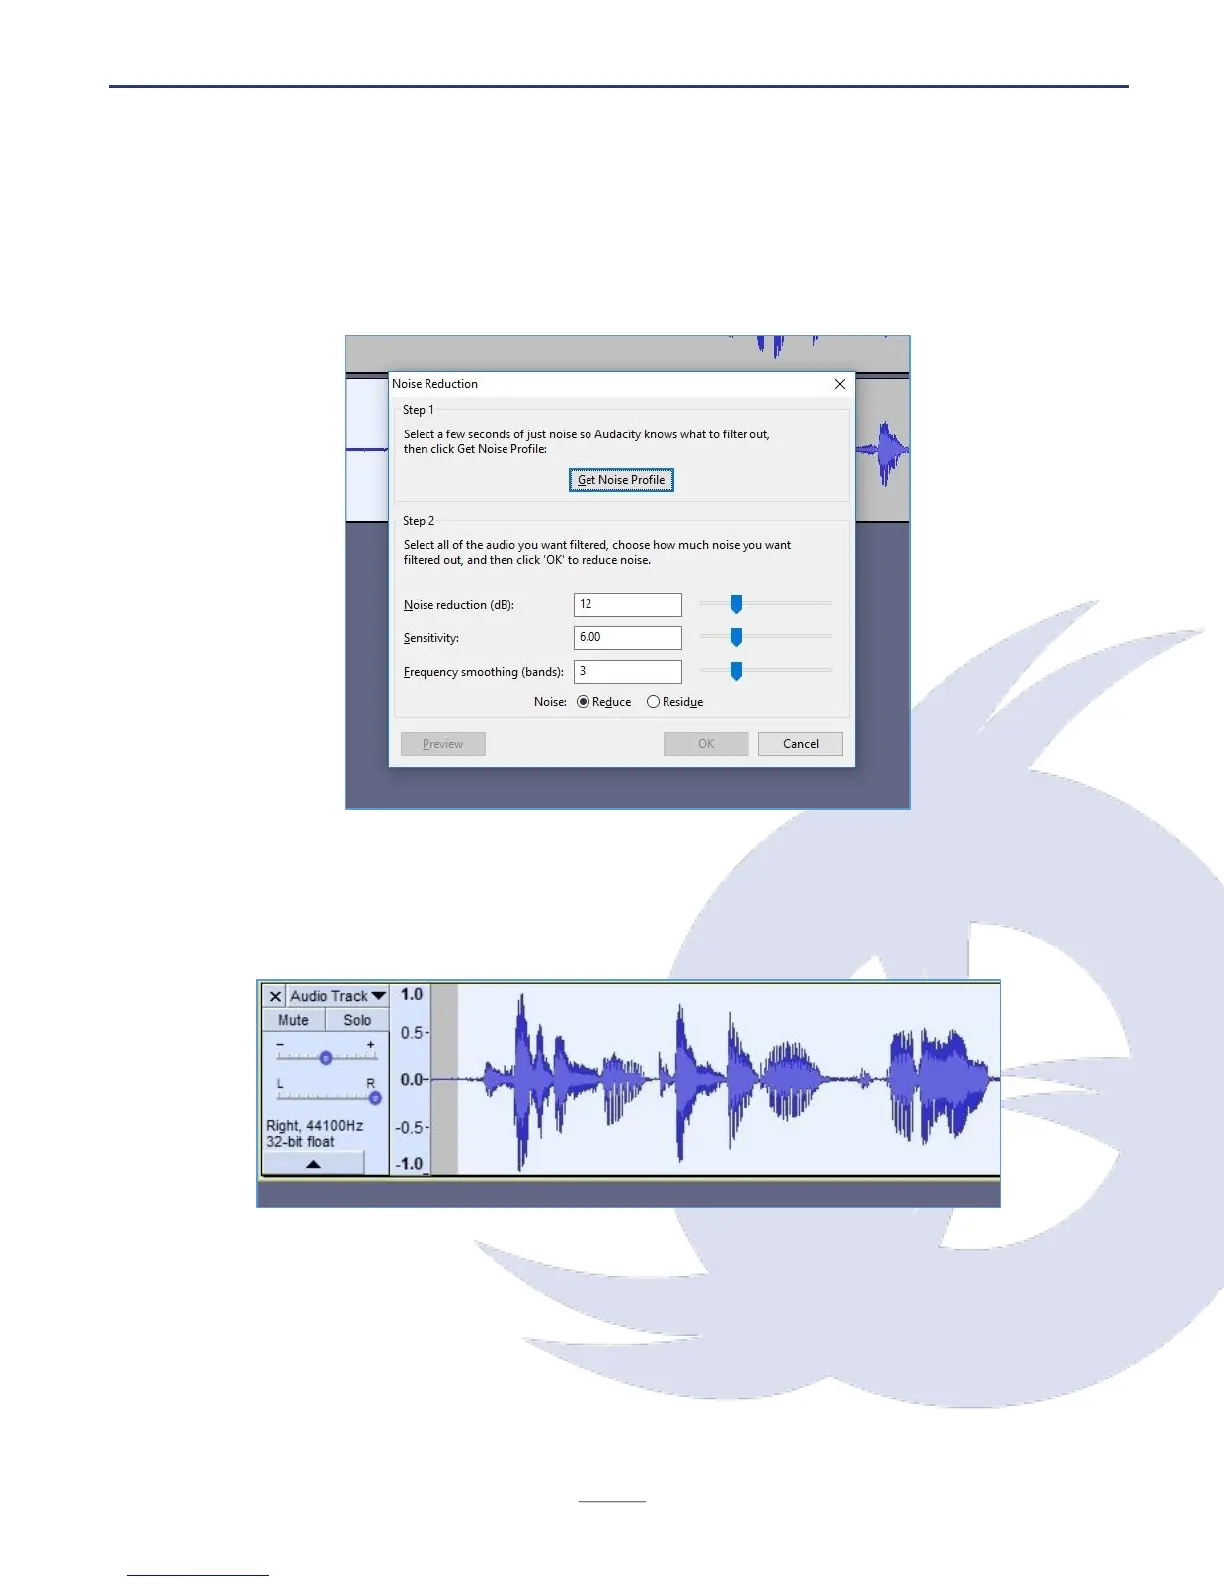
Step 2 - Use Noise Reduction
With the audio selected (it will be highlighted in blue), open the Effects > Noise Reduction
feature. You’ll see a dialogue box with a two-step tool. First, head to Step 1 and click the
Get Noise Profile button. You have your profile selected already, so proceed to click this.
At this point, the Noise Reduction box will close. Don’t let this confuse you. Instead, select
the portion of audio that you wish to remove the ambient sound from. If this is an entire
track, simply left-click the track header to select it all.
With this selected, return to Effects > Noise Reduction, and look at Step 2. In most cases,
the default Noise Reduction, Sensitivity and Frequency Smoothing settings will work, so
you can go ahead and click OK to accept these. It may take a while for the noise reduction
to be applied; this will depend on the track duration.