Klipsch Reference Series Technology
The Klipsch Reference Series is a complete, matched family of high performance loudspeakers that
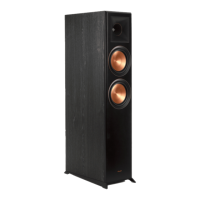
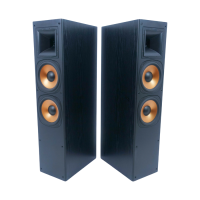
offer superior home theater and two-channel performance. This series offers a choice of three floor-
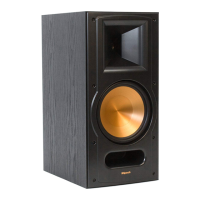
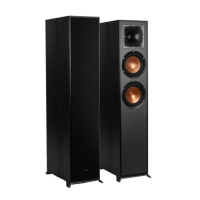
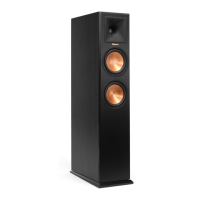
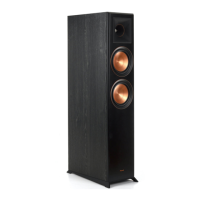
standing speakers (RF-3, RP-3 and RP-5), a high performance bookshelf model (RB-5) and companion,
voice-matched center (RC-3) and surround (RS-3) speakers. Both the RP-3 and RP-5 feature built-in
powered subwoofers to provide maximum deep bass performance while reducing demands on floor
space and amplifier power. An updated version of our square Tractrix Horn, driven by a titanium
diaphragm tweeter, is paired with high output woofers featuring glass-fiber-reinforced polymer frames
and light, rigid aluminum cones. All front channel models feature video shielding, bi-wire inputs and
a “floating” grille design that gives the speakers a handsome, contemporary style with minimal sonic
interference. Flush-mounted components and narrow front profiles are combined with time-aligned
drivers and simple, minimum phase filter networks to provide truly extraordinary soundstaging. The
rear sound field is provided by the Klipsch RS-3 Wide Dispersion Surround Technology
™
speakers. These
speakers contain an array of three drivers that flood the back of the listening room with high quality
direct and diffuse sound providing pinpoint rear channel imaging and full ambient envelopment.
Speaker Placement
REFERENCE RB-5, RF-3, RP-3 AND RP-5 MAIN SPEAKERS
Both speakers should be placed on the same wall of your room facing the listening area. Space the loud-
speakers so they are between six and 15 feet apart with the same, or slightly greater, distance from the
speakers to your listening position. For best results with the RB-5, we recommend the use of a high quality,
rigid speaker stand that will place the horn tweeter at ear level when seated. The desired spread between
the speakers may be different for a home theater application than it would be for a two-channel audio
system. Some correlation between the size of the video and sonic image may dictate the final placement of
the speakers. For a higher quality stereo image, angle, or toe in, the speakers toward the listener.
Additional bass output will result if you place the speakers in a corner or near a wall due to the addition-
al reflected energy from the walls and floor. This may, however, degrade soundstage quality so these two
attributes must be balanced depending upon
your sonic priorities. Room acoustics vary, so experiment
with specific placement within the listening area.
Reference floorstanding models include four extension feet to enhance stability. We strongly recommend
that these extension feet be used. Attach the extension feet to the threaded inserts in the bottom of the
speaker cabinet using the supplied screws. Do not overtighten! Also included are four spikes and four
rubber tipped pads that can be screwed into the threaded inserts on the bottom of the extension feet.
Although we recommend the use of the extension feet, the spikes or rubber pads can be screwed directly
into the inserts on the cabinet bottom. The rubber pads are for use on hard flooring and the spikes are
designed for carpeted surfaces. The spikes will provide the best sonic performance on all types of floors
but be advised that they will scratch or mar the floor’s surface. By concentrating the speaker’s weight on a
small contact area, spikes reduce cabinet movement and resonance, improving clarity, imaging and detail.
REFERENCE RC-3 CENTER SPEAKER
Place the center speaker on top of or just below the video screen, centered. This anchors center channel
sounds to the on-screen image for off-center viewers. By installing the adjustable foot, the RC-3 may be
angled down to compensate for placement on a high shelf or the top of a large rear projection televi-
sion. First thread the jamb nut onto the threaded rod, then screw the pointed end of the threaded rod
into the insert on the bottom rear of the speaker cabinet. Install the vinyl boot on the end of the rod
to protect your shelf or television cabinet from marring. Adjust the length of the rod to aim the speaker
at ear level when seated in the listening area. Gently tighten the jamb nut with a wrench, being careful
not to overtighten! Stick-on rubber pads are included for attachment to the speaker bottom to prevent
vibration and scratching of the television cabinet or shelf. When the adjustable foot is not being used,
cover the threaded insert with one of the supplied self-stick rubber pads.
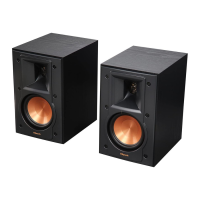
REFERENCE RS-3 WDST SURROUND SPEAKER
One of the principle advantages of Klipsch’s unique Wide-Dispersion Surround Technology is greater
placement flexibility. Due to their full 180° coverage pattern, the RS-3s will perform well in a variety of
locations. The most effective placement for home theater systems is either on the side walls, adjacent to
or behind the listening area, or on the rear walls near the corners of the room. A height of approximately
five to seven feet from the floor to the base of the speaker is recommended.
Your Klipsch surround speaker can be wall mounted by using the supplied keyhole brackets on the rear
of the cabinet. These two brackets are vertically oriented to attach to a pair of screws secured into a
wall stud.
 Loading...