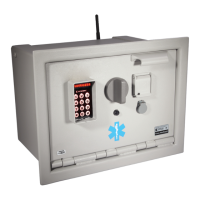
MedVault
®
Hardware Installation Instructions
OPE-MVHDWR-0202-H The Knox Company ▪ MedVault
®
▪ 4
Note: The MedVault
®
contains a polarity diode to
prevent damage to the unit
if the wires are attached in
reverse.
Installing the Electronics
Wire Connection Table
Red +12 Volts DC
Black Ground
Assemble the following tools and supplies:
Electrical tape
Wire stripper
Follow these steps to install the MedVault® electronics:
1. Establish the desired location of the unit in the vehicle.
2. Determine the source of the MedVault® power. Ensure that the power supply is filtered,
fused and capable of supplying three (3) amps.
3. Run the supplied 2-conductor cable to the power connection.
4. Connect the black wire in the ten-foot (10’) cable to ground.
5. Connect the red wire to a 12-volt power source.
6. Ensure that the power can be turned off with the vehicle’s master power switch.
7. If you are connecting the unit with continuous power:
A. First, connect ground to the black wire.
B. Second, power +12 volts to the red wire.
8. Test the installation by turning on the power. The
keypad should be lighted and a banner should scroll
above it, displaying the time, date. and door status.
A. Enter a PIN code.
B. The MedVault should unlock, allowing you to turn the knob from the vertical position
to the horizontal position.
9. You or your administrator can set the MedVault
®
date and time from the laptop PC
containing the Knox Units Administrator
®
software.
10. Congratulations! You have successfully installed the hardware and electronics.

 Loading...