Presence detector Mini
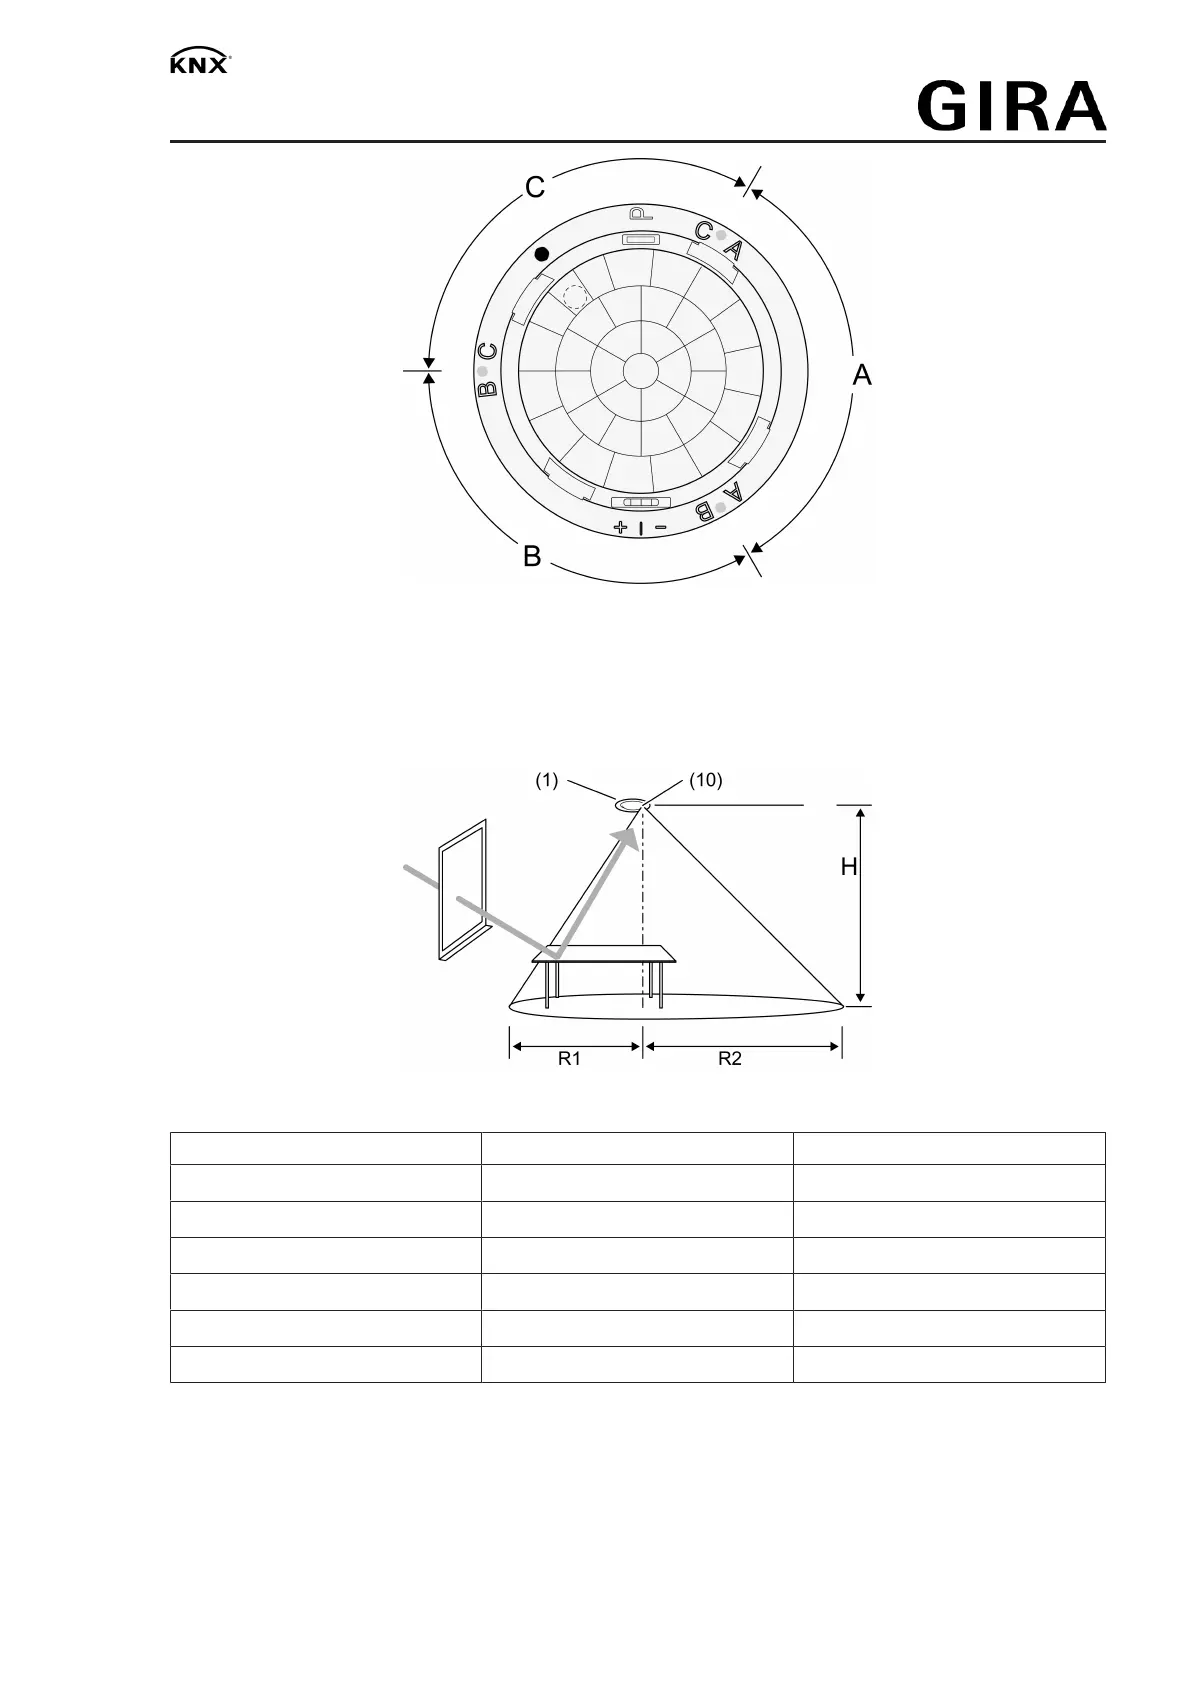
Figure6: Arrangement of the areas A, B and C
Brightness detection
The brightness sensor (8) is attached on the side and thus enables an asymmetric measuring
surface. In this way, for example, it is possible to include several work places in the measure-
ment without any laterally entering light distorting the measurement.
Figure7
Installation height H R1 R2
2.20 m 1.5 m 2.3 m
2.50 m 1.8 m 2.6 m
3.00 m 2.0 m 3.0 m
3.50 m 2.5 m 3.6 m
4.00 m 2.8 m 4.2 m
5.00 m 3.5 m 5.2 m
Light falling directly onto the sensor or reflected by shiny surfaces influences the brightness de-
tection.
Selecting installation location
When used as a presence detector, the device is installed on the ceiling and monitors the sur-
face below it. When used as a motion detector, the device is installed e.g. in the hallway on the
ceiling.
7 / 13
32589822 10867613 25.02.2020
 Loading...
