EasyManuals Logo

KNX GIRA Operating Instructions

KNX GIRA
13 pages
To Next Page IconTo Next Page
To Previous Page IconTo Previous Page
Page #9 background imageLoading...
Page #9 background image
Presence detector Mini
Mounting friction springs for box mounting
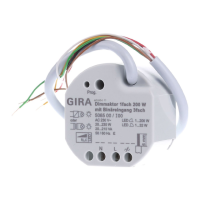
Figure9
For mounting in flush-mounted box or surface-mounted housing.
Remove spring clamp (3) (Figure 1).
Push friction springs (13) in the right orientation on the guides (2) from behind until they
snap into place (Figure 9).
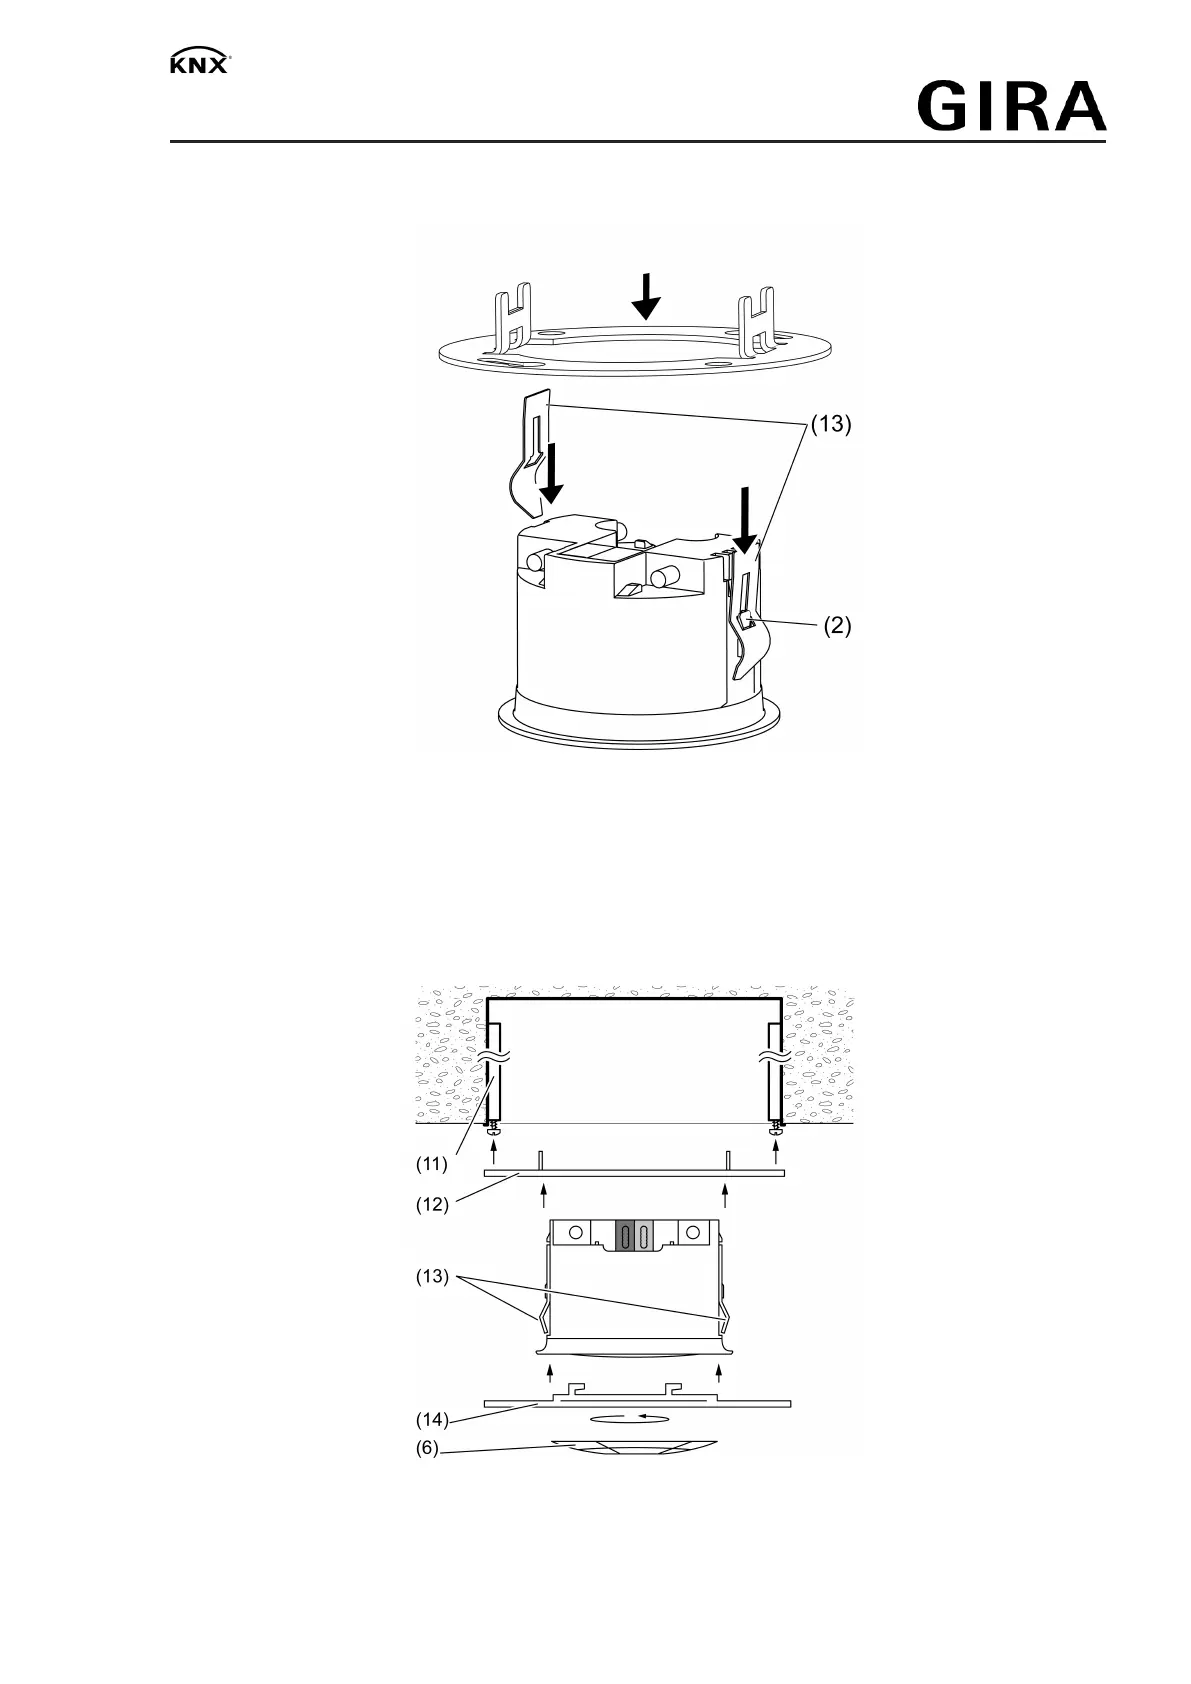
Connecting and fitting the device in a flush-mounted box
Figure10
Flush-mounted box (11) is mounted on the ceiling at the designated installation location.
Spring clamps (3) are removed and friction springs (13) are mounted.
9 / 13
32589822 10867613 25.02.2020

Other manuals for KNX GIRA

Questions and Answers:

Question and Answer IconNeed help?

Do you have a question about the KNX GIRA and is the answer not in the manual?

KNX GIRA Specifications

General IconGeneral
Protection ClassIP20
Ambient Temperature-5 °C to +45 °C
Communication ProtocolKNX
MountingDIN Rail
Number of ChannelsDepends on model

Related product manuals