(A)
(B)
(5)
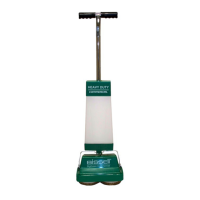
ENSAMBLE DE SU LAVAPISOS / PULIDORA
ACCESORIOS
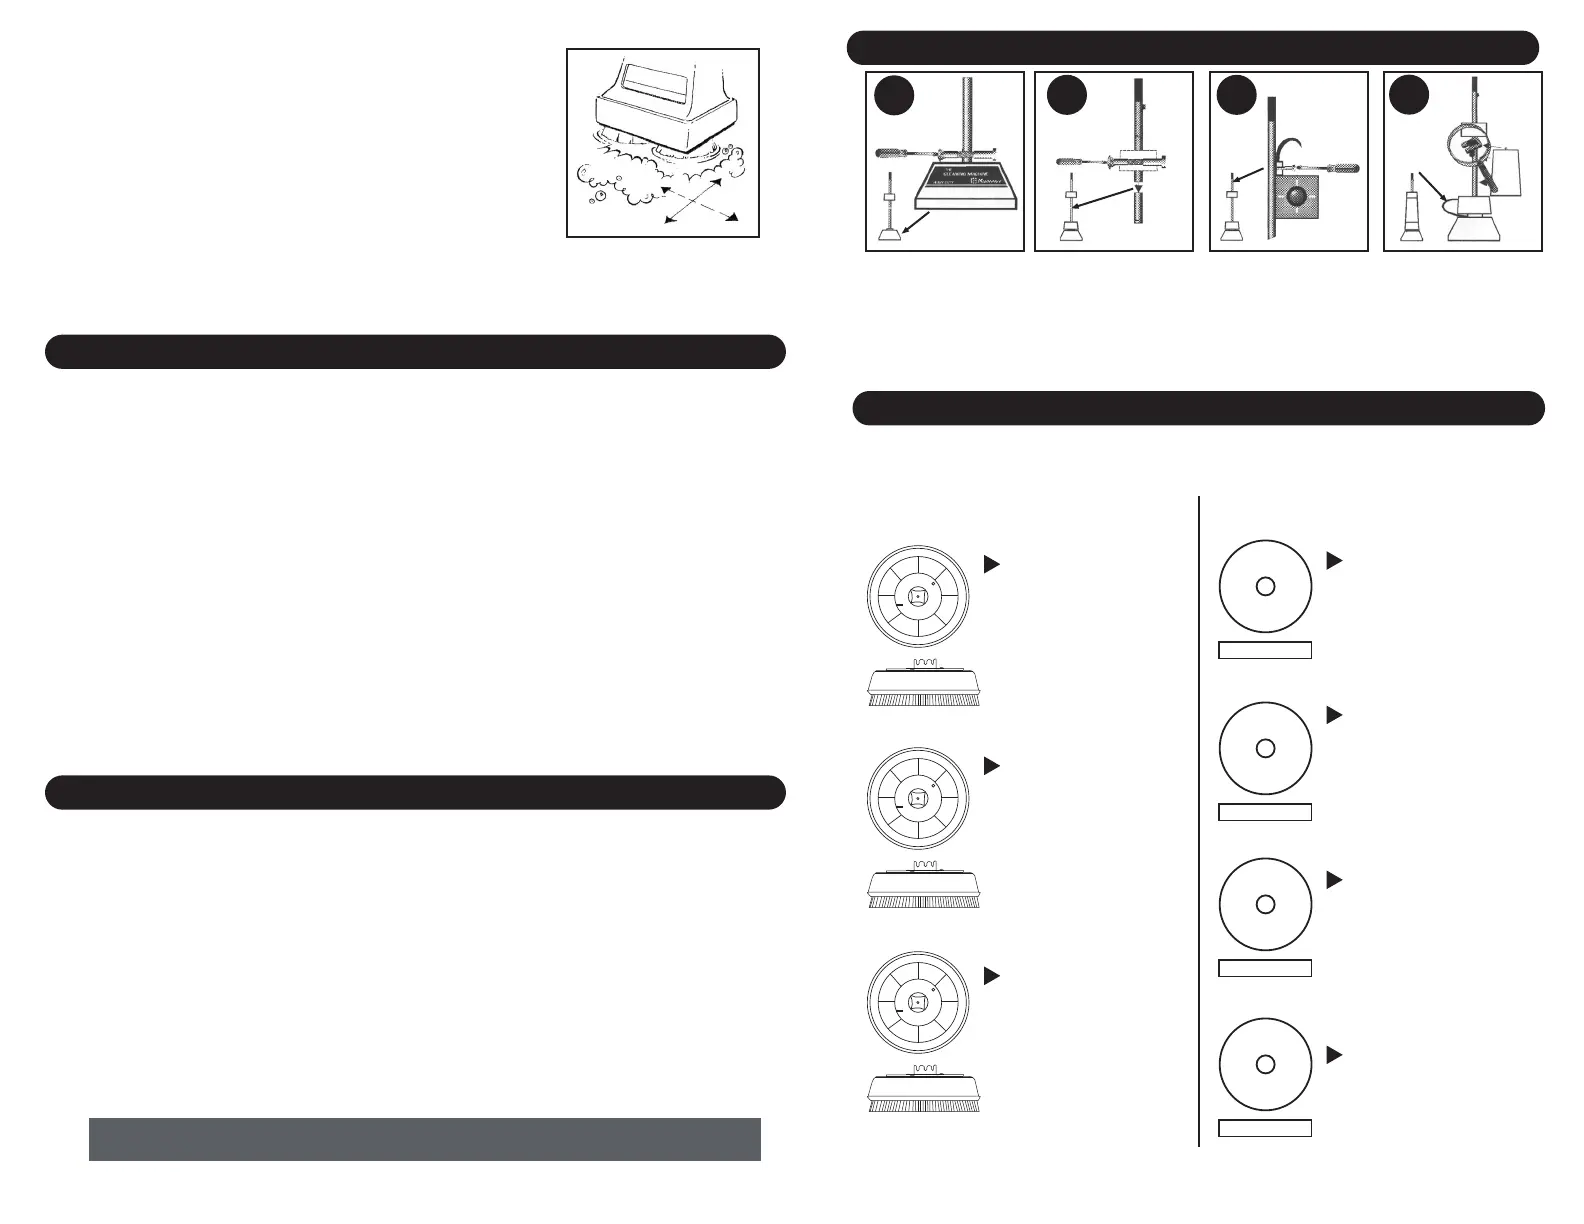
1
2 3
4
HARDWOOD FLOOR CARE
HARD FLOOR CARE
5 10
1. Colocar el tubo de la
parte inferior a la entrada
de la base del motor.
Sujételos con los tornillos
que vienen en el manual.
Asegúrese que los tornillos
estén alineados a los
oricios del tubo.
2. a) Ensamblar el tubo de
la manija superior con el
tubo inferior.
b) Asegúrelos con los
tornillos.
3. Inserte el interruptor en
el tubo de arriba.
Asegúrelo con el tornillo
pequeño que viene en el
manual del usuario.
4. Haga presión para
insertar el tanque hasta oir
que encaja como se ven en
la imagen.
5. Conecte la manguera en
el oricio localizado en la
parte trasera de la unidad.
NO TODOS LOS ACCEORIOS SE INCLUYEN EN TODOS LO MODELOS,
VEA EL CONTENIDO QUE TRAE LA CAJA. Para más información sobre el uso de accesorios vaya a la sección de uso.
CEPILLOS COJINETES
CEPILLOS PARA ALFOMBRA
Lave sus alfombras con la espuma
del shampoo sin mojar en exceso.
NO USE ESTOS CEPILLOS CON LOS
COJINETES, USE ESTOS CEPILLOS
ÚNICAMENTE PARA LAVAR SU
ALFOMBRA.
CEPILLOS PARA RESTREGAR
Remueven manchas y mugre
pegadas en cualquier tipo de piso
duro.
NO USAR EN ALFOMBRAS. ESTOS
CEPILLOS TAMBIEN FUNCIONAN
COMO BASE PARA MONTAR TODOS
LOS COJINETES.
CEPILLOS PARA PULIR
Ideales para esparcer la cera sobre
pisos irregulares, puliendo
rmemente y mejorando el brillo
logrando una capa lisa y durable.
No use estos cepillos sobre
alfombra. También puede usar
estos cepillos como base para los
cojinetes.
(Café obscuro)
(Café claro)
COJINETES PARA RESTREGAR
Remueve manchas y mugre pegada al
piso. Ideal para limpieza profunda en
cualquier tipo de piso duro.
INSTALE L OS COJINETES SOBRE LOS
CEPILLOS PARA RESTREGAR O PULIR.
(Polietileno blanco)
(Fibra verde)
COJINETES PARA
PULIR Y ENCERAR
(Fibra canela)
Remueven y distribuyen las capas de
cera para mejorar el brillo y crear una
capa de cera durable. INSTALE ESTOS
COJINETES SOBRE LOS CEPILLOS PARA
RESTREGAR O PULIR.
COJINETES PARA ABRILLANTAR
(Fieltro gris)
Saca el brillo de cualquier supercie
encerada. Remueve las marcas que
deja el pulido. INSTALE ESTOS
COJINETES SOBRE LOS CEPILLOS PARA
RESTREGAR O PULIR.
COJINETES PARA LUSTRAR
(Lana blanca)
Para dar brillo a madera y otras
supercies. INSTALE ESTOS COJINETES
SOBRE LOS CEPILLOS PARA RESTREGAR
O PULIR.
• Vacuum your floors daily.
• Polish the dry surface once or twice a week.
Vacuum Hardwood oors daily.
Buff once or twice a week to remove scuff marks and improve the shine of the hardwood oor.
Make sure that the oor is dry. Attach the lambswool or felt pads over the polishing or
scrubbing brushes. Secure with the pad retainers. To remove stubborn scuff marks use the tan
cleaning pads. Turn the unit on and glide the machine over the surface with forward and
backward strokes, following the direction of the grain until the desired nish is achieved.
Hardwood oors may be damp mopped with a ph balanced neutral cleaner if they have been
previously sealed with a polyurethane nish. Always avoid excess water on wood oors.
To polish using paste wax, apply the wax by hand and let dry. Use the machine with polishing
brushes or dry tan pads placed over the polishing brushes. Turn the unit on. Glide the machine
over the oor with forward and backward strokes following the direction of the grain. If you
apply two or more layers of wax, polish the rst layer before applying the second layer. Never
pour liquid wax into the tank. If a liquid wax nish is applied to the wood oor by hand, let it
dry, they buff with the lambswool pads if desired.
A sealed hardwood oor may be deep cleaned if excessively soiled. Dilute a neutral cleaner in
the tank following the instructions on the product. Use the machine with the tan pads placed
over the polishing or scrubbing brushes. Pull the trigger to dispense the cleaning solution
of the oor. Do not place too much water on the oor and dry immediatly after cleaning.
• Vacuum your floors daily. Damp mop with a neutral detergent using as little water as
possible to avoid damaging your floors.
• Polish the dry surface once or twice a week.
1. Attach scrub brushes to clean oors in kitchens or bathrooms. For textured surfaces use the brushes,
for smooth surfaces use the green pads.
2. Tilt your device towards you and turn it on. Wash the oor with slow back and forth motions
until dirty suds appear.
3. Remove dirty soapy water with a clean cloth or cloth until the oor is free of soap.
Dry well with a clean cloth.
1. Make sure the oor is dry.
2. Place the tan polishing pads on top of the scrub brushes (both should be dry).
3. Turn on the device and do the same scrubbing movements until you get the perfect nish.
1. Place the felt pads on top of the dry scrub brushes.
2. Tilt the device, plug it in and turn it on.
3. Follow the same movement instructions as for polishing.
4. A protective layer of liquid wax can be applied before or after polishing.
If you apply it, let it dry completely and then polish.
SCRUBBED
POLISHING
POLISHED
To properly clean and maintain the oors in your home,
always follow the Manufacturer's recommendations.
6. Fill tank with water then add the desired cleaning solution. It is recommended to
put the water rst, to avoid foaming. Place tank on shampooer.
DO NOT USE SOAP OR DETERGENT ON CARPET.
7. Lower handle to the operating position, and turn the unit on. When brushes start
rotating, press the dispenser trigger to release shampoo solution.
DO NOT SOAK TO AVOID MILDEWING AND DISCOLORATION.
8. Clean small areas of 3 x 3 feet at a time using slow foward, sideways and
backwards strokes until a small uniform lm of foam disappears. (Fig. B)
9. Proceed to another area in the same manner. Make sure that the last movement in
one area is in the same direction as the last area.
10. Allow carpeting to dry completely, preferably overnight. Ventilating the room or
using a fan may reduce drying time. If your need to walk over a wet carpet, protect it
with a white cloth or towel.
11. Once dry, vacuum the carpet to remove all crystalized debris.
Fig. B
KEEP FLOORS CLEAN
BUFFING
CLEANING
POLISHING
DEEP CLEANING
 Loading...