MODELO CON CONEXIÓN POLARIZADA
ADVERTENCIA
Un adaptador puede utilizarse temporalmente para conectar la clavija a
un contacto no polarizado.
El adaptador temporal solo podrá utilizarse mientras un electricista
calicado instala un contacto polarizado como el que se ilustra en la
Figura A.
FIGURA. A
Clavija
Polarizada
Esta máquina está diseñada para utilizarse en un circuito nominal de
120 V~ y tiene una clavija polarizada como se ilustra en la Figura A.
Cuide su máquina de altos y bajos voltajes
Una conexión inapropiada puede provocar riesgo de choque eléctrico, revise por medio de un electricista
capacitado que el contacto que se utilizará esté debidamente polarizado. No modique la clavija de la máquina,
si la clavija no ajusta en el contacto, instale uno llamando a un electricista capacitado.
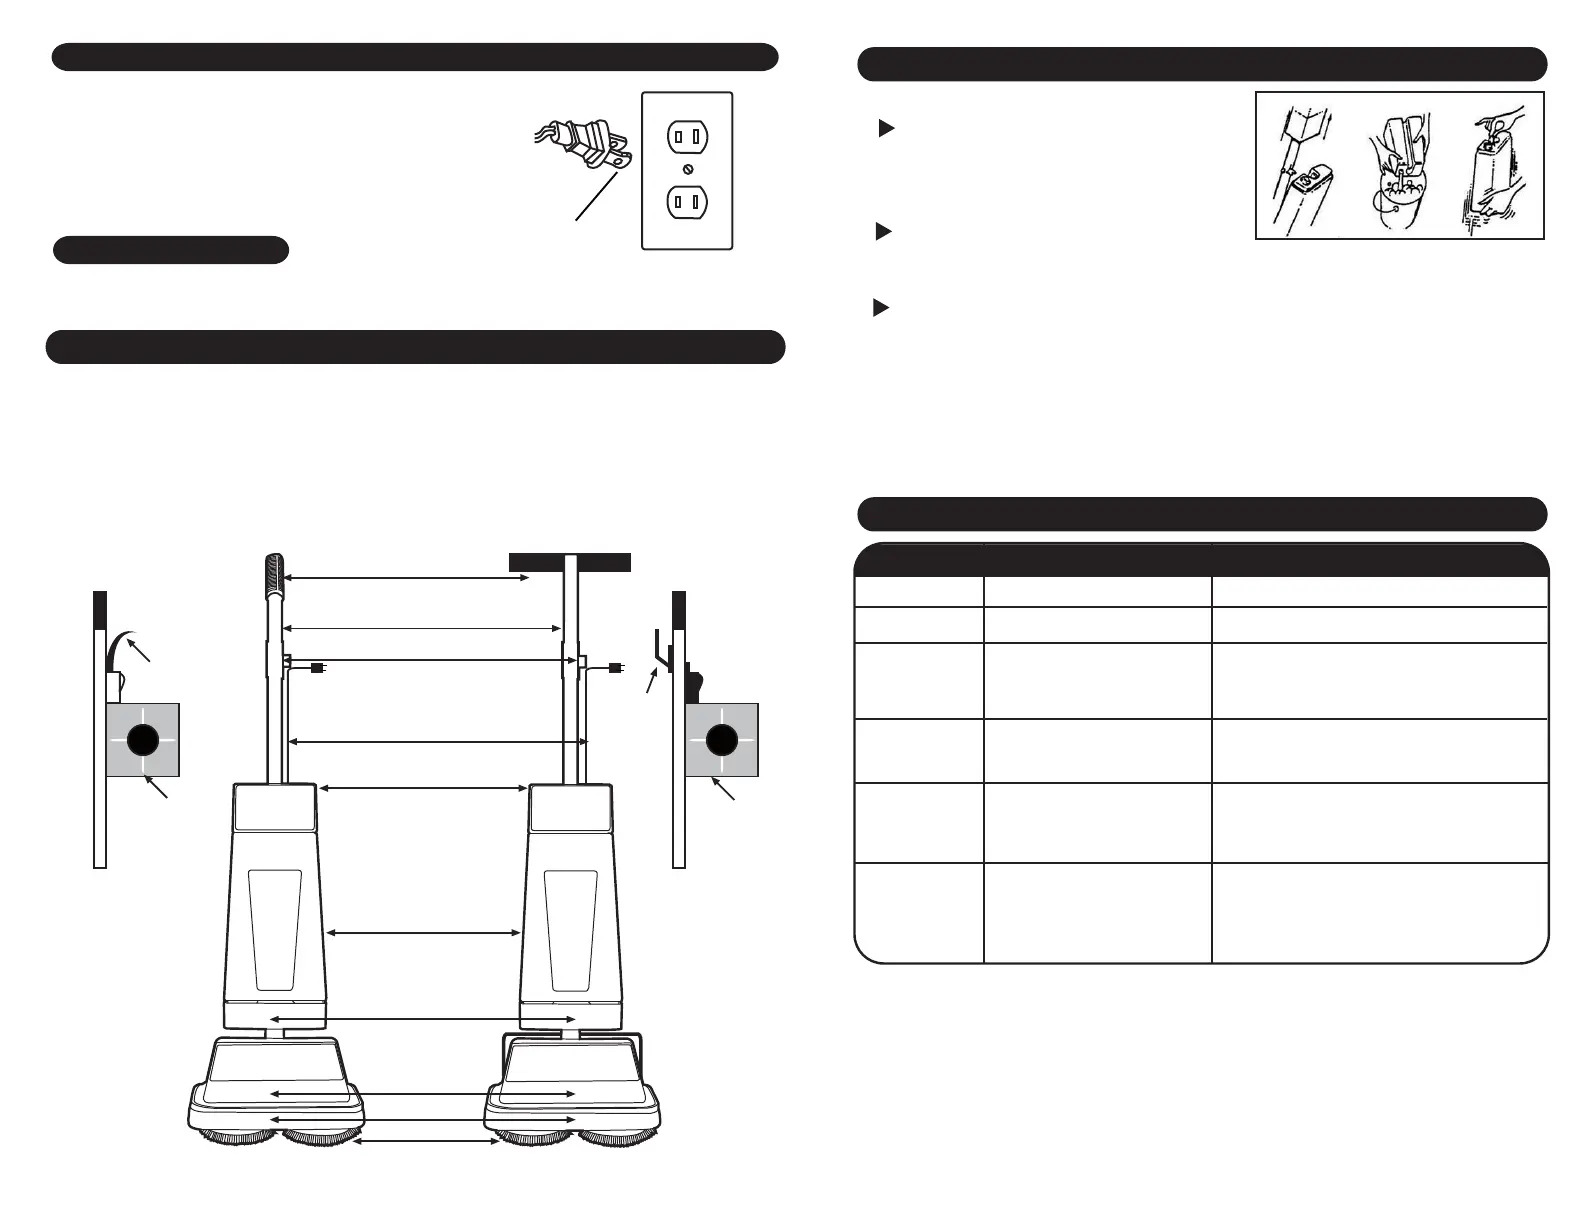
COMPONENTES DE SU LAVAPISOS / PULIDORA
1. Manija
2. Tubo manija superior
3. Interruptor
4. Gatillo
5. Cable de corriente (Alimentación motor)
6. Tapa superior del tanque
7. Tanque
8. Soporte inferior del tanque
9. Cubierta motor
10. Moldura protectora
11. Cepillos y cojinetes
9 6
1
2
3
5
6
7
8
9
10
3
4
4
3
11
Bad connection
Wrong brushes or pads
Tank clogged
Tank loose
Tank valve not opening
Hose loose
Broken tank
Broken hose
Not attached correctly
Spring not functioning
Worn or Damaged
Pads retainers not placed correctly
Pad retainers broken
Connect plug rmly.
Check if brushes or pads are the correct ones.
Remove tank and clean.
Check that tank is installed correctly.
Make sure tank is inserted correctly with valve stem
above valve hook. (see how to assemble the tank)
Place hose into position.
Replace tank with original replacements.
Replace hose.
Push brushes completely down into spindle.
If this does not work, check the little spring loaded
ball or nib.
Replace nib. See spindle cap insulator.
Kit part number 46-1610
Place pad retainers correctly.
Replace with genuine parts.
Shampooer does
not turn on
Does not clean
properly
Does not
dispense
shampoo
Shampoo leaks
Brushes fall off
Pads fall off
TROUBLESHOOTING
CLEANING & STORAGE
PROBLEM POSSIBLE CAUSE SOLUTION
HOW TO CLEAN TANK AND ACCESSORIES
STORAGE
ALL ACCESSORIES AND TANK SHOULD BE COMPLETELY DRY BEFORE STORING THEM.
REMOVE BRUSHES AND PADS FROM MACHINE FOR STORAGE.
Cord Storage:
After use, unplug and coil the power cord around the cord wrap placed on the back of the machine.
BRUSHES
After each use, wash with lukewarm soapy water.
NEVER USE HOT WATER. Shake out excess water. Stand bristles on paper towel to dry.
DO NOT FORCE DRY BY USING OVEN OR RADIATOR HEAT.
PADS
Pads should be washed with warm soapy water. Rinse throughly in cold water.
Stretch out to shape and allow to dry on a at surface.
TANK
Rinse thoroughly with warm water and allow to dry. (Fig. G)
NEVER STORE LIQUID IN TANK
Flush dispensing system by partially lling tank with warm
water and mounting it and dispensing the water into a
receptacle placed under the unit.
FIG. G