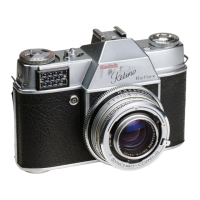
The centre of the screen of the Retina Reflex carries a split
image optical rangefinder which shows the incorrectly focused
subject in two displaced halves (right. The remainder of the
finder field constitutes a ground glass focusing screen. When the
subject is accurately focused, it appears sharp on the screen and
the two halves of the rangefinder image move together to form a
continuous line (above and extreme right).
Shooting
Practise the following operations first with an empty camera until you can do them practically automatically.
1. Work the film transport. Swing film transport lever out as far as it will go (180°). It will only spring back
into its original position if it has been wound fully. This advances the film and film counter, tensions the
shutter, opens up the aperture and brings down the mirror, ready for the next exposure.
2. Set the exposure. Adjust the shutter for the right amount of light for the subject conditions. The built-in
photo-electric exposure meter indicates the setting required, or even sets the controls.
3. Select the aperture speed combination you want to use, smaller aperture for greater depth of field (p.
40) or faster speed to arrest movement (p.38).
4. Focus and determine picture area to obtain a sharp picture and the view you want.
5. Release the shutter gently.
LOADING AND UNLOADING
The Retina Reflex uses standard perforated cine film, 35 mm. wide, as used in the majority of other 35 mm.
miniature cameras. It is available in various packings (see also p. 18), the most convenient being standard
daylight cassettes. These are light-tight containers with a ready cut and trimmed length of film for 36 or 20
exposures and are loaded into the camera in daylight.
Avoid loading or unloading the camera in brilliant sunlight, though. Choose a shady spot or do it in the shadow
of your own body if nothing better is available.
Loading
1. Open the camera back by turning the double lever surrounding the tripod bush on the camera base in the
direction of the arrow. Then press the little button underneath the lever, and the back will spring open.
2. Fully pull out the rewind knob above the film chamber.
3. Insert the film cassette so that projecting spool peg lies in the recess in the bottom of the spool chamber.
4. Push back the rewind knob.
5. Fix the film to the take-up spool. Pull out about 3½ in. of film from the cassette; turn the built-in take-up
spool so that the slot is accessible. Push the film end into the slot and anchor a perforation hole in the
 Loading...