TP-6805 8/15138 Section 7 Disassembly/Reassembly
e. Place the end bracket onto the stator assembly,
lining up the alignment marks on the top of the
stator and end bracket. See Figure 7-29.
f. Thread the four overbolts with locating washers
through the end bracket and into the generator
adapter, sliding one damper onto each
overbolt, if equipped. See Figure 7-29 and
Figure 7-30.
g. Position the locating tab of each washer to the
outer edge of the oblong (OBROUND) hole on
the end bracket. The overbolts should be
parallel to the outside of the alternator. If the
overbolts are slanted, rotate the locating
washer 1/2 turn. Do not final tighten the
overbolts at this time.
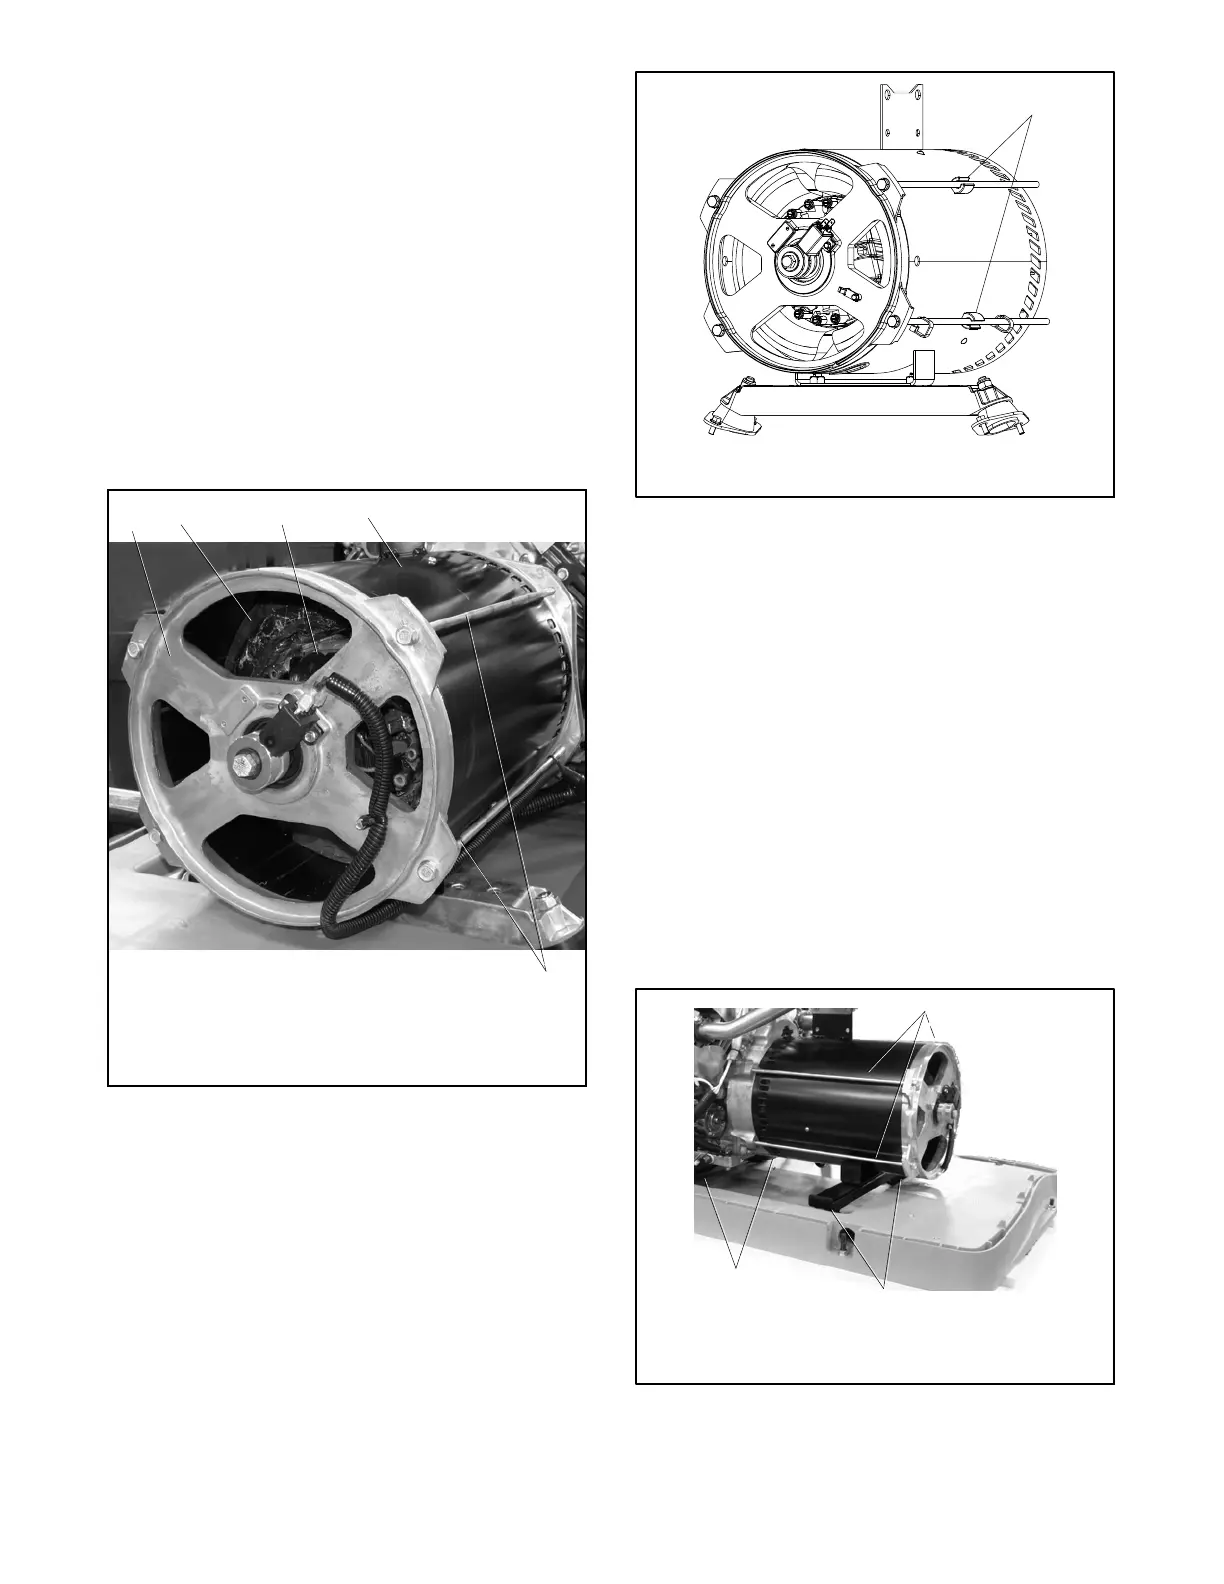
1. End bracket (brush assembly shown attached)
2. Stator windings (outer)
3. Rotor (inner). Also see Figure 7-25.
4. Stator shell
5. Overbolts (qty. 4)
1
3
2
4
5
Figure 7-29 End Bracket and Overbolt Assembly
1
GM88221
1. Dampers GM93481, qty. 4
Figure 7-30 Overbolt Dampers (if equipped)
4. Secure the generator set to the skid.
a. Raise the alternator end of the generator set
and remove the wood support block(s).
b. Lower the end of the generator set and reinstall
the screws and washers that secure the
vibromounts to the skid. Tighten all four
vibromounts (for the alternator and engine) to
5.4 Nm (4 ft. lbs.). Do not overtighten. See
Figure 7-31.
5. Tighten the four alternator assembly overbolts to
14.9 Nm (11 ft. lb.). See Figure 7-31.
6. Tighten the rotor thrubolt to 85 Nm (63 ft. lb.). It
may b e necessary to keep the engine flywheel from
turning while torquing the rotor thrubolt.
2
TP-6735
1. Alternator overbolts (qty. 4)
2. Alternator vibromounts (qty. 2)
3. Engine vibromounts (qty. 2)
3
1
Figure 7-31 Vibromounts and Overbolts (RESA
shown)

 Loading...