TP-6953 7/19284 Section 16 Additional 4PX/4QX Alternator Information
GC70113B-
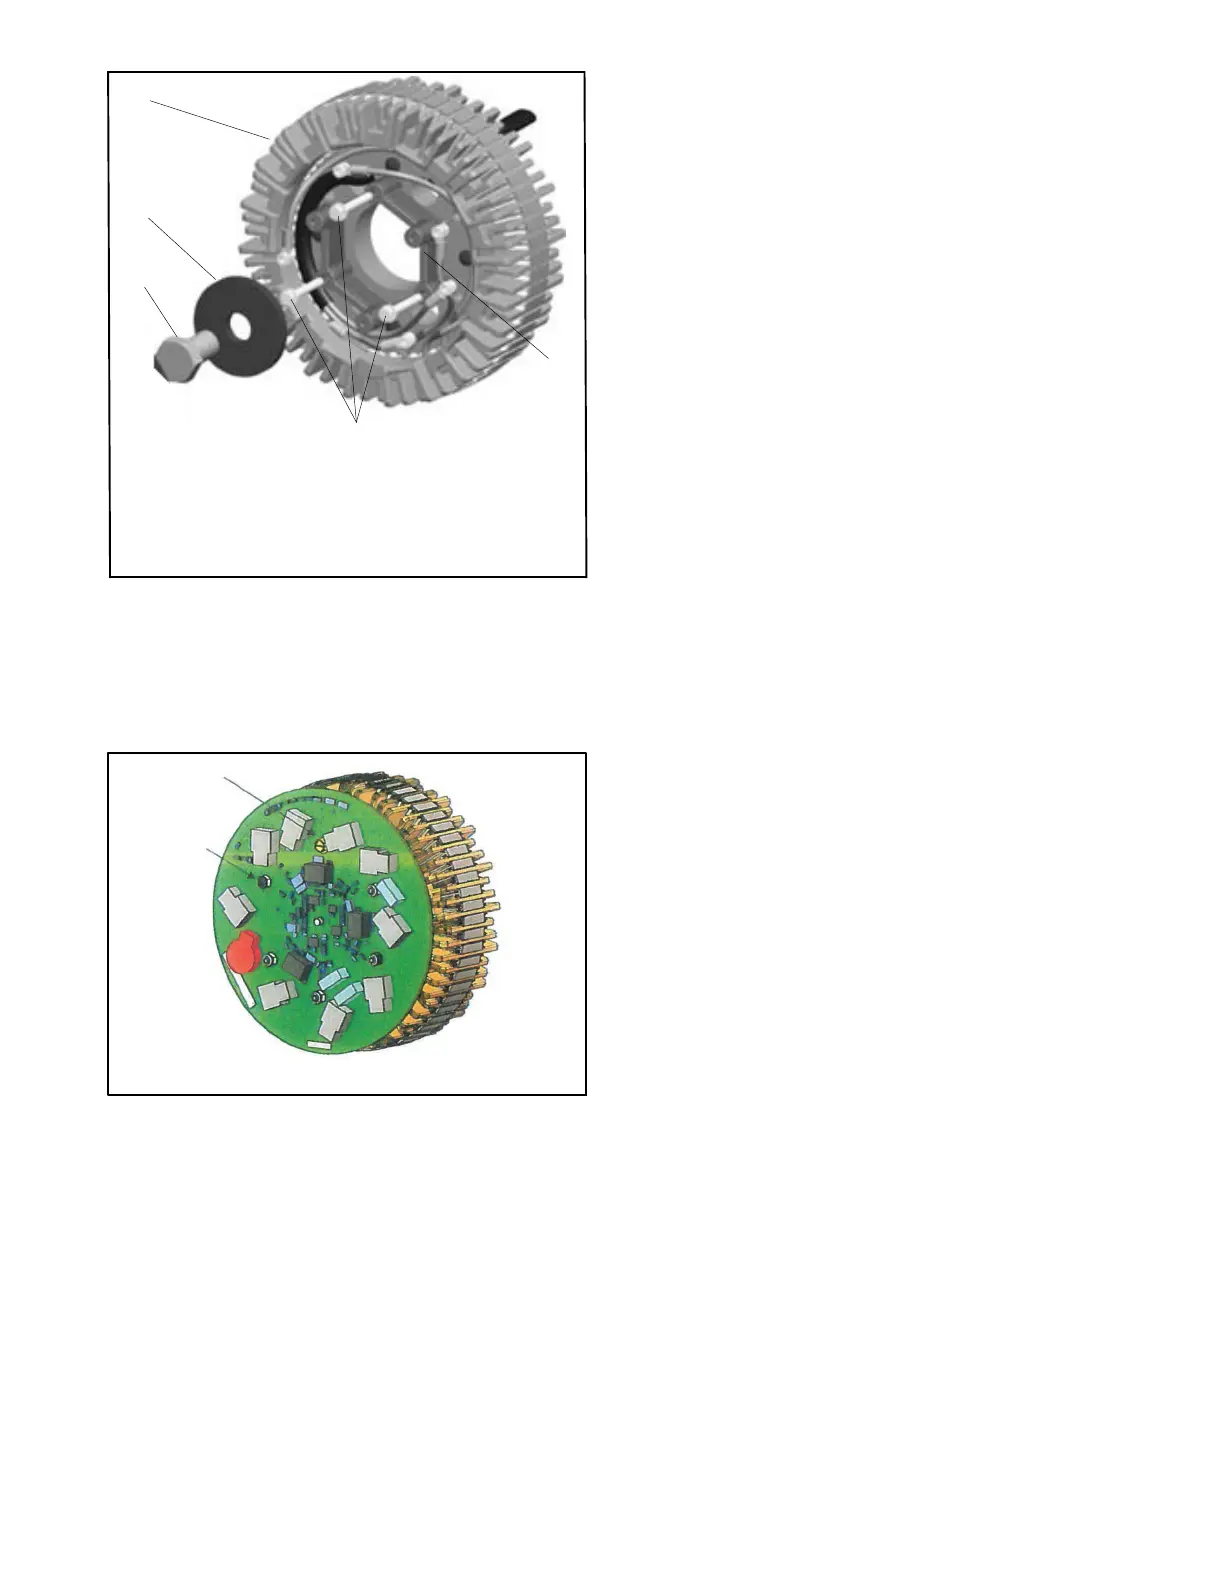
1. Exciter armature
2. Bow washer (position washer w ith convex side outward)
3. Bolt
4. Three screws
5. Spacer
1
2
3
4
5
NOTE: Remove items 2 and 3 only when changing the armature.
Figure 16-11 Exciter Armature
11. Secure the activator board to the studs on the
spacer by using 5 stainless steel elastic stop hex
nuts and a thread-forming screw. Torque to 1.3 Nm
(12 in. lbs.). See Figure 16-12 and Figure 16-13.
1
2
1. Thread-forming screw
2. Stainless steel nuts
Figure 16 -12 Activator Board
12. Mount the LED optic board to the LED optic board
holder using one screw.
13. Attach the LED o ptic board holder to the end
bracket using four screws and torque to 6.2 Nm
(4.6 ft. lbs.).
14. Reconnect the two-lead P6 connector at the LED
optic board.
15. Install the fan guard to the alternator a dapter.
16. Reinstall the junction box and controller.
17. Reconnect all controller-to-engine and engine-to-
alternator harnesses and wiring. Refer to the
wiring diagrams as required.
18. Reconnect the fuel, cooling, and exhaust systems
disconnected during disassembly. Reconnect the
output leads or load circuit cables at the alternator.
Open the fuel supply valve.
19. Replace the junction box panels.
20. Reconnect the starting batteries, negative lead
last. Connect any AC-powered accessories such
as the battery charger, block heater, fuel transfer
pump, etc.
 Loading...