8.9
Section 8
Disassembly
8
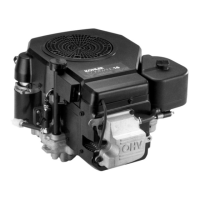
Mounting
Screws
Molded Clips
Figure 8-33. Removing Stator.
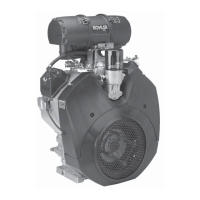
4. Unhook the wiring harness from the molded
clips if it is being serviced separately. See Figure
8-34.
Molded
Clip
Wiring
Harness
Molded
Clip
Figure 8-34. Removing Wiring Harness.
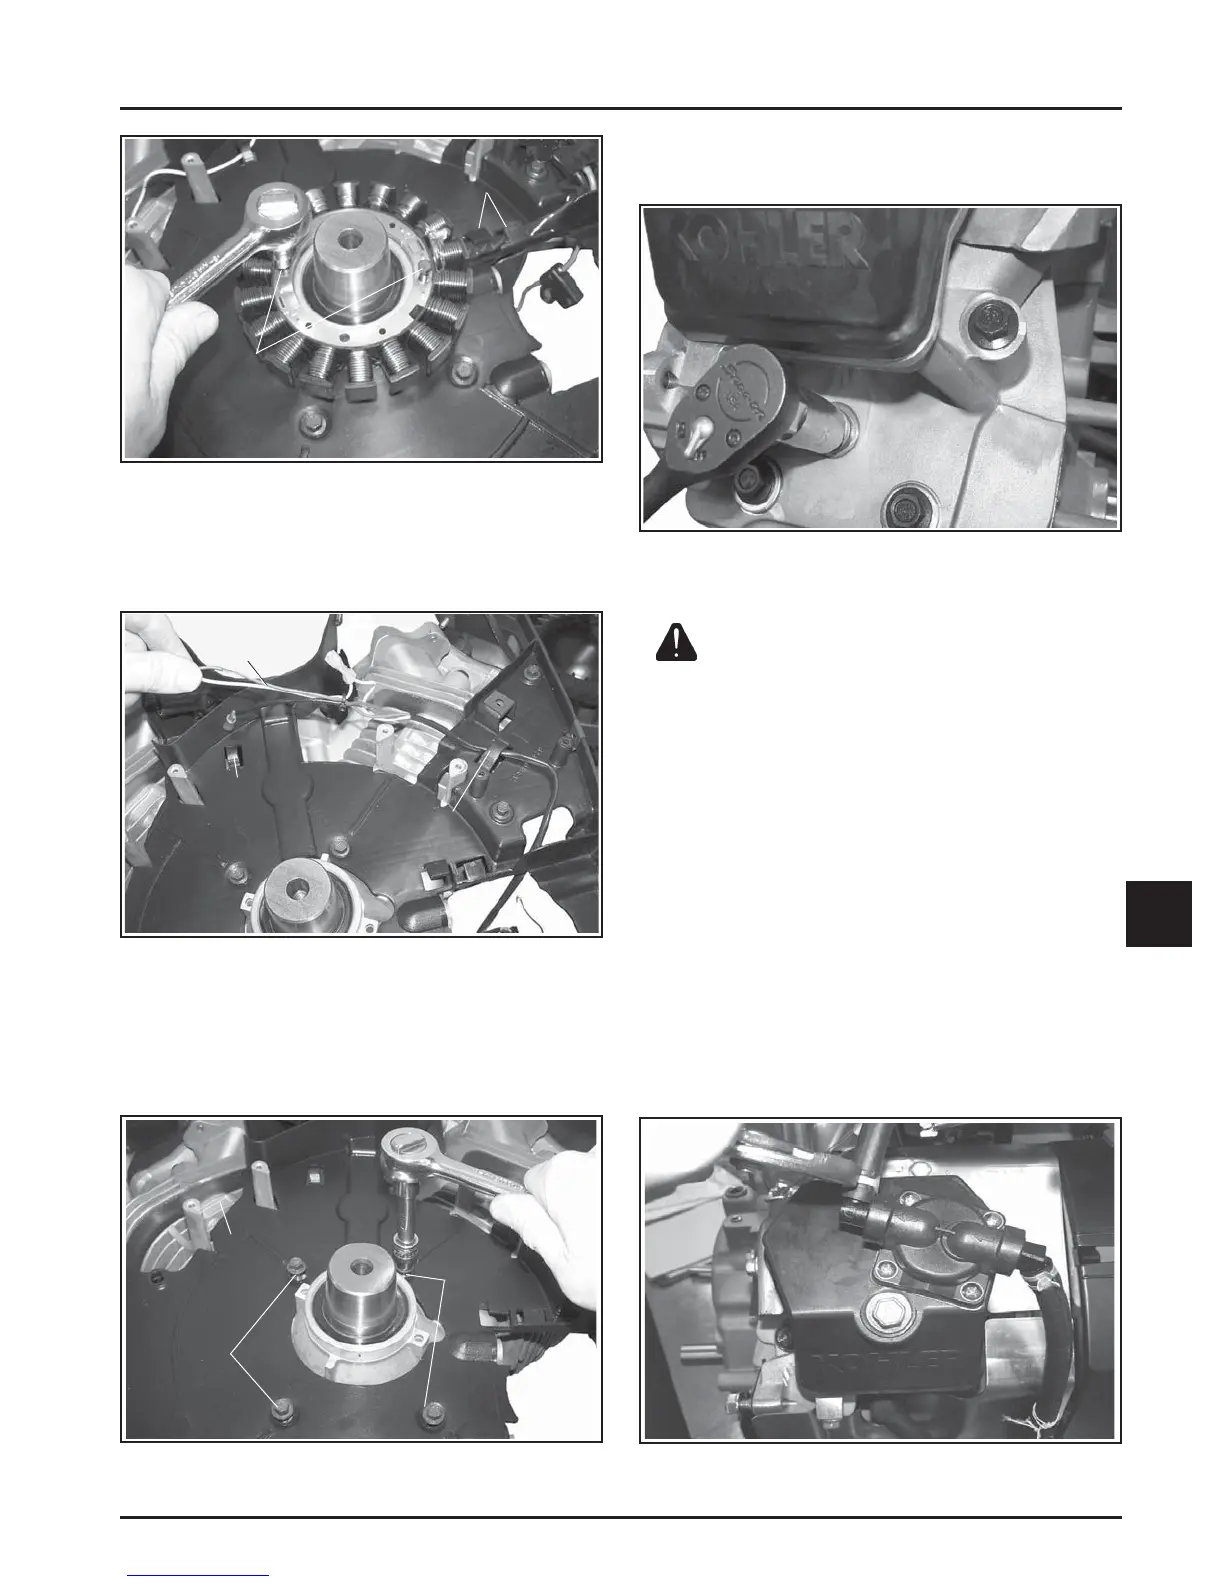
Remove Backing Shroud Assembly
1. Remove the four mounting screws securing the
backing shroud assembly to the crankcase. See
Figure 8-35.
Backing
Shroud
Assembly
Screws
Screws
Figure 8-35. Removing Backing Shroud Mounting
Screws.
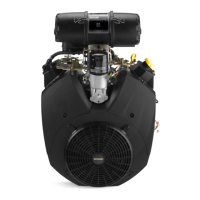
Remove Spark Plugs
1. Remove the spark plug from each cylinder head.
Figure 8-36. Removing Spark Plugs.
Remove Valve Covers and Fuel Pump
WARNING: Explosive Fuel!
Gasoline is extremely fl ammable and its vapors can explode
if ignited. Store gasoline only in approved containers, in
well ventilated, unoccupied buildings, away from sparks or
fl ames. Do not fi ll the fuel tank while the engine is hot or
running, since spilled fuel could ignite if it comes in contact
with hot parts or sparks from ignition. Do not start the
engine near spilled fuel. Never use gasoline as a cleaning
agent.
NOTE: Based on the style of fuel pump used refer to
the following when removing valve covers.
Mechanical Fuel Pump
1. The mechanical fuel pump is part of the valve
cover and not serviced separately. Remove with
the valve cover. Disconnect the fuel lines at the
fuel pump fi ings. See Figure 8-37. Properly
contain any remaining fuel.
Figure 8-37. Disconnecting Fuel Lines.
 Loading...