8.8
Section 8
Disassembly
Short
Screw
Location
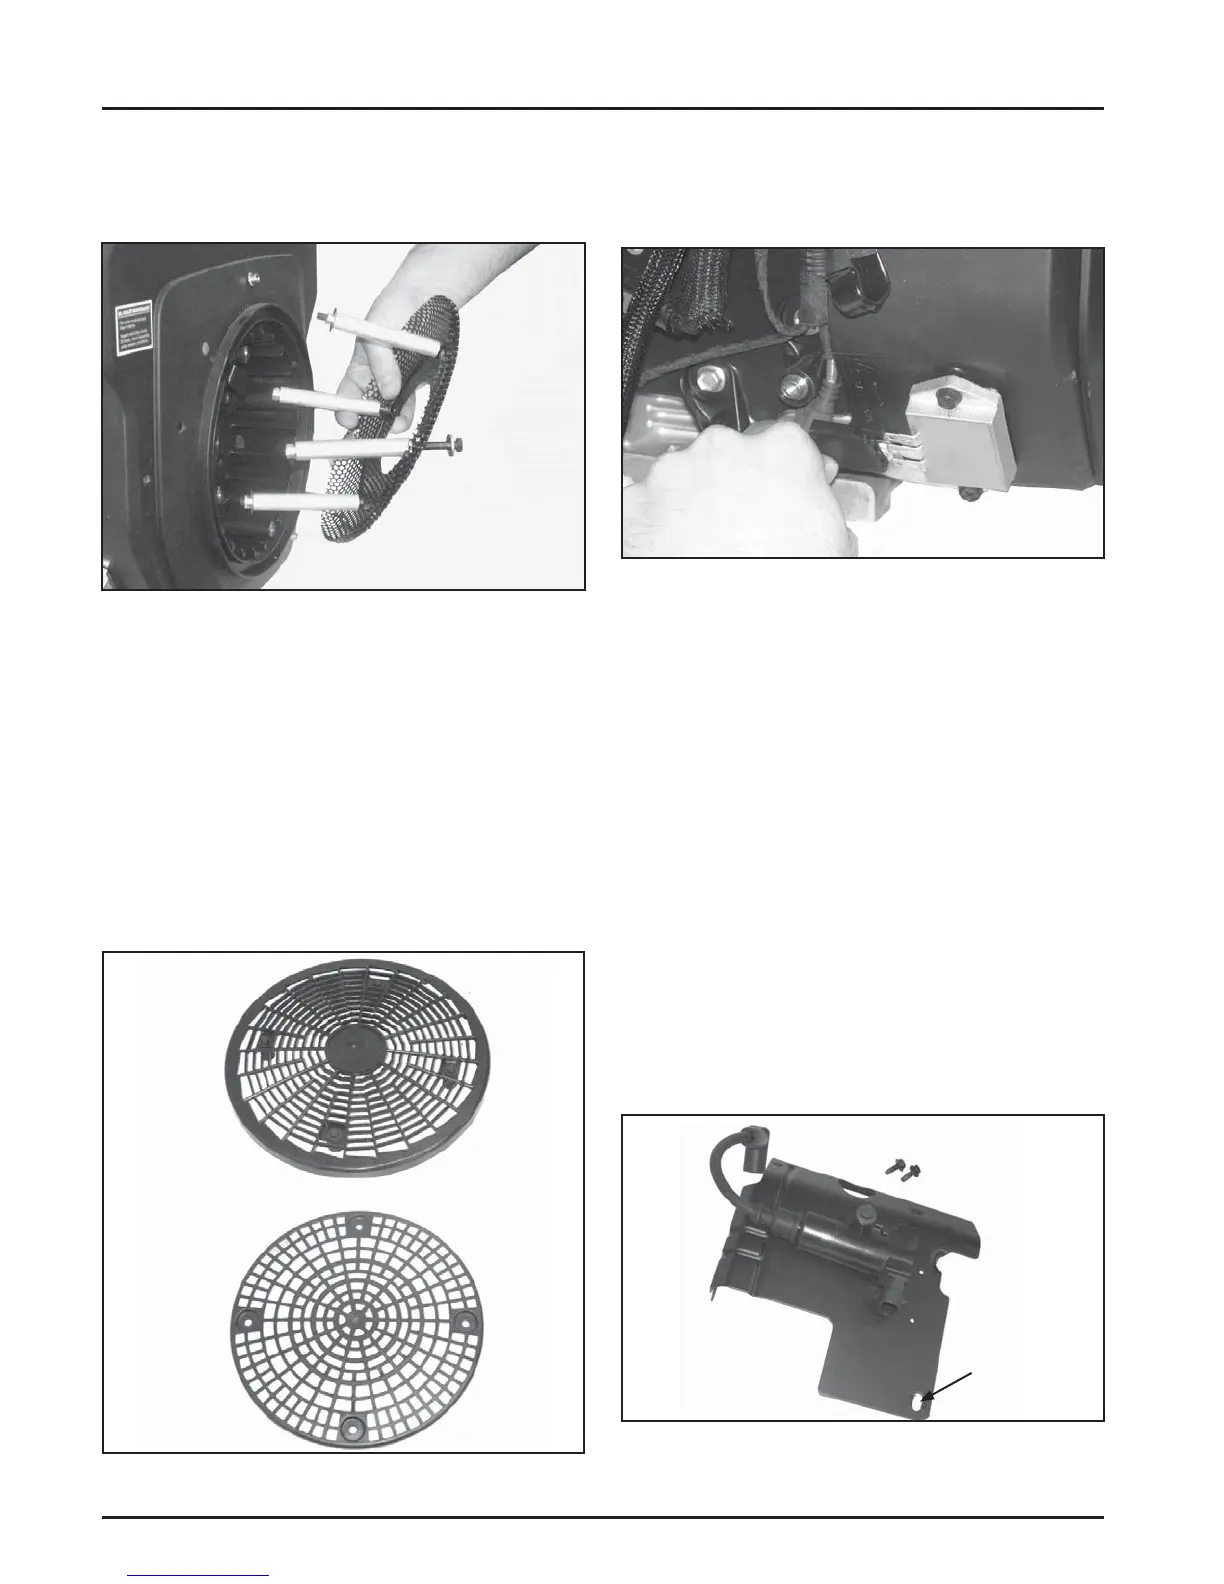
Figure 8-32. Disconnecting Plug from Rectifi er-
Regulator.
2. Remove the silver plated rectifi er-regulator
ground strap screw fastened to the crankcase.
The rectifi er-regulator does not have to be
detached from the blower housing.
3. Disconnect the three fuse connectors on outer
baffl e and allow them to hang.
NOTE: Some engines may have two fuses mounted
to a bracket above the ECU, and a third in-
line fuse by the rectifi er-regulator.
4. Remove the three (each side) hex fl ange screws
securing the outer baffl es. Note the location of
any li ing strap and the position of the two short
screws (one each side on bo om) for reassembly.
See Figure 8-33. The coil and any hoses may
remain a ached to the baffl e a er being
unplugged or disconnected.
Figure 8-33. Note Location of Short Screws.
Remove Grass Screen
1. Remove the four socket head cap screws securing
the metal grass screen and remove the screen. See
Figure 8-30.
Figure 8-30. Remove Metal Grass Screen.
2. Remove the four spacers, paying a ention to
the curvature of the spring washers between the
spacers and the fan.
NOTE: The fan will be loose, but cannot be removed
until a er the blower housing is removed.
3. If there is a plastic grass screen a ached to the
fan, remove the four screws securing the grass
screen. Removing the screen will expose the
four screws fastening the fan to the fl ywheel. See
Figure 8-31.
Figure 8-31. Plastic Grass Screen Variations.
Remove Outer Baffl es and Blower
Housing
1. Disconnect the plug from the rectifi er-regulator.
See Figure 8-32.

 Loading...