10.2
Section 10
Reassembly
Install Piston and Connecting Rod
NOTE: Proper orientation of the piston and
connecting rod inside the engine is extremely
important. Improper orientation can cause
extensive wear or damage.
1. Stagger the piston rings in the grooves until the
end gaps are 120° apart. Lubricate the cylinder
ǰȱĞȱǰȱȱȱǰȱ
piston, and rings with engine oil.
2. Compress the piston rings using a piston ring
compressor. See Figure 10-2.
ȱ śǯȱ ȱȱȱȱȱĞǰȱȬȱȱȱ
tap the piston into the bore. See Figure 10-5.
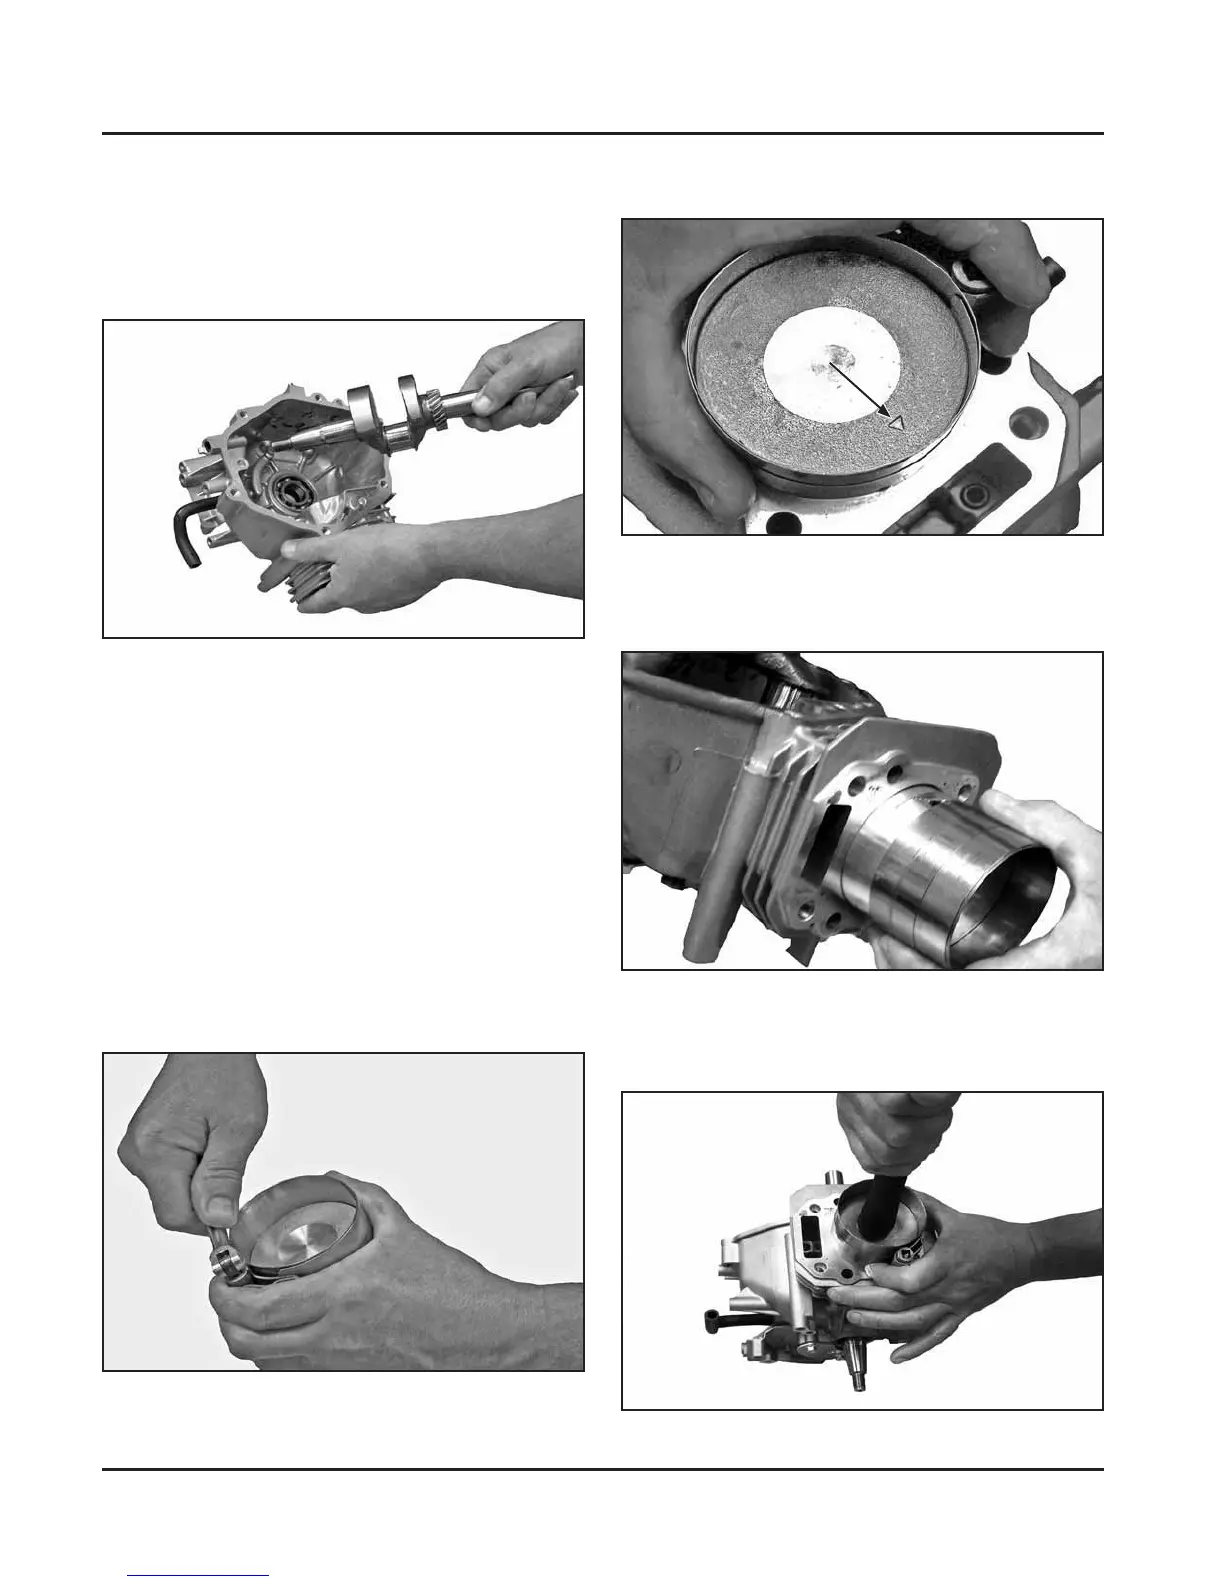
Install Crankshaft
ȱ ŗǯȱ ¢ȱȱȱĞȱȱȱȱ
through the front seal, and fully seat into place.
ȱȱŗŖȬŗǯȱȱȱĞȱȱȱ
journal for the connecting rod is away from the
cylinder.
Figure 10-1. Installing Crankshaft.
Figure 10-5. Tapping Piston.
4. Carefully guide the connecting rod, with piston
ĴǰȱȱȱǯȱȱȱŗŖȬŚǯȱ
Figure 10-2. Compressing Piston Rings.
Figure 10-3. Piston Orientation (After Installation).
Triangle
3. Aim the triangle on top of the piston towards the
push rod chamber. See Figure 10-3.
Figure 10-4. Installing Piston.
 Loading...