113
Section 7 Decision-Makerr 6000 ControllerTP-6356 4/12
d. Initialize the EEPROM.
D Arrow down to the CODE VERSION display.
D Arrow right to INITIALIZE EEPROM display.
D Press the YES key to initialize the EEPROM.
D Press the ENTER key.
e. Wait for completion of the system reset.
f. Choose one of the following methods to load
the user parameters.
D Backup disk/drive. Use a PC with SiteTecht
software to load the data from the user parameter
backup disk/drive.
D Paper form. Use a PC to enter the user parameter
data from the filled-out Decision-Maker r 6000
Controller Operation Manual TP-6750,
Appendix B, User-Defined Settings form, the
User-Defined form located in Section 7.6.3, or
other similar form.
g. Create a new user parameter data backup
disk/drive if any changes are made using
SiteTecht software. Refer to TP-6701
SiteTecht Software Operation Manual for
details.
h. The generator set controller is now ready for
keypad entries.
11. Establish the controller identity in Menu 20.
The controller displays the following error
message: GENSET S/N WARNING.
This procedure includes instructions on how to
unlock and lock the factory setup after entering
Menu 20. Use the down arrow key to go to the
setup lock menu for determining the setup status.
Note: After completing the factory setup, always
return the controller to the setup lock
position to prevent inadvertent program
changes.
a. Press the RESET MENU key on the controller
keypad.
b. Use the controller keypad to go to Menu 14,
Programming Mode, and select programming
mode—local. Use the information from the
controller operation manual as necessary.
Note: The factory default access code is the
number 0.
c. Press the RESET MENU key on the controller
keypad.
d. Use the controller keypad to go to Menu 20,
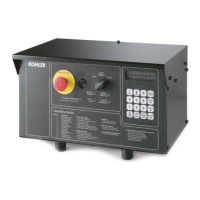
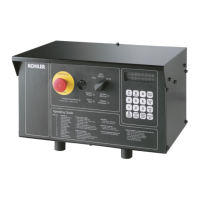
Factory Setup. See Figure 7-9 for displays.
e. Arrow down to the SETUP LOCK display.
If the SETUP LOCK display indicates YES, go
to step f. If the SETUP LOCK display indicates
NO,gotostepg.
f. Unlock the setup.
D Arrow down to the FINAL ASSEMBLY,
CLOCK NO. display. Record the clock
number on the controller display.
D Arrow right to ENTER CODE display.
D Use the controller keypad to enter the clock
number previously recorded.
D Press the ENTER key. Changes to Menu 20,
Factory Setup, are now possible.
g. Initialize the EEPROM.
D Arrow down to the CODE VERSION display.
D Arrow right to INITIALIZE EEPROM display.
D Press the YES key to initialize the EEPROM.
D Press the ENTER key.
h. Wait for completion of the system reset.
i. Go to Menu 20, Factory Setup. See Figure 7-9
for displays.
j. Change the final assembly date.
D Arrow down to the FINAL ASSEMBLY DATE
display.
D Enter the final assembly date using the data
recorded from the old controller, reference
step 2.d. If data from the old controller is not
available, keep the default setting.
D Press the ENTER key if making a new entry.
 Loading...