-14-
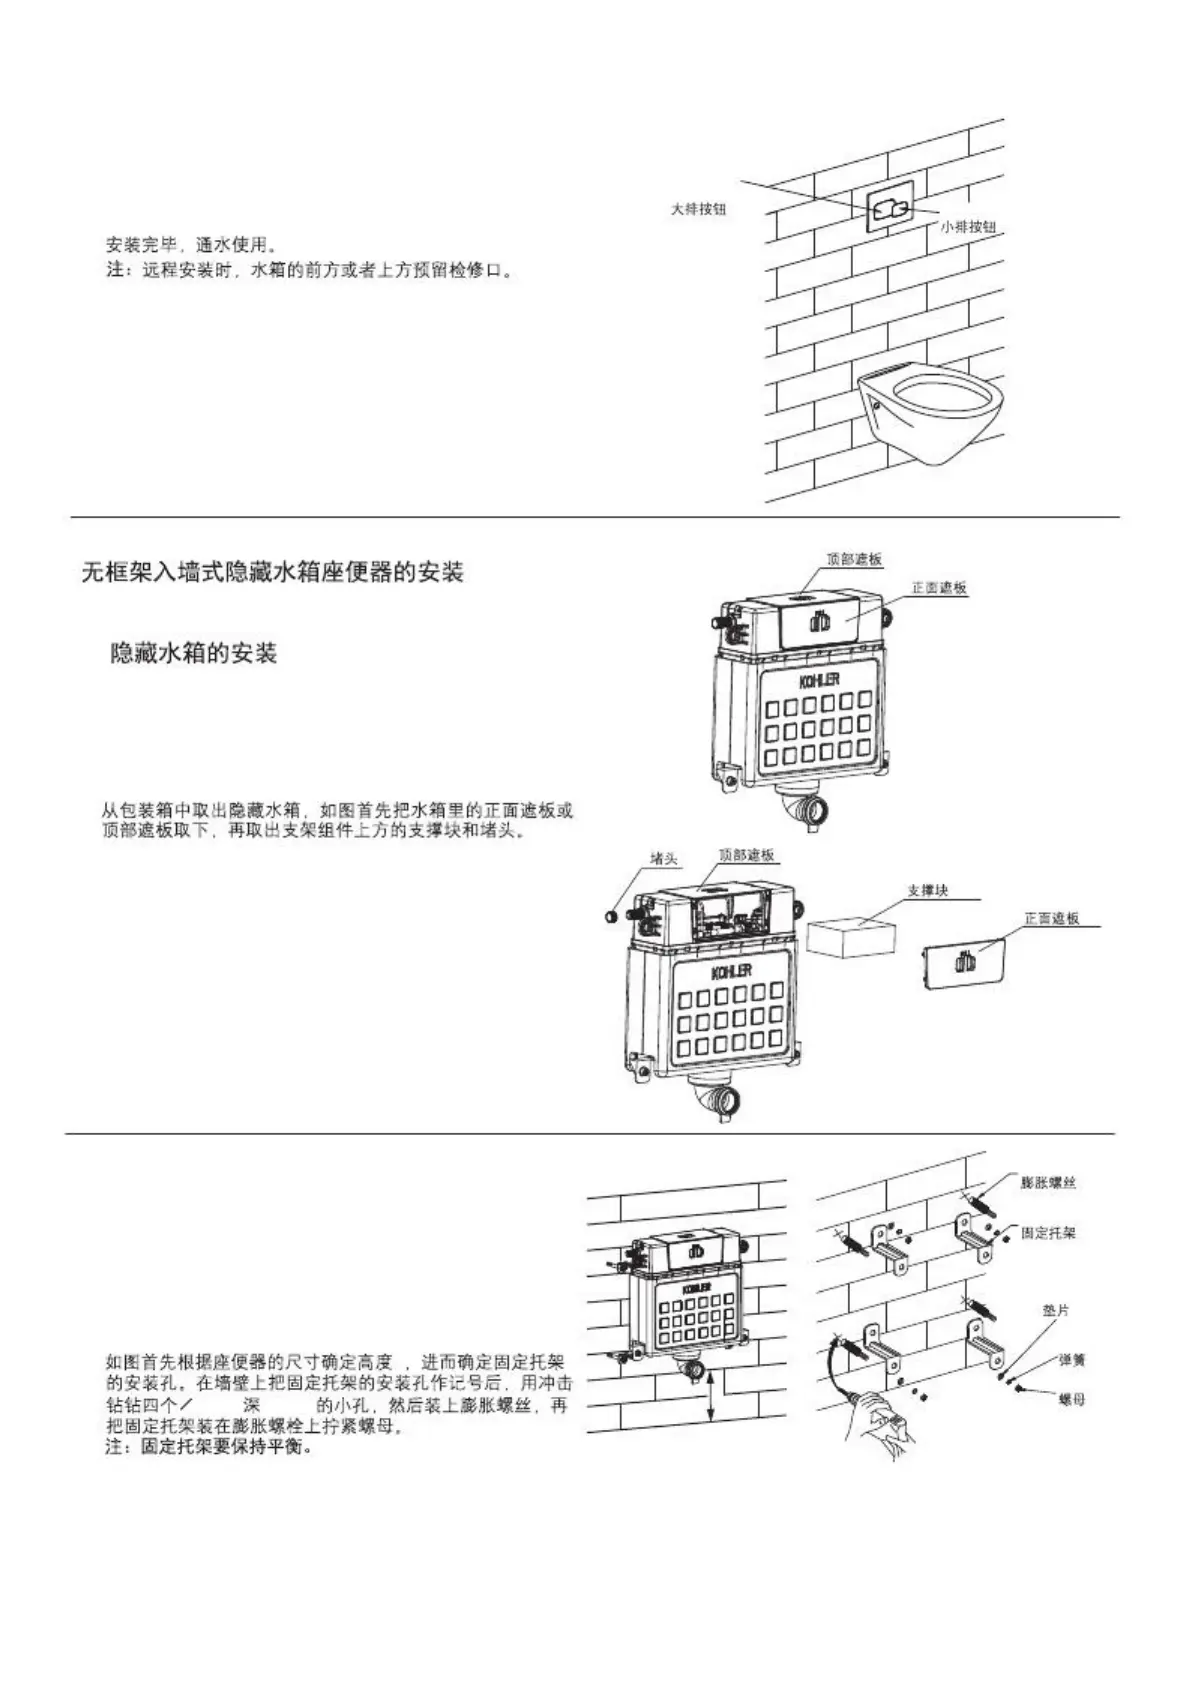
2. Make sure of h according to dimensions of bowl and then
locate the installation hole of fixing bracket. Mark on the
wall for appropriate position for fixing bracket, and drill four
holes with diameter of 10mm and depth of 80mm with
churn drilling as shown in illustration, and fill in the holes
with bulge screw and tighten the screw to set the fixing
bracket.
Note: Ensure the fixing bracket to remain level.
2. h
80mm O10mm
Bulge Screw
Fixing Bracket
Gasket
Spring
Nut
Installation For In-wall Tank Without Frame
4. It is ready to use when connected to water supply after
installation.
Note: Reserve access panel at front or top of the tank in
remote installation.
4.
Half Flush Button
Full Flush
Button
h
A. Installation of In-wall Tank
A.
1. Remove in-wall tank from packing box. Remove front cover
board or top cover board inside water tank first as shown.
Then remove support block and plug above bracket
assembly.
1.
Cover,Top
Cover,Front
Plug
Cover,Top
Cover,Front
Supporting Board
1288818-T01-A
 Loading...