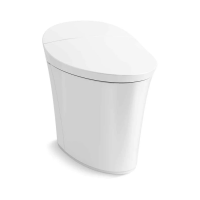
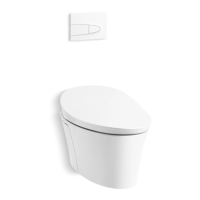
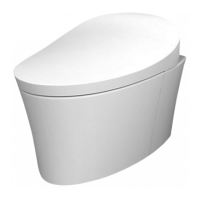
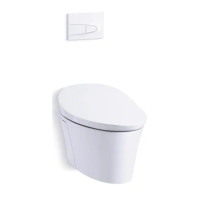
This document serves as an installation and user guide for the Kohler K-5724K Cleansing Seat, a bidet toilet seat designed to enhance personal hygiene. The manual provides detailed instructions for installation, operation, and maintenance, ensuring proper and safe use of the device.
Function Description:
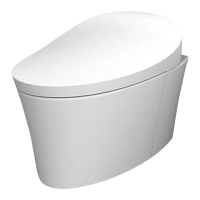
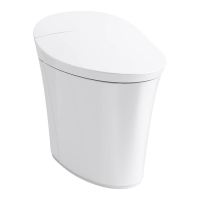
The Kohler K-5724K Cleansing Seat is a toilet seat equipped with an integrated bidet function. It provides a cleansing spray for personal hygiene, offering an alternative to traditional toilet paper. The seat is designed for easy installation on most standard toilets and connects to the cold water supply. Key features include adjustable spray intensity and position, and a user-friendly design for operation and maintenance.
Important Technical Specifications:
- Dimensions (Approximate, Unit: mm):
- Minimum clearance from finished wall to front of bowl: 13-1/4" (337 mm)
- Minimum clearance from finished wall to center of mounting holes: 5-1/2" (140 mm)
- Distance from center of mounting holes to front edge of seat: 18-11/16" (475 mm)
- Width of seat: 11-3/4" (298 mm)
- Overall length from finished wall to front of seat: 20-1/2" (521 mm)
- Distance between mounting holes: 8-1/8" (206 mm)
- Rough-in length from finished wall to end of T-valve connection: 14-5/16" (364 mm)
- Overall rough-in length from finished wall to front of seat: 17-11/16" (449 mm)
- Clearance from finished wall to side of seat: 4-3/8" (111 mm)
- Minimum clearance from finished wall to side of seat (for T-valve connection): 2-1/8" (54 mm)
- Diameter of T-valve connection: 7/8" (22 mm)
- Water Supply Requirements:
- Connection to a cold water supply of drinking quality.
- Water pressure: 20 psi (139 kPa) - 80 psi (551 kPa).
- Maximum water temperature: 104°F (40°C).
- Tools Required for Installation:
- Adjustable Wrench
- Screw driver
Usage Features:
- Installation:
- Mounting Plate Installation: Position the mounting plate over the toilet bowl's mounting holes. Place washers in the plate's openings and insert bolts through the plate and into the holes. Push nuts onto the bolts as far as possible without threading.
- Seat Installation: Slide the seat onto the mounting plate until it snaps into place. Check and adjust the seat's position as needed. To adjust, remove the seat by pressing the release button and sliding it forward, then reposition the mounting plate. Securely tighten the mounting plate bolts and nuts, then re-slide the seat onto the plate.
- Water Supply Connection:
- Connect the T-valve to the seat hose.
- If necessary, connect the supply hose from the supply stop to the T-valve.
- Ensure the filter is in place (install if needed).
- Connect the seat hose to the orange-colored inlet on the seat.
- Important: The white cap must be in place on the side opposite the seat hose.
- Connect the T-valve to the water inlet on the toilet tank.
- Turn on the water supply and check all connections for leaks, making adjustments as needed.
- Caution: Avoid pushing or pulling on the water connection between the seat and the water supply stop to prevent leakage.
- Notice: Use an adjustable wrench to tighten connections one-quarter turn past hand-tight, avoiding cross-threading or overtightening.
- Operation:
- Important: Water can spray when no one is sitting on the seat. Do not activate the water until seated.
- Activating the Spray Wand: Twist the handle away from you.
- Controlling Water Flow: Twist the handle away from you to increase flow, and toward you to decrease flow.
- Adjusting Spray Wand Position: Push the handle down until the desired position is found.
- Turning Off the Spray Wand: Twist the handle toward you until it stops.
- Nozzle Options: The seat comes with three nozzle options, each offering a different spray intensity:
- Nozzle 1 (Installed): Mid-level intensity.
- Nozzle 2 (Soft Spray): For users preferring a gentle spray or homes with high water pressure.
- Nozzle 3 (Intense Spray): Best for installations with low water pressure.
- Changing Nozzles: Manually pull the wand out. Firmly grip the wand, pull the nozzle to remove it. Select the replacement nozzle. With the outlet holes facing up, grasp the wand and firmly push the replacement nozzle into place.
- Removing the Seat: Turn off the water supply. Press the release button on the right side of the seat (near the water inlet). Slide the seat forward to remove.
Maintenance Features:
- Care and Cleaning:
- Always test cleaning solutions on an inconspicuous area before applying to the entire surface. Avoid aerosol products.
- Wipe surfaces clean and rinse completely with water immediately after applying cleaner. Rinse and dry any overspray on nearby surfaces.
- Do not allow cleaners to soak on surfaces.
- Use a soft, dampened sponge or cloth. Never use abrasive materials like brushes or scouring pads.
- Do not allow chemicals and cosmetics (e.g., fingernail polish, aftershave) to contact the seat.
- The ideal cleaning mixture is dishwashing soap and water. Rinse and dry with a soft cloth.
- For detailed cleaning information and product recommendations, visit www.kohler.com/clean.
- Nozzle Replacement: Nozzles can be easily removed and replaced to suit user preferences or for cleaning.