71
E
F
Fig. 6.35
HG
J
A
C
M
D
Fig. 6.37
K
P
Fig. 6.36
ED0053030410
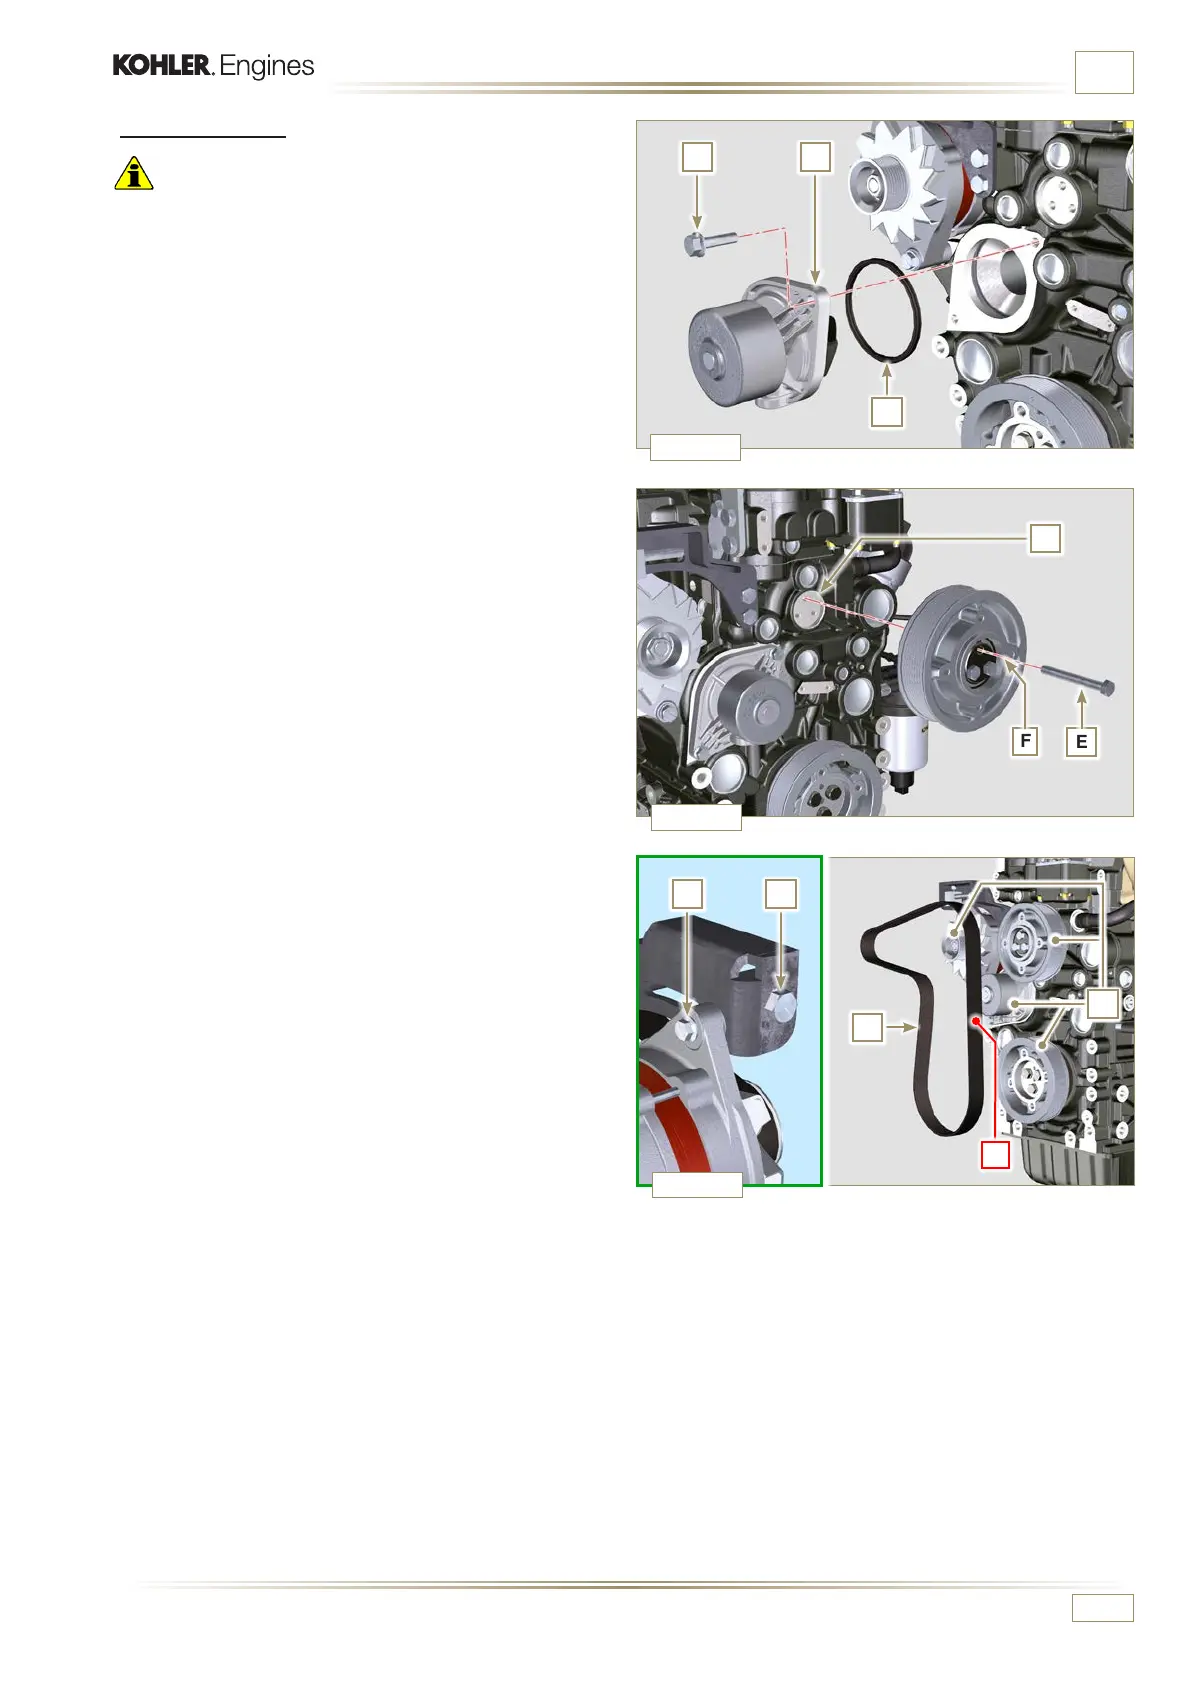
INFORMATION FOR REPLACING THE FUNCTIONAL UNITS
6.2.2 Assembly
Important
• Always replace the gaskets J, at each disassembly.
• Always replace the belt D after each assembly.
1 - Fit the pump H with the screws G interposing the new
gasket J (tightening torque at 25 Nm).
2 -
By means of capscrews E, secure pulley F to crankcase K
(tightening torque at 25 Nm).
3 - Insert the belt D on the pulleys M.
4 - Tighten capscrew C, bringing capscrew A to its stop on the
slot of support.
5 - Fit the screw A (tightening torque at 25 Nm).
6 - Fit the screw B (Fig. 6.32 - tightening torque at 45 Nm).
7 - Start the engine and run it for some minutes, then turn off
it and let it cool down at ambient temperature.
Check by the appropriate tool that at point P the tension
value is between 135 and 178 Hz.
NOTE: If the belt does not comply with the pre-set voltage
values, replace it.

 Loading...


