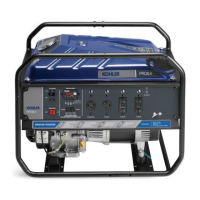
Be sure to memorize location of individual parts when
disassembling generator so that generator can be
reassembled correctly. Tag disassembled part with
necessary information to facilitate easier and smoother
reassembly.
For more convenience, divide parts into several groups
and store them in boxes.
To prevent screws from being misplaced or installed
incorrectly, replace them temporarily to their original
position.
Handle disassembled parts with care; clean them before
reassembly using a neutral cleaning fl uid.
Remove battery before disassembling generator.
(Electric start models).
Be sure to attach foam rubber linings inside covers on
their original position when reassembling generator.
When deformation or damage of foam rubber lining is
found, replace it with new part. Failure to do so will result
in poor performance and durability of generator.
Tie wires and fuel hoses using cable ties as they were in
original confi guration.
Remove Fuel Tank
1. Close fuel valve and remove fuel hose from
carburetor. Drain fuel into an approved container.
2. Disconnect fuel hose from fuel valve.
3. Remove screws from fuel tank, and remove fuel
tank.
Remove Muffl er
1. Remove screws securing muffl er cover, and muffl er
cover.
2. Remove screws for muffl er bracket.
3. Remove screws securing exhaust pipe to engine,
and remove muffl er.
Remove Control Panel
WARNING
Electrical Shock can cause injury.
Do not touch wires while generator is running.
Never operate generator in rain or snow.
Never touch generator with wet hands or electrical
shock may occur.
NOTE: When removing wiring terminals from wiring
board, it may be helpful to document the order.
1. Remove end cover.
2. Disconnect wire connections from alternator.
3. Remove wire terminals from wiring board.
WARNING
Before working on engine or equipment, disable engine as
follows: 1) Disconnect spark plug lead(s). 2) Disconnect
negative (–) battery cable from battery.
Do not allow children to operate generator.
Accidental Starts can cause severe injury
or death.
Disconnect and ground spark plug lead(s)
before servicing.
4. Disconnect wiring from control panel to engine.
5. Remove screws securing control panel to frame.
6. To access inside control panel, remove screws
securing control box to control panel.
Remove AVR
1. Remove screws attaching AVR to rear cover and
remove AVR unit.
Remove Brush Holder
1. Remove screw attaching brush holder to rear cover
and remove brush holder.
Inspection
1. Inspect brushes for freedom of movement in brush
holder.
2. Check continuity between each brush tip and its wire
terminal.
3. Inspect brush-to-rotor contact surface for unusual
wear or contamination.
4. Check brush free length. Replace the brush
assembly if the length is less than 3/16 in.(5 mm).
Remove Stator
NOTE: Take care not to damage stator coil and rotor
coil when removing/installing them.
NOTE: Place stator core side down. Do not set stator on
coil end. Coils may be damaged.
NOTE: It may be easier in some instances to tip
generator set on a side. Ensure oil is drained
from engine prior to doing this.
NOTE: Rear cover and stator are screwed together. Do
not loosen or remove screws. Remove rear
cover from stator after separated from alternator.
NOTE: Stator is heavy; be prepared to handle the
weight to maneuver for inspection and service.
1. Remove nuts fi xing rear cover onto rubber mounts.
2. Remove stator.
a. Remove stater and rear cover as an assembly.
b. Remove screws connecting rear cover and stator.
3. Remove rear cover.
Remove Rotor
1. Remove through bolt of rotor.
2. Place a wooden block or similar material under rotor
to support weight as rotor is removed.
3. With a rubber mallet, tap rotor a few times. Rotor
should slide off engine shaft.
Remove Front Cover
1. Remove screws and washers securing front cover,
and remove front cover.
Disassembly/Inspection and Service
15TP-7088 6/17 KohlerPower.com
 Loading...