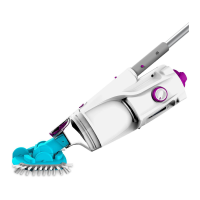
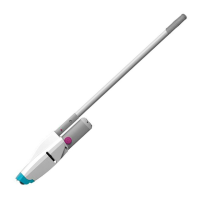
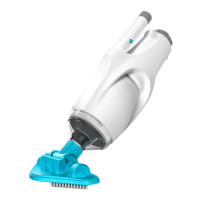
GETTING STARTED
IMPORTANT NOTE: Fully charge the electric vacuum before using it for the first time.
Charging the battery
NOTE: It requires an USB charging adaptor (not provided) with a safety output of 5.0V DC and 1.0A.
For EU market, a CE-certificated USB charging adaptor shall be used.
For US and Canada market, limited power source (LPS) or Class 2 type adaptor certificated by North America standards
(such as UL 60950-1, CSA C22.2 No. 60950-1, UL 1310 and C22.2 No. 223) shall be used.
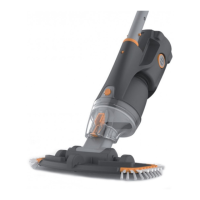
OPERATION
Before immersing the electric vacuum in water, turn the switching knob clockwise until it comes
to a halt (you will hear a ‘click”) to expose the two water-sensing pins and a green dot on the
right side. As soon as both pins make contact with water, the motor will start running. Similarly,
it will stop as soon as the pins are no longer in contact with water.
NOTE: Never attempt to make contact with both pins with anything other than clean water.
EMPTYING THE FILTER
WARNING! Using the electric vacuum without a filter bag / filter cage in place will VOID your warranty.
In order to maximize the cleaning efficiency of the cleaner, be sure to clean the filter bag/ filter cage before and after each use.
CAUTION! If the electric vacuum is charging, disconnect the USB charging adaptor from the power source and detach the electric vacuum
from the USB charging cable before making any attempts to clean it.
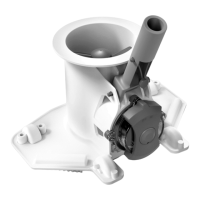
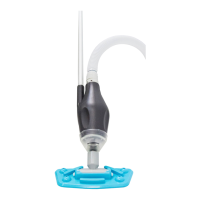
Emptying filter bag / filter cage
1. Place the electric vacuum on a stable surface.
2. Hold the electric vacuum body and turn the canopy anticlockwise until
the white marking on the canopy reaches the lock-unlock marking. (Fig.1)
Detach the canopy and remove the filter bag / filter cage from the
electric vacuum
CAUTION! Replace a damaged filter bag / filter cage with a new one
before initiating the next operation.
3. Clean out the debris and rinse the filter bag / filter cage with water. If brushing is deemed necessary, use only a soft brush to clean it
gently and carefully.
4. Replace the filter bag / filter cage inside the electric vacuum. Reverse the steps to align and attach the canopy to electric vacuum and
turn the canopy anticlockwise until it comes to a halt.
MAINTENANCE & STORAGE
NOTE:
1.Battery discharges on its own during storage. The battery should be stored at room temperature, charged to about 30% to 50% of its capacity.
2.You must recharge the battery at least once every three months if it is not frequently used.
•Disconnect all USB charging peripherals.
•Detach all accessories from the electric vacuum. If necessary, rinse the electric vacuum and accessories with fresh water. DO NOT use
detergent.
•Be sure to drain the water from the electric vacuum before storing it.
•Use a damp cloth to clean and dry the electric vacuum and its accessories.
•Store them in a well-ventilated area away from the sunlight, children, heat, ignition sources, and pool chemicals. Ambient temperature for
storage should be 10˚C – 25˚C (50˚F – 77˚F). NOTE: A higher temperature may reduce the battery life during storage.
WARNING!
- Under no circumstances should you attempt to disassemble the electric vacuum and replace the impeller, motor and battery
by yourself.
CAUTION!
• Excessive heat can damage the battery and reduce the lifespan of your electric vacuum as a result.
• Consult your dealer regarding battery replacement if the following happens:
- Battery appears damaged or will not charge fully.
- Battery operation time is noticeably reduced. Observe and record the run times of the first few operations (on a full charge). Use these run
times as a reference point to compare with run times of older batteries.
• The battery must be removed from the electric vacuum before it is scrapped.
• The electric vacuum must be disconnected from the supply mains when the battery is being removed.
• The battery is to be disposed safely in accordance with local ordinances or regulations.
NOTE: Incorrect maintenance may reduce the battery life and affect its capacity as a result.
BATTERY DISPOSAL
Your electric vacuum’s battery is a maintenance-free, rechargeable lithium-ion battery pack, which must be disposed properly. Recycling is
required; please contact your local authorities for more information.
WARNING!
Never attempt to disassemble a battery pack
• Be sure to remove all personal items such as rings, bracelets, necklaces, and watches before you unwire the battery pack from
the electric vacuum.
• A battery can produce a short circuit current high enough to weld a ring (or similar items) to metal, potentially causing a severe
burn in the process.
• Wear complete eye protection, gloves, and protective clothing before you remove the battery pack.
• Avoid touching the wires altogether and avoid allowing them to make contact with any metal items, which could cause sparking
and/or short-circuit the battery.
• Never smoke or allow a spark or flame in the vicinity of the battery or the electric vacuum.
• Do not expose the battery to fire or intense heat as this may result in an explosion.
CAUTION!
If a battery leak occurs, avoid contact with the leaking fluids and place the damaged battery in a plastic bag.
- If leaking fluids come in contact with skin and clothing, wash immediately with plenty of soap and running water.
- If leaking fluids come in contact with eyes, immediately flush them with cool, running water for at least 15 minutes and do not rub them.
Seek medical attention immediately.
CAUTION
• DO NOT cover the side slot (middle gap) of the electric vacuum during operation, the impeller / motor may be damaged otherwise.
• Remove the electric vacuum from the pool/spa as soon as cleaning is complete.
CAUTION! Make sure the electric vacuum is always pointing downwards when it is placed into the pool. Otherwise, the pole connector may
be bent and damaged as a result.
To retrieve the electric vacuum from the pool / spa, lift the electric vacuum while pointing it downwards in order to allow water to discharge.
Rinse the electric vacuum with fresh water after every use. DO NOT use any detergent.
1. Place the unit on a flat surface. Turn the switching knob anticlockwise until it stops and completely exposes the charging port.
Align and insert the USB charging cable into the charging port.
2. Connect the USB charging cable to the charging adaptor, then plug the charging adaptor to the power source.
NOTE
• Charge the electric vacuum completely (about 7-8 hours) before using it for the first time.
• Always disconnect the USB charging adaptor from the power source as soon as charging is complete.
•
Immediately turn the power off and disconnect the USB charging adaptor from the power source if you detect any of the following conditions:
- Offensive or unusual odor
- Excessive heat
- Deformation, cracks, leaks
- Smoke
1. Connect the USB charging adaptor to the power source. Once the electric vacuum begins charging, the indicator light at the end of the
vacuum will turn red. Normally, it takes about 4.5 - 6 hours to reach a full charge. The indicator light will turn green once the electric
vacuum is almost fully charged.
2. When charging is complete, disconnect the charging adaptor from the power source and unplug the USB cable from the adaptor and
electric vacuum.
Normally, the electric vacuum can operate up to 30 minutes on a full charge (after 4.5-6 hours of charging)
Note: Clean the filter regularly. Excessive debris inside the filter will increase burden to the motor operation and shorten the operating
duration as a result.
NOTE: Rechargeable lithium-ion battery is classified as a consumable item. It has a limited life and will gradually lose its capacity to hold
a charge. Therefore, the running time of the electric vacuum will gradually reduce after repeated charging and discharging throughout its
product life.
NOTE: Let the electric vacuum rest for 30 to 40 minutes before charging it again.
WARNING!
•Do not use the USB charging cable / USB charging adaptor if any damage is detected.
•Make sure both the electric vacuum and the charging port are clean and dry before charging them.
•Refer to the instruction manual of USB charging adaptor (not included) for instructions concerning safety and operation.
Fig.1
 Loading...