11
KOLDWAVE 3AK (AIRMASTER)
CONDENSER RETURN AIR PLENUM SA076-D-2411
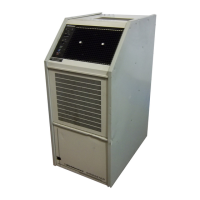
Plenum Construction
A 48" x 16 1/2" x 21 3/8" condenser return air plenum
constructed of 22 gauge galvanized steel with two-
tone enamel finish can be furnished. The entire inside
of the plenum is lined with vibration dampening 1/8"
thick armaflex insulation. This plenum is designed for
use with a flexible duct kit assembly. A hinged filter
access door is provided to remove or replace the
condenser filters. The access door is secured by a
magnetic strip.
Plenum Application
Koldwave Airmaster can be employed as a room air
conditioner to cool the entire enclosed space in which
it is placed. In this application, hot exhaust air venting
and condenser air intake ducting are definitely needed.
This can be accomplished by using the “flexible duct kit
assembly” (optional) and the “condenser return air
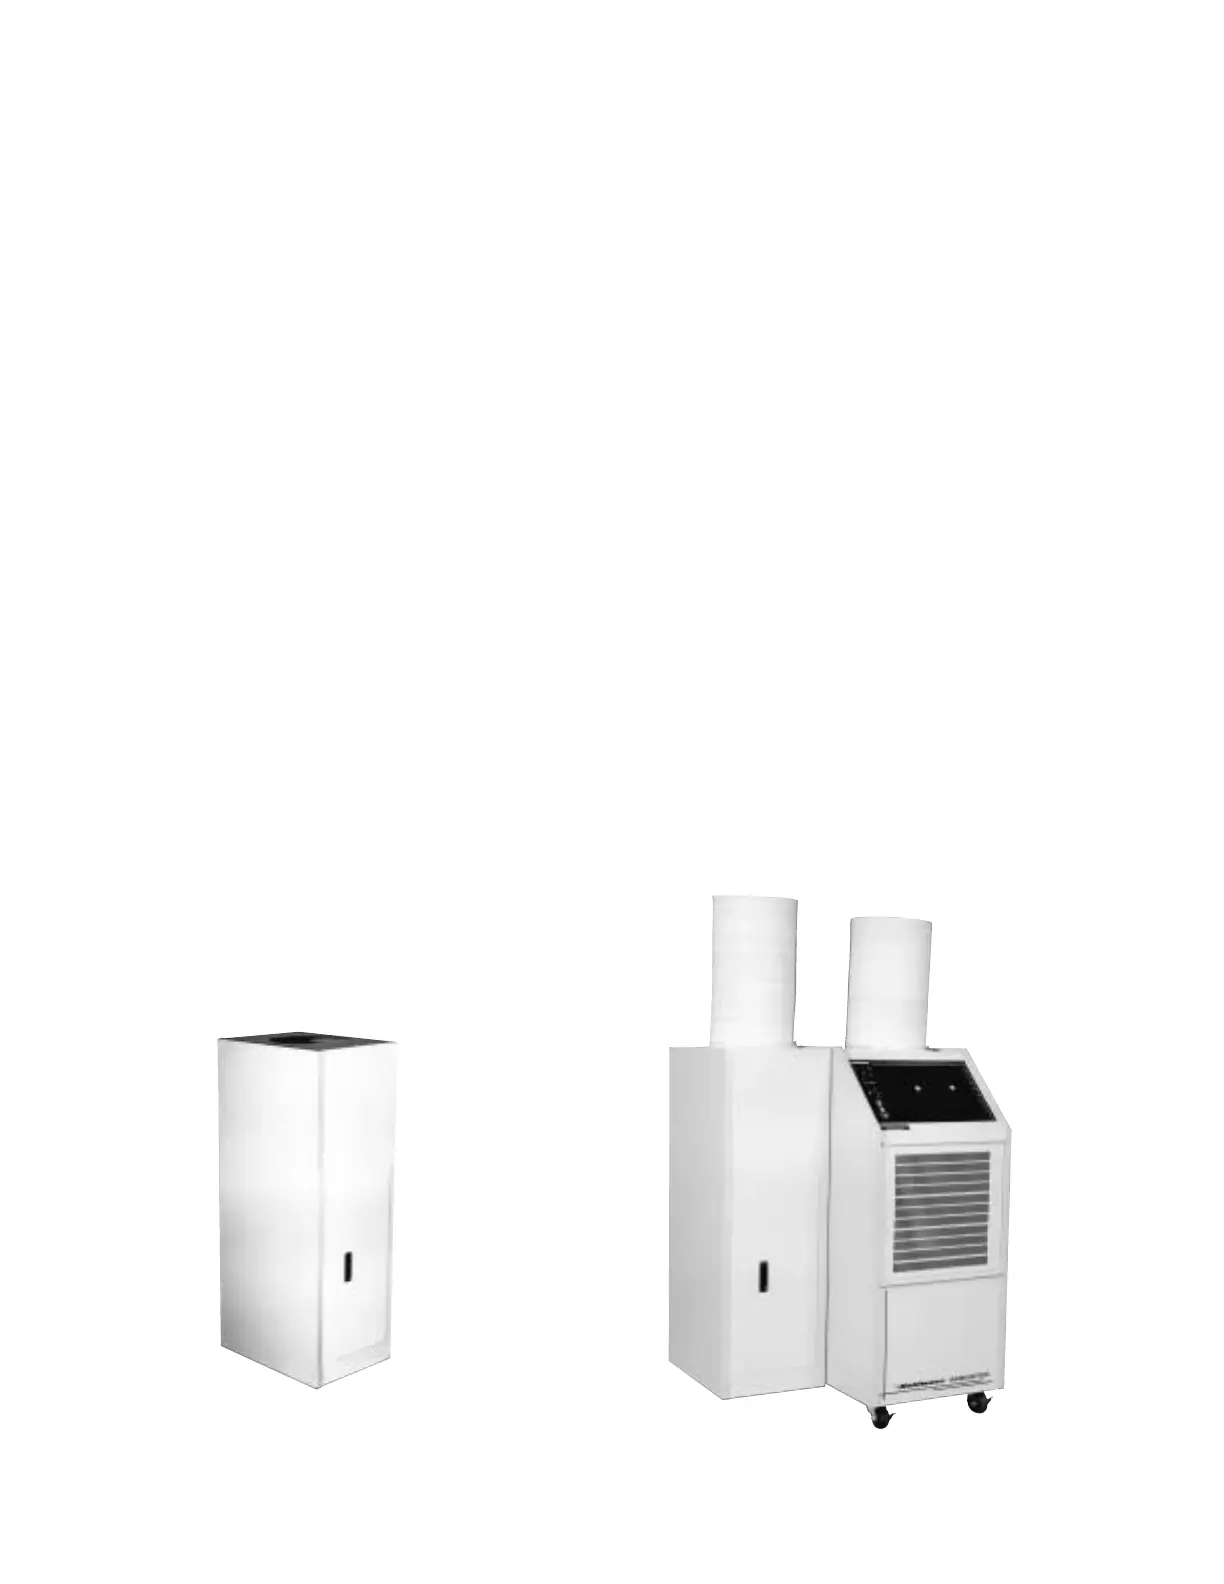
plenum” (optional). See figure on next page for
orientation of flexible ducts.
The condenser coil is cooled by the air drawn from the
false ceiling. The air passes through the hot condenser
coil, gets heated up, then discharges to an area
outside the room being cooled (outdoors).
Condenser Return Air Plenum
SA076-D-2411
Plenum installed with additional (optional) accessory kits
on plenum inlet and unit discharge
Installation Procedure
1. Remove seventeen 10-24 x 1/2" long phillips head
screws securing left hand side panel to unit. The
loose panels stay somewhat in place, but are not
sturdy. Retain these screws to secure plenum to
unit.
2. Assemble plenum front, top, bottom and back
together with 12 light grey screws provided
separately in plenum carton.
3. Mount plenum to unit with care to prevent panels
from shifting, using the seventeen screws removed
from the unit.
4. Attach side panel to plenum with 17 dark grey
screws provided separately in plenum carton.
5. To remove or replace the condenser filters, open
the filter access door, lift the filters up and pull out.
6. To install the flexible duct, slip one end of the duct
over the lay-in ceiling panel/collar assembly and
the other end over the plenum duct collar.
7. Clamp the duct to lay-in ceiling panel/collar
assembly and the plenum duct collar.
8. Place the 2' x 2' lay-in ceiling panel in the false
ceiling directly above the unit.
9. Secure the duct collar to the plenum with six
screws provided.
10. The 3AK’S condenser hot air exhaust duct can be
secured to the unit by slipping and clamping one
end of the duct over the collar assembly. The other
end is routed to outdoors.
Condenser
Hot Air
Exhaust
佢
Condenser
Room Air
Intake
佣