EasyManua.ls Logo

Kompernass IUK 5 A1 - User Manual

Kompernass IUK 5 A1
93 pages
Print Icon
To Next Page IconTo Next Page
Loading...
GB
IE
Quick installation guide
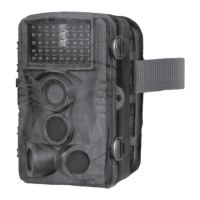
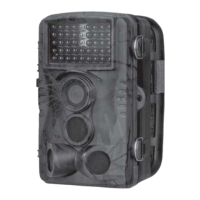
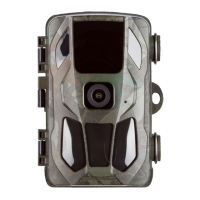
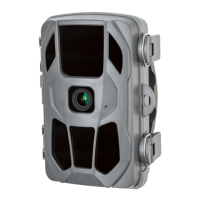
IP surveillance camera IUK 5 A1 (IAN 48807)
This guide shows you how to get your surveillance camera up and running in just a few steps using your smartphone or tablet. It also shows you how to connect to your Wi-Fi network.
LAN
WAN
Step 1 Step 2 Step 3 Step 4
Screw the Wi-Fi antenna onto the camera.
Connect the mains adapter to the camera and
a mains power socket.
Using the supplied network cable, connect the
camera to your network router or switch.
Ensure that your smartphone or tablet is con-
nected to your Wi-Fi network.
If you are using an Android smartphone or
tablet, install the app "IUK Viewer" from the
Google Play Store.
If you are using an iPhone or iPad, install the
app "IUK Viewer" from the Apple App Store.
Start the app and tap on "Add a new camera".
Select "Scan QR-Code" and scan the QR code
on the underside of the camera.
Once the QR code has been successfully
scanned, the corresponding camera ID
appears in the CAMERA INFO.
Then tap on "Done".
Visit our product support website on www.kompernass.com to download the latest version of the operating instructions, any firmware updates and additional control software.
QIG_48807_IUK5A1_GB.indd 2 15.04.15 16:03

Table of Contents

Other manuals for Kompernass IUK 5 A1

Questions and Answers

  • T
    Thomas DavisAug 16, 2025
    What to do if my Kompernass IP Camera does not work?
    • A
      Aaron MillerAug 16, 2025
      If your Kompernass IP Camera isn't working, there could be a couple of reasons. First, check that the power supply isn't interrupted by plugging the provided mains adapter into a power outlet and connecting the plug of the adapter cable into the power supply socket. If the power is fine, the issue might be a faulty network connection. In this case, start the "Search Tool" software from the supplied CD to set up the connection between the camera and your computer.
  • C
    Corey LoweryAug 19, 2025
    Why is the image on my Kompernass IP Camera too bright or dark?
    • J
      jbarkerAug 19, 2025
      If the image from your Kompernass IP Camera is too bright or too dark, it probably means the brightness needs adjustment. To fix this, connect to the camera through your web browser. Then, adjust the brightness by moving the "Brightness" slider to the right to brighten the image or to the left to darken it.
  • O
    oyorkAug 21, 2025
    What to do if my Kompernass IP Camera is unresponsive?
    • C
      christinawestAug 22, 2025
      If your Kompernass IP Camera becomes unresponsive, it might be due to an internal error. To resolve this, use a small pointed object to carefully push the reset switch through the opening on the underside of the device.
  • J
    Jessica MarshallAug 25, 2025
    How to fix a blurred image on my Kompernass IP Camera?
    • T
      tony92Aug 26, 2025
      If the image from your Kompernass IP Camera appears blurred, it might be because the contrast needs adjustment. Connect to the camera via the web browser and adjust the contrast by moving the "Contrast" slider to the right for higher contrast or to the left for lower contrast. You can also manually focus the image by turning the focus ring clockwise or anticlockwise.
  • M
    michaelyangAug 27, 2025
    What to do if my Kompernass Security Camera does not work?
    • S
      Scott WagnerAug 28, 2025
      If your Kompernass Security Camera isn't working, first ensure the power supply is properly connected. Plug the provided mains adapter into a functioning power outlet and connect the adapter cable to the camera's power supply socket. If the power is fine, a faulty network connection could be the issue. Use the "Search Tool" software from the supplied CD to establish a connection between the camera and your computer.
  • T
    tsimmonsAug 31, 2025
    Why is the image too bright or dark on my Kompernass IUK 5 A1 Security Camera?
    • C
      Charles Davis MDAug 31, 2025
      If the image from your Kompernass Security Camera appears too bright or too dark, the brightness setting likely needs adjustment. Access the camera settings via a web browser. To brighten the image, move the "Brightness" slider to the right. To darken it, move the slider to the left.
  • T
    Troy VelezSep 2, 2025
    How to fix a blurred image on Kompernass IUK 5 A1?
    • T
      tonyarnoldSep 2, 2025
      If the image from your Kompernass Security Camera is blurred, it may be due to incorrect contrast or focus settings. Connect to the camera through a web browser and adjust the contrast using the "Contrast" slider: move it right for higher contrast and left for lower contrast. Additionally, manually adjust the focus by turning the focus ring clockwise or anticlockwise until the image becomes clear.
  • J
    jenniferrileySep 6, 2025
    What to do if Kompernass IUK 5 A1 is unresponsive?
    • A
      Andrew Velasquez Jr.Sep 6, 2025
      If your Kompernass Security Camera is unresponsive, it may have encountered an internal error. To resolve this, use a small pointed object to gently push the reset switch through the opening on the underside of the device.
  • K
    Kirk ScottSep 9, 2025
    How to fix blurred image on Kompernass IUK 5 A1?
    • T
      Timothy YoungSep 9, 2025
      If the image from your Kompernass Security Camera appears blurred, it might be a matter of adjusting the contrast or focus. Connect to the camera through a web browser. To adjust the contrast, move the "Contrast" slider to the right for higher contrast or to the left for lower contrast. You can also manually focus the image by turning the focus ring clockwise or anticlockwise.
  • S
    Sharon FordSep 12, 2025
    How to adjust brightness on Kompernass IUK 5 A1 Security Camera?
    • W
      Wendy SmithSep 12, 2025
      To adjust the brightness on your Kompernass Security Camera, connect to the camera via a web browser. If the image is too dark, move the "Brightness" slider to the right to brighten the image. If it's too bright, move the "Brightness" slider to the left to darken the image.

Summary

Quick Installation Guide

Physical Setup

Connect camera hardware: antenna, power adapter, and network cable. Ensure Wi-Fi connectivity.

App Installation and QR Scanning

Install "IUK Viewer" app, add camera, and scan QR code for identification.

Wi-Fi Connection Steps

Access Wi-Fi Settings

Access Wi-Fi settings and scan for available wireless networks in the vicinity.

Connect to Wi-Fi Network

Select your Wi-Fi network and enter the password to establish a connection.

Camera Component Identification

Camera Head and Rear Panel Components

Identifies camera head (1-11) and rear panel (12-17) components with numerical labels.

Accessory and Mounting Component Identification

Camera Base and Accessory Parts

Identifies camera base (18-24) and accessory kit (25-28) components with numerical labels.

Product Introduction and Warnings

Information, Copyright, and Intended Use

Overview of instructions, copyright, intended use, and general warning notices.

Safety Guidelines and Precautions

Basic Safety Rules and Warning Symbols

Explains warning symbols (DANGER, WARNING, CAUTION, NOTE) and fundamental safety guidelines for device operation.

Device Handling and Environmental Safety

Covers safe handling, power supply, environmental conditions, and preventing damage or injury.

Device Usage and Power Safety

Safe Operation and Power Supply Handling

Details safe operation, power adapter handling, preventing damage, and emergency socket access.

Legal, Privacy, and Environmental Safety

Electrostatic Discharge and Environmental Risks

Addresses electrostatic discharge effects and risks in environments with explosive gases.

Privacy and Legal Compliance

Discusses privacy protection, legal compliance, personal identification, and workplace surveillance laws.

Legal Notification and Brand Notes

Road Traffic Surveillance and Notification Duty

Covers road traffic camera placement and requirements for notifying individuals of surveillance.

Operating Components Detailed View

Camera Head and Rear Panel Components

Identifies components of the camera head (1-11) and rear panel (12-17) with numerical labels.

Accessory and Setup Components

Camera Base and Accessory Parts

Identifies components of the camera base (18-24) and accessory kit (25-28) with numerical labels.

Package Contents and Initial Inspection

Verifying package contents and checking for any damage or missing items.

Setting Up the Camera Location

Set-up Location Requirements

Details requirements for a stable, dry, and well-ventilated location for optimal camera operation.

Initial Connections and Operation

Power, Audio, and LAN Connections

Steps for connecting the power supply, audio devices, and wired network (LAN).

Wi-Fi and Alarm System Connection

Instructions for connecting to a wireless network and integrating with an alarm system.

Handling and Operation Overview

System Requirements and Browser Support

Lists system prerequisites and supported web browsers for camera configuration and access.

Network Camera Discovery and Setup

Finding the Camera in the Network

Using the "Search Tool" to locate the camera and configuring firewall settings for access.

Network Configuration Details

Automatic and Manual Network Settings

Configuring network parameters, including IP address, subnet mask, and gateway, automatically or manually.

Advanced Camera Settings and Browser Access

Firmware Updates and MAC Address

Procedures for updating camera firmware and viewing the MAC address through advanced options.

Displaying Camera Image via Internet Explorer

Requirements and initial steps for viewing the camera feed using Internet Explorer.

Accessing Camera Feed via Browser

Browser Login and Language Selection

Logging into the camera interface and selecting the desired display language for the browser.

Browser Settings for Saving Media

Internet Options and Trusted Sites Configuration

Configuring Internet options, specifically adding the camera site to trusted zones for saving media.

Browser-Based Camera Controls

PTZ and Infrared Controls

Operating camera movement (pan, tilt) and switching to infrared mode using browser interface buttons.

Image and Position Configuration

Image Quality and Speed Settings

Adjusting resolution, frame rate, brightness, contrast, and PT speed for optimal image display.

Saving and Recalling Camera Positions

Setting and retrieving specific camera positions for quick access and managing multiple camera views.

Media Management and Snapshot Functionality

Audio, Recording, and Snapshot Controls

Managing audio streams, recording video, and capturing still images from the camera feed.

Browser Interface Configuration Menu

Applying Settings and Basic Device Info

Steps to apply changes, refresh data, and view basic device information like firmware version and name.

Date, Time, and Video Saving Configuration

Date & Time Synchronization

Setting the camera's time zone and synchronizing it with NTP servers or the PC's time.

Video Saving Path and Parameters

Configuring the location for saving videos, video size limits, recording length, and overwrite settings.

Alarm Settings Configuration

Motion, Audio, and External Alarm Triggers

Setting up triggers for motion detection, audio detection, and external alarm inputs.

Alarm Actions and Notifications

Alarm Actions and Scheduler Setup

Configuring alarm actions like siren output, mail notifications, image uploads, and scheduling.

Notification Settings and FTP Uploads

Mail Notification and FTP Connection Setup

Configuring email notifications and FTP server settings for image uploads.

Viewing Alarm Logs

Accessing and reviewing the log file of recorded alarm events.

Network Settings Configuration

DHCP IP Address Assignment

Enabling automatic IP address assignment from a DHCP server and managing the yellow LAN LED indicator.

Wi-Fi and Pan;Tilt Settings

Wireless Network Connection Setup

Scanning for Wi-Fi networks, selecting one, and entering security keys for wireless connectivity.

Pan;Tilt Speed and LED Controls

Adjusting camera movement speed and controlling the red LED indicator and preset position on power-on.

User and Device Management

Multi-Device and User Account Settings

Managing multiple cameras in the network and setting up user accounts with access privileges.

Maintenance and Software Updates

Device Maintenance and Reset Options

Performing maintenance tasks like resetting settings, rebooting the device, and updating firmware.

Smartphone Operation and Preview

Smartphone Interface and Camera View

Using the "IUK Viewer" app to display and control the camera image on a smartphone.

Smartphone Camera Control Functions

Image Mirroring and Pan;Tilt Controls

Controlling image mirroring, horizontal/vertical panning, and rotation via smartphone app icons.

Smartphone Media and System Controls

Video Recording, Snapshot, and LED Management

Saving video streams, capturing snapshots, and managing camera LEDs and data transmission settings via smartphone.

Central Monitoring Software Setup

Installing and Launching IUK Viewer Software

Installing the central monitoring software and confirming system permissions for initial launch.

Central Monitoring Software Configuration

System Settings for Photo and Video Paths

Configuring system settings for photo/video saving paths, view modes, and system language in the software.

Central Monitoring Device Management

Searching and Adding Cameras in Software

Using the software to search for cameras on the network and manually add new devices with connection details.

Modifying and Deleting Camera Entries

Editing and Removing Camera Details

Modifying parameters of existing cameras and deleting them from the device list within the software.

Central Monitoring Screen Layout and Controls

Screen Layout and Camera Control Icons

Selecting screen tile layouts, viewing cameras full-screen, and using control icons for Listen, Speak, Record, Snapshot, and Close.

Cleaning and Disposal Instructions

Device Cleaning Precautions

Guidelines for safely cleaning the camera surfaces, avoiding moisture, and using appropriate detergents.

Storage and Device Disposal

Instructions for storing the device and proper disposal methods according to environmental regulations.

Troubleshooting Common Malfunctions

Identifying and Rectifying Faults

A table listing common malfunctions, their possible causes, and recommended remedies for the camera.

Appendix: Technical Data and Compliance

Declaration of Conformity and Technical Specifications

States compliance with relevant directives and lists the camera's technical data and operating parameters.

Appendix: Mains Adapter and Warranty

Mains Adapter Specifications

Details the type, manufacturer, input/output voltage, and current consumption of the mains adapter.

Warranty Terms and Conditions

Outlines the 3-year warranty coverage, exclusions, and conditions for claims.

Service and Contact Information

Service Contact Details for Great Britain and Ireland

Provides telephone numbers and email addresses for customer service in the UK and Ireland.

Kompernass IUK 5 A1 Specifications

General IconGeneral
BrandKompernass
ModelIUK 5 A1
CategorySecurity Camera
LanguageEnglish

Related product manuals