INSTALLATION INSTRUCTIONS
19744 Tablet PC stand holder
19744 »Biobased«
INTENDED USE
- Universal tablet holder fit for all tablets sized approx. 10" to 16".
- Particularly suited for Tablets with protective covers or casing up to 20 mm.
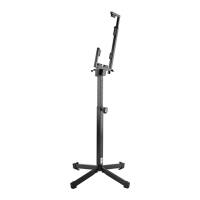
- With a support arm and clamp for side attachment for tripods, tubes, poles.
FEATURES & CAPABILITIES
- The holder is flexible and solid as well as being an absolute eyecatch.
- Equally suited for stage, home, rehearsal room and studio
- The clamping mechanism (including sideways Guard arm) enables a simple,
- effective and secure mounting of your Tablet PC
- Overlapping clamping jaws with integrated foam rubber coating ensure a secure hold,
- eliminate vibration noise and protect the Tablet case
- Can be screwed onto any microphone stand with 3/8" resp. 5/8" internal thread
- Adjustment options that leave nothing to be desired: Tablet size, tilt angle, direction,
- portrait/landscape: all individually adjustable
- Clamping range: height 158-280 mm, width 150-330 (430) mm, depth max. 20 mm
SAFETY INSTRUCTIONS
- The stand must be sufficiently stable and dispose of a suitable threaded bolt:
- e.g. K&M - Microphone Stands 199, 200, 21020, 21090, 210/6, 210/8, 252, 259, 260, 260/1, 27105 etc.
- Screw the holder properly to the stand: we recommend approx. 3 turns.
- As described attach the tablet carefully to the holder and check for security
- Handle the holder with care; especially when changing the settings (inclination, format and direction),
- ensure that the Tablet has a secure hold
PREPARE THE STAND (see above: Safety
Instructions)
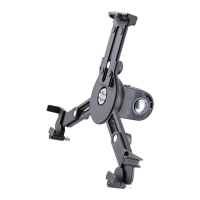
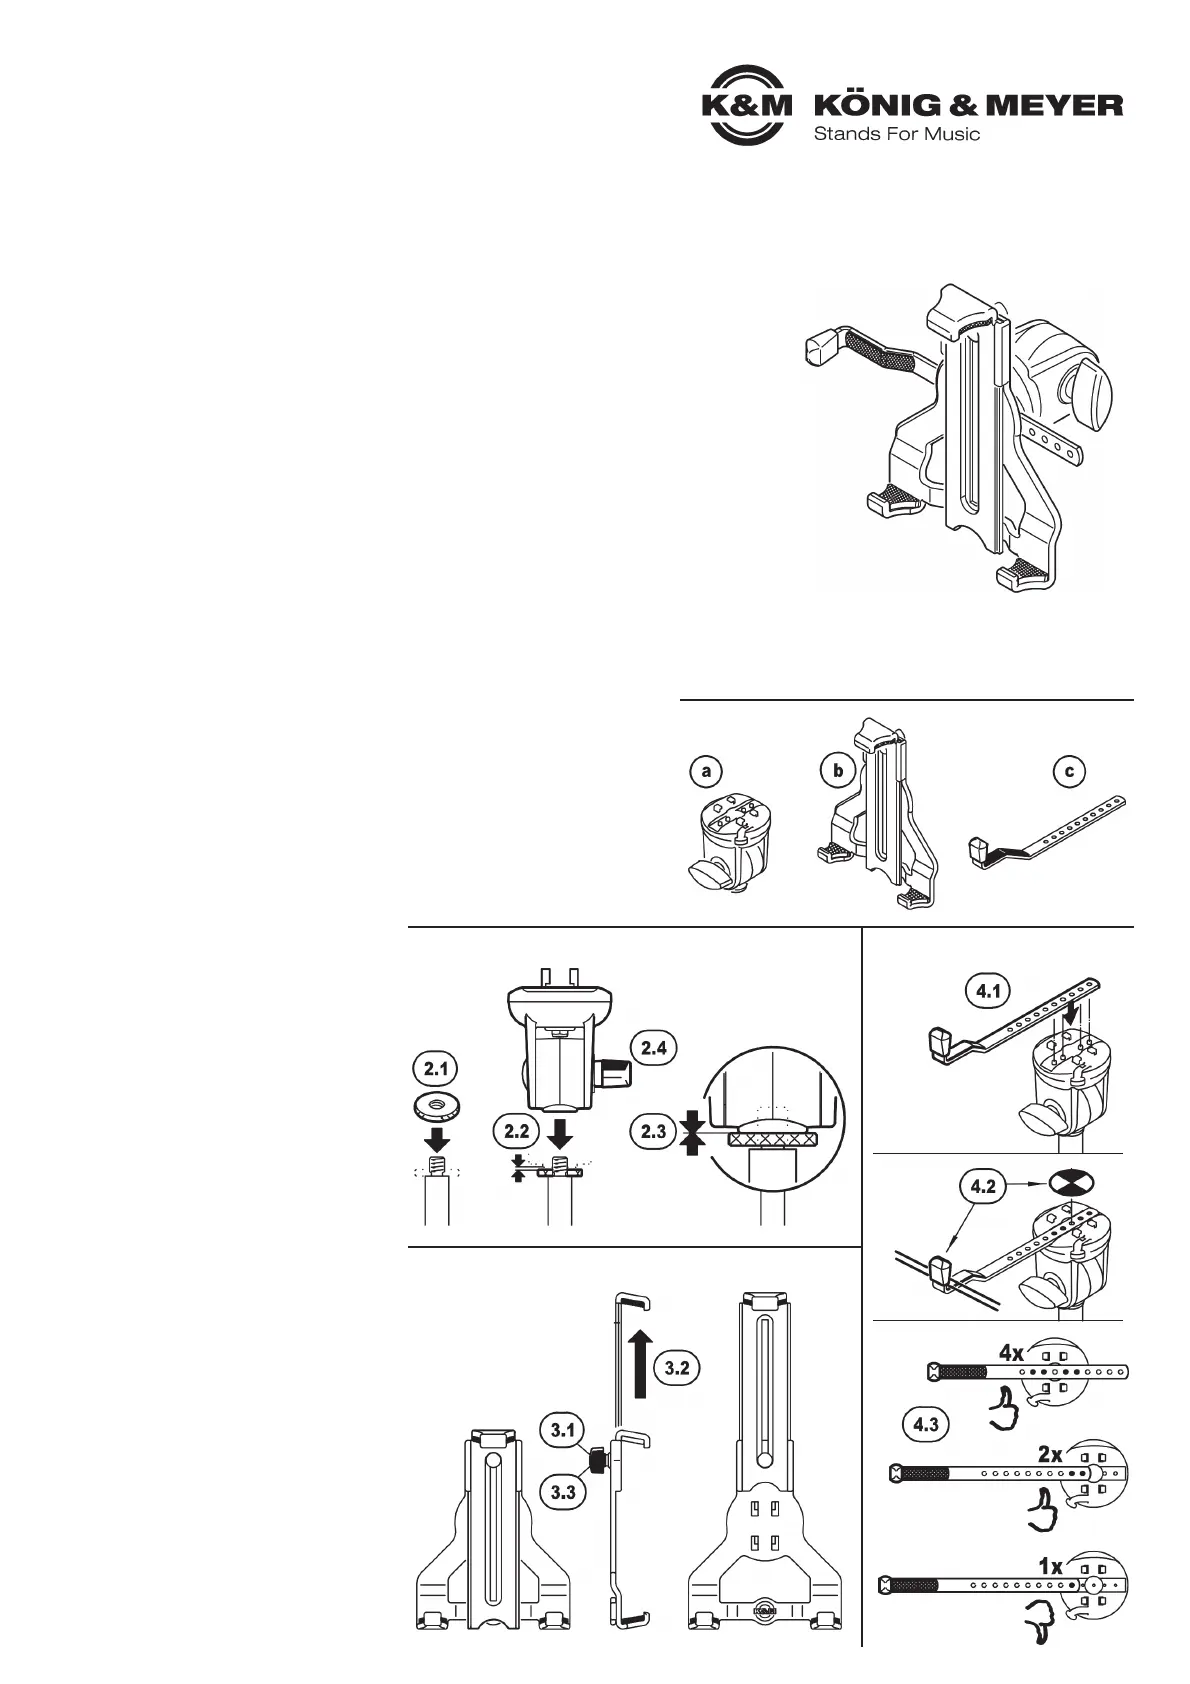
1. COMPONENTS
Please visually check whether all parts are present
and in order - as far as recognizable.
a SWIVEL JOINT
a (with stand connection thread)
b TABLET CRADLE
b (base, slider, clamp)
c GUARD ARM
c (with felt and rubber cap)
2. MOUNTING the SWIVEL JOINT
2. to the STAND
2.1 If the stand is equipped with a knurled disc,
2.1 turn it first on the threaded bolt as far as it
2.1 will go
2.2 Now screw the SWIVEL JOINT a to the threa-
2.2 ded bolt of the stand, but not quite up to stop
2.2 (approx. 2 - 3 turns)
2.3 Turn the knurled washer back again, so
2.3 that it is clamped backlash-free with the
2.3 swivel joint
2.4 Tighten the wing nut
3. PRESET the CRADLE
3.1 Loosen slightly the clamping nut…
3.2 …and extend the slide as far as it will go
3.3 Retighten the clamping nut
4. ATTACHING the GUARD ARM
4.1 Insert GUARD ARM c into the correspon-
4.1 ding recess of the SWIVEL JOINT a.
NOTES:
4.2 Select the position of the arm so that the
4.2 tablet PC sits in the centre of the holder
4.2 and attaches sideways to the rubber of
4.2 the bracket (see also Chapter 8)
4.3 The Guard arm should be attached to the
4.3 swivel joint with at least 2 boreholes.
Thank you for choosing this product. Please read and follow the instructions carefully. They inform you
about all the important steps concerning assembly and handling. We recommend you to keep them for
future reference.
1. COMPONENTS
2. MOUNTING the SWIVEL JOINT to the STAND
3. PRESET the CRADLE
4. ATTACHING the GUARD ARM
 Loading...